Butterfinger Balls
Easy Butterfinger Balls Recipe: No-Bake Peanut Butter Bliss
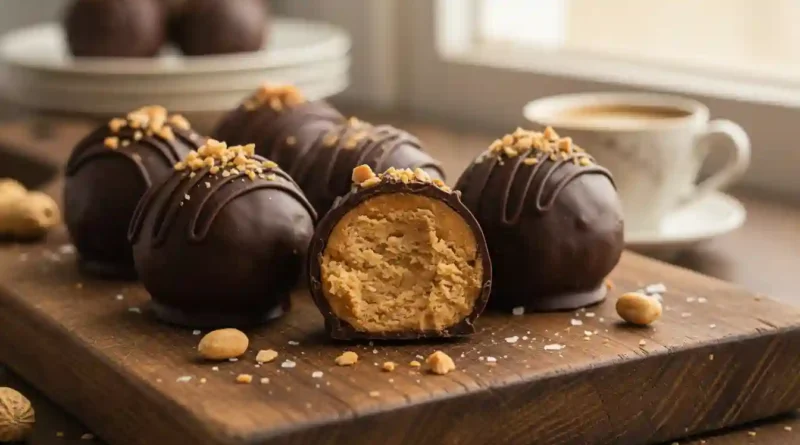
There’s a certain magic that happens in the kitchen when you don’t even have to turn on the oven. It’s the kind of magic that filled my grandmother’s kitchen every December, a whirlwind of powdered sugar dusting the air like fresh snow and the rich, buttery scent of melting chocolate. These Butterfinger Balls are a direct descendant of that magic. They’re my go-to recipe when I need a guaranteed crowd-pleaser that’s as fun to make as it is to eat. With a creamy, peanut butter center that gives way to a satisfying crunch, all enrobed in a crisp chocolate shell, this is the no-bake confection that turns a regular Tuesday into a celebration.
Why You’ll Love This
-
Effortless Elegance: These little bites look like they came from a fancy chocolatier, but the process is wonderfully simple and requires no baking.
-
A Textural Dream: Experience the perfect play of textures—smooth and creamy peanut butter, a tender crumb from the graham cracker, and the iconic crispy crunch of Butterfinger.
-
The Ultimate Crowd-Pleaser: From holiday parties to potlucks, this is the treat that disappears first from the platter, earning you requests for the recipe every time.
-
Make-Ahead Marvel: You can whip up a batch days in advance, making holiday entertaining or last-minute gifting completely stress-free.
I’ll never forget the time I brought a platter of these to a family gathering. My cousin’s son, a notoriously picky eater whose diet seemed to consist solely of plain pasta and apple slices, eyed them warily. After some gentle coaxing, he took one tiny bite. His eyes widened. He then proceeded to quietly hover near the platter for the rest of the afternoon, sneaking ball after ball until his mom had to gently steer him away. It was a silent, crumb-covered victory.
What Makes It Special
The beauty of this recipe lies in its humble, powerhouse ingredients.
-
Creamy Peanut Butter: Acts as the rich, savory-sweet base that holds everything together in a luxuriously creamy embrace.
-
Graham Cracker Crumbs: The secret weapon for structure and a subtle, honey-kissed flavor that keeps the filling from being overly sweet.
-
Real Butterfinger Bars: Provide that unforgettable, crispy-crunchy texture and a malty, peanut-buttery flavor you simply can’t replicate with anything else.
-
Chocolate Bark or Coating Wafers: This is key for a thin, crisp, and professional-looking shell that sets beautifully without the fuss of tempering.
Making It Happen
Let’s create some magic. Start by combining the creamy peanut butter and softened butter in a bowl. Beat them together until they’re perfectly smooth and well-incorporated. A whisper of vanilla extract goes in next, deepening the overall warmth of the flavor.
Now, gradually add the powdered sugar, mixing on a low speed until a soft dough begins to form. This is where the transformation happens. Gently fold in the graham cracker crumbs and the star of the show—your crushed Butterfinger bars. The mixture might seem a bit soft, but that’s perfect.
Line a baking sheet with parchment paper. Using a small cookie scoop or a tablespoon, portion out the dough and roll it between your palms into smooth, neat balls. Lining them up on the baking sheet, they look like little moons waiting for their chocolate coating. This is a crucial step: pop the entire tray into the freezer for a solid 30 minutes. This firmness is what makes dipping them a dream.
While they chill, melt your chocolate. I prefer the microwave method for its control: heat the chocolate bark or chips in a microwave-safe bowl at 50% power in 30-second bursts, stirring diligently between each session. The key is to take it out when there are still a few unmelted chunks and stir until the residual heat melts them completely. This prevents the chocolate from seizing and keeps it gloriously fluid.
Now for the fun part. Remove your peanut butter balls from the freezer. Using a fork or a dipping tool, lower each ball into the melted chocolate, swirling to coat it entirely. Let the excess chocolate drip back into the bowl before placing it back on the parchment paper. Immediately, while the chocolate is still wet, shower them with your chosen garnish—a little more crushed Butterfinger, a pinch of flaky sea salt, or some festive sprinkles. Then, all that’s left to do is let the chocolate set completely into a firm, glossy shell.
You Must Know
-
Peanut Butter is Key: For the right consistency, use a standard, shelf-stable peanut butter like Jif or Skippy. The oil in natural, stir-only peanut butters can cause the filling to be too soft and greasy.
-
Patience is a Virtue: Do not skip or shorten the freezer time. A firm, cold center is non-negotiable for a clean, easy dip and prevents the balls from falling apart in the warm chocolate.
-
Low and Slow for Chocolate: Always melt your chocolate gently over low heat or at a reduced power in the microwave. Burnt or overheated chocolate becomes clumpy and unusable.
Serving Ideas
Arrange these Butterfinger Balls on a elegant platter for your next party. They pair wonderfully with a cup of strong, black coffee that cuts through the sweetness, or a tall glass of cold milk for the ultimate nostalgic treat. For a dessert charcuterie board, place them alongside fresh berries and a sharp, aged cheddar for a surprising and delightful contrast of flavors.
Make It Different
-
Gluten-Free: Simply use certified gluten-free graham crackers.
-
Different Candy: Not a Butterfinger fan? Try this with crushed Heath bars, Oreos, or pretzels for a salty-sweet twist.
-
Nut-Free: Use SunButter (sunflower seed butter) in place of peanut butter and opt for a nut-free crispy bar alternative.
-
Dark Chocolate Lovers: Use high-quality dark chocolate chips for dipping for a richer, less sweet finish.
Storing Your Creation
Store your finished Butterfinger Balls in a single layer in an airtight container in the refrigerator. They will keep their perfect texture for up to one week. For longer storage, you can freeze them for up to three months. Let them thaw for a few minutes in the refrigerator before serving.
Success Tips
-
If your mixture is too sticky to roll, pop it in the fridge for 15-20 minutes to firm up.
-
For the smoothest chocolate coating, consider using chocolate melting wafers or bark specifically designed for candymaking.
-
If you don’t have an electric mixer, a sturdy wooden spoon and a bit of elbow grease will work just fine.
Frequently Asked Questions (FAQ)
1. Can I use natural peanut butter?
It’s not recommended. The oil separation in natural peanut butter can make the filling too soft and oily, preventing it from holding its shape.
2. My chocolate is thick and clumpy. What happened?
This means the chocolate was likely overheated. You can try stirring in a teaspoon of coconut oil to thin it out, but prevention is the best method—always melt slowly and gently.
3. Can I make these without a mixer?
Absolutely! A large bowl and a sturdy spatula or wooden spoon will work. It will require a bit more arm power to bring the dough together, but it’s completely doable.
4. How far in advance can I make these?
They are a fantastic make-ahead treat. You can prepare them and store them in the fridge for up to a week, making them perfect for getting a head start on holiday baking.
5. What’s the best way to crush the Butterfingers?
Place the bars in a sealed plastic bag and use a rolling pin to crush them into small, uneven pieces. You want a mix of fine crumbs and slightly larger bits for the best texture.
Recipe Card
Prep Time: 30 minutes
Chill Time: 30 minutes
Total Time: 1 hour
Servings: Approximately 24 balls
Category: Dessert
Difficulty: Easy
Cuisine: American
Yield: 2 dozen
Ingredients
-
1 cup creamy peanut butter (like Jif or Skippy, not all-natural)
-
4 tablespoons (½ stick) butter, softened
-
1 teaspoon vanilla extract
-
1 cup powdered sugar
-
¾ cup graham cracker crumbs
-
½ cup crushed Butterfinger bars
-
8 ounces chocolate bark or chocolate melting wafers
-
For garnish: additional crushed Butterfingers, holiday sprinkles, or coarse sea salt
Instructions
-
In a medium bowl, use an electric mixer to beat the peanut butter and softened butter together until smooth and well-combined.
-
Mix in the vanilla extract.
-
With the mixer on low speed, gradually add the powdered sugar until fully incorporated. Scrape down the sides of the bowl as needed.
-
Switch to a spatula and gently stir in the graham cracker crumbs and crushed Butterfinger bars until a uniform dough forms.
-
Line a baking sheet with parchment paper. Scoop out about 1 to 1 ½ tablespoons of dough and roll into smooth balls. Place them on the prepared sheet.
-
Freeze the balls for 30 minutes, or until completely firm.
-
Melt the chocolate in a microwave-safe bowl in 30-second intervals at 50% power, stirring between each interval, until smooth and fluid.
-
Using a fork or dipping tool, dip each frozen ball into the melted chocolate, allowing the excess to drip off. Return to the parchment paper.
-
Immediately garnish with additional toppings before the chocolate sets.
-
Allow the chocolate to harden completely at room temperature or in the refrigerator. Serve and enjoy!
Nutrition Information (per ball, estimated):
Calories: 185 | Fat: 11g | Carbohydrates: 20g | Sugar: 16g | Protein: 3g
