Chocolate Chip Cookie Fries
The Best Crispy Chocolate Chip Cookie Fries: A Brown Butter Twist
There is something inherently playful about eating with your hands. It takes us back to childhood summers and late-night diner runs. I remember the first time I pulled a tray of these Chocolate Chip Cookie Fries out of the oven. The kitchen was thick with the scent of toasted hazelnuts and caramelized sugar—not from nuts, but from the liquid gold we call browned butter.
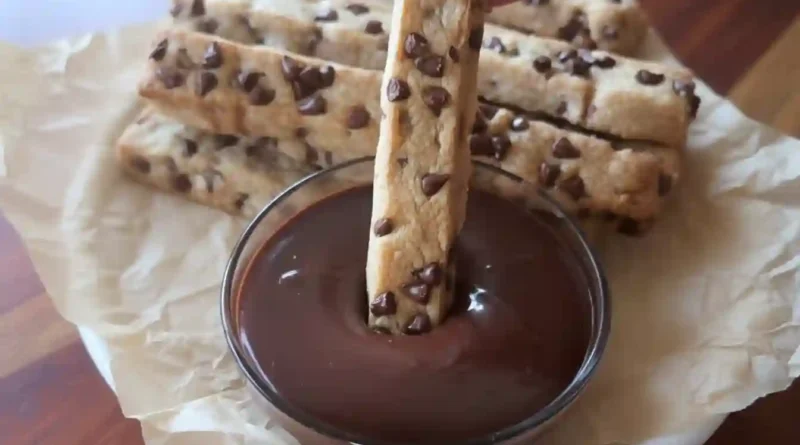
These aren’t your standard, thick-and-chewy rounds. They are slender, golden batons with crisp edges and a tender heart, designed specifically for dipping. Whether you are hosting a movie night or just looking for a way to make a Tuesday feel a bit more whimsical, these cookie fries offer a sophisticated depth of flavor hidden inside a nostalgic, fun-to-eat shape.
Why You’ll Love This
-
The Texture Contrast: You get more “edge” per bite than a traditional cookie, meaning every fry is perfectly crisp on the outside while remaining soft in the middle.
-
Grown-Up Flavor: By browning the butter, we transform a simple sugar cookie into a rich, complex treat with deep toffee notes.
-
Perfect for Entertaining: They are the ultimate finger food. Arrange them in a paper cone or a basket, and they instantly become the talk of the party.
The Critic Who Couldn’t Resist
My father-in-law is a self-proclaimed “cookie purist.” To him, a cookie should be round, thick, and served with a glass of cold milk—no exceptions. When he saw me cutting dough into long, thin strips with a pizza cutter, he was skeptical, calling them “gimmicky.”
But then he tried one. He didn’t just eat one; he ended up dipping a handful of these Chocolate Chip Cookie Fries into his coffee, admitting that the increased surface area made for a much better “dunking experience.” Now, it’s the only recipe he asks for when he visits.
What Makes It Special
-
Beurre Noisette (Browned Butter): This is the soul of the recipe. It adds a savory, toasted quality that balances the sweetness of the chocolate.
-
Milk Chocolate Chips: While many bakers reach for dark chocolate, milk chocolate provides a creamy, mellow sweetness that pairs beautifully with the saltiness of the butter.
-
The Chilling Process: We don’t just refrigerate; we freeze. This ensures the “fries” maintain their distinct rectangular shape and don’t melt into a single giant pancake in the oven.
-
High-Quality Sea Salt: (Optional but recommended) A tiny pinch heightens the brown sugar and chocolate.
Making It Happen
The process begins with the butter. You’ll want to watch it closely in a light-colored pan. As it melts and foams, it will eventually quiet down and begin to smell like toasted brioche. Once you see those little brown specks at the bottom, pull it off the heat. That toasted sediment is where all the flavor lives.
While the butter cools, you’ll whisk it together with your sugars until the mixture is glossy and smooth. Adding the egg at this stage creates a beautiful, emulsion-like base—almost like a thick caramel. When you move to the dry ingredients, put the whisk away. You want to gently fold in the flour and baking powder with a spatula. Overworking the dough here will make the fries tough rather than tender.
Once your milk chocolate chips are folded in, the fun starts. You’ll roll the dough out directly onto parchment paper into a neat rectangle. Cutting them into strips feels more like a craft project than baking. After a quick stint in the freezer to firm them up, you’ll space them out on a tray and give them one final chill. This patience pays off when they emerge from the oven golden-brown and perfectly straight.
You Must Know
-
Watch the Butter: It goes from browned to burnt in seconds. The moment it smells nutty, move it to a cool bowl.
-
Cold is Key: Do not skip the 30-minute freezer rest. If the dough is too warm, the fries will spread and lose their shape.
-
Uniform Cutting: Try to cut the strips to the same width so they bake evenly. A pizza cutter or a bench scraper works best for clean lines.
Serving Ideas
These fries are born to be dipped. Serve them in a basket with a side of warm chocolate ganache, marshmallow fluff, or even a salted caramel sauce.
For pairings, a cold glass of whole milk is the classic choice, but they are also incredible alongside a steaming cup of espresso or a creamy vanilla milkshake.
Make It Different
-
The Salted Version: Sprinkle a little flaky sea salt over the top immediately after they come out of the oven.
-
White Chocolate & Macadamia: Swap the milk chocolate for white chocolate chips and finely chopped nuts for a different profile.
-
Festive Fries: Add colorful sprinkles to the dough for a birthday party or holiday-themed treat.
Storage and Reheating
Store any leftover cookie fries in an airtight container at room temperature for up to 3 days. If they lose their crunch, simply pop them back into a 180°C (350°F) oven for 2–3 minutes. They will crisp right back up as they cool.
Success Tips
-
Spacing: Leave at least an inch between each fry on the baking sheet to allow the hot air to circulate and crisp the edges.
-
The “Golden” Rule: Take them out when the edges are a deep golden brown but the centers still look slightly pale. They will continue to firm up on the hot pan.
Frequently Asked Questions
Can I use dark chocolate instead of milk chocolate?
Absolutely. While milk chocolate offers a creamier finish, semi-sweet or dark chocolate provides a nice bitterness that cuts through the richness of the butter.
Why did my fries spread into each other?
This usually happens if the dough wasn’t cold enough when it hit the oven. Make sure the cut fries are frozen solid before baking.
Can I make the dough in advance?
Yes! You can roll and cut the fries, then keep them in the freezer (wrapped well) for up to two weeks. Just bake them straight from the freezer when you’re ready.
Do I have to brown the butter?
You can use regular melted butter, but you will miss out on the deep, toasted flavor that makes this specific recipe stand out.
What if I don’t have a pizza cutter?
A large, sharp chef’s knife works perfectly. Just press straight down rather than sawing through the dough to keep the edges clean.
Recipe Card
-
Prep time: 20 minutes
-
Cook time: 13 minutes
-
Total time: 1 hour 15 minutes (includes chilling)
-
Servings: 4–6 people
-
Category: Dessert/Snack
-
Difficulty: Medium
-
Cuisine: American
-
Yield: Approximately 24–30 cookie fries
Equipment
-
Light-colored saucepan
-
Large mixing bowl
-
Whisk and silicone spatula
-
Rolling pin
-
Parchment paper
-
Pizza cutter or sharp knife
-
Baking sheet
Ingredients
-
120g butter
-
30g brown sugar
-
60g granulated sugar
-
1 egg
-
160g all-purpose flour
-
1/2 teaspoon baking powder
-
150g milk chocolate chips
Instructions
-
Brown the Butter: Melt butter in a saucepan over medium heat. Stir as it foams. Once it turns golden brown and smells nutty, remove from heat and let it cool.
-
Mix Sugars: Whisk the cooled brown butter with granulated and brown sugars until smooth.
-
Incorporate Egg: Whisk in the egg until the mixture is glossy.
-
Dry Ingredients: Fold in the flour and baking powder using a spatula until just combined.
-
Add Chocolate: Gently fold in the milk chocolate chips.
-
Shape: Roll dough into a rectangle on floured parchment paper. Cut into thin “fry” strips.
-
Flash Chill: Freeze the strips for 5–10 minutes to firm up.
-
Arrange: Transfer the fries to a baking sheet, leaving space between them.
-
Deep Chill: Freeze the tray for 30–60 minutes.
-
Bake: Preheat oven to 190°C (375°F). Bake for 13 minutes until edges are golden.
Nutrition
(Estimated per serving)
Calories: 280kcal | Fat: 16g | Carbohydrates: 32g | Protein: 3g
