No-Bake Chocolate Chip Cookie Dough Bars
The Ultimate No-Bake Chocolate Chip Cookie Dough Bars
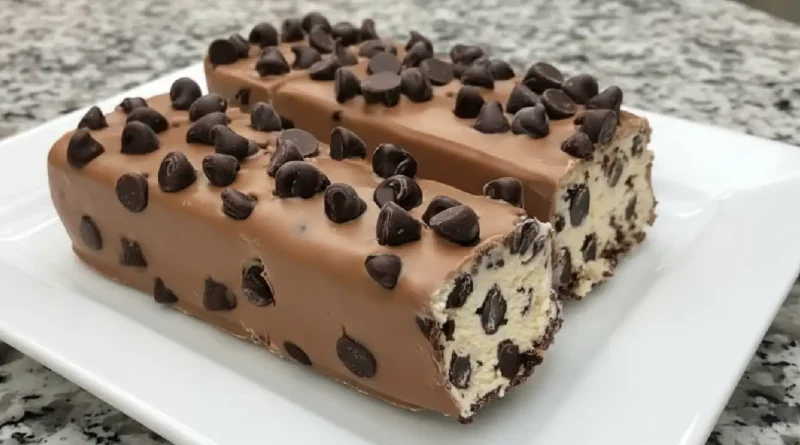
There is something inherently nostalgic about sneaking a spoonful of raw cookie dough from the mixing bowl when no one is looking. It is that perfect combination of buttery sweetness, the crunch of sugar, and the way chocolate melts against your tongue. These No-Bake Chocolate Chip Cookie Dough Bars were born out of a humid July afternoon when I was craving that exact flavor but couldn’t bring myself to turn on the oven. I wanted something dense, fudge-like, and unapologetically rich. After a few rounds of perfecting the ratios, I landed on this version: a velvety, heat-treated flour base that stays soft even after chilling, studded with mini chocolate chips that ensure you get a bit of cocoa in every single bite.
Why You’ll Love This
-
Zero Oven Time: You can keep your kitchen cool while satisfying a serious dessert craving in under twenty minutes of active work.
-
Safe and Stress-Free: By heat-treating the flour, you get that authentic dough texture without any of the safety concerns associated with raw eggs or untreated grains.
-
Crowd-Pleasing Portability: These bars hold their shape beautifully, making them the perfect candidate for potlucks, lunchboxes, or a midnight snack straight from the fridge.
-
The Texture Balance: It strikes the perfect chord between a soft truffle and a chewy cookie, finished with a pinch of sea salt to cut through the sweetness.
I first realized these bars were a winner when I served them at a neighborhood block party. My neighbor, a self-proclaimed dessert snob who usually avoids “unbaked” treats, skeptically took a small square. Five minutes later, he was back at the dessert table asking if I had used a secret French butter. He couldn’t believe a recipe this simple could produce such a sophisticated, creamy mouthfeel. Seeing a picky eater go back for thirds is the highest praise a baker can receive, and these bars earn it every time.
What Makes It Special
-
Heat-Treated Flour: This provides the essential structural backbone while ensuring the dish is completely safe to eat.
-
Brown Butter Notes: While we use softened butter, the high ratio of brown sugar creates a deep, toffee-like undertone that mimics the flavor of a classic baked cookie.
-
Miniature Chocolate Chips: Using mini chips instead of full-sized ones ensures even distribution so the chocolate doesn’t overwhelm the delicate dough.
-
Vanilla Bean Paste: A heavy hand with high-quality vanilla adds an aromatic warmth that elevates these from a simple snack to a gourmet treat.
Making It Happen
The process begins with a little bit of preparation to ensure safety and texture. You will start by heat-treating your flour in the microwave or oven until it reaches 160°F, which kills any bacteria and gives the flour a slightly toasted, nutty scent. Once cooled and sifted, the magic happens in a large mixing bowl. You cream together softened salted butter with a generous amount of brown sugar and a touch of granulated sugar until the mixture looks pale and fluffy. This aeration is what keeps the bars from feeling too heavy.
Next, you stir in the milk and vanilla, creating a smooth, almost caramel-like base. Slowly fold in the prepared flour and a pinch of salt until a thick, cohesive dough forms. The best part is folding in the chocolate chips; as they hit the buttery dough, they stay suspended in a perfect mosaic. You then press this mixture firmly into a lined square pan, smoothing the top with a spatula. A quick chill in the refrigerator allows the fats to set, transforming the soft dough into a sliceable, decadent bar that holds its form beautifully.
You Must Know
-
Sift Your Flour: After heat-treating, flour tends to clump. Sifting it ensures your bars are silky smooth rather than gritty.
-
Don’t Skip the Salt: A half-teaspoon of fine sea salt balances the sugar and makes the chocolate flavors pop.
-
Room Temperature Butter: Make sure your butter is truly soft but not oily; this creates the creamy emulsion needed for the perfect “bite.”
Serving Ideas
These bars are quite rich, so they pair beautifully with a cold glass of whole milk or a bitter, dark roast coffee to balance the sweetness. For a more formal presentation, serve a chilled square alongside a scoop of tart raspberry sorbet or a dollop of unsweetened whipped cream. If you are feeling extra indulgent, a drizzle of warm salted caramel over the top just before serving turns these into a plated masterpiece.
Make It Different
-
Vegan Variation: Replace the butter with a high-quality plant-based buttery stick and use almond milk and dairy-free chocolate chips.
-
Nutty Crunch: Fold in a half-cup of toasted chopped pecans or walnuts for an added layer of texture.
-
Peanut Butter Twist: Swap half of the butter for creamy peanut butter to create a protein-rich, savory-sweet hybrid.
-
Double Chocolate: Add two tablespoons of cocoa powder to the flour for a “brownie dough” variation.
Storage and Reheating
Because these contain dairy and no preservatives, they are best kept in an airtight container in the refrigerator for up to seven days. They do not require reheating, as they are designed to be eaten cold or at room temperature. If you want to keep them longer, these bars freeze exceptionally well. Wrap individual squares in parchment paper and store them in a freezer bag for up to three months. Just let them sit on the counter for ten minutes before eating.
Success Tips
The secret to the professional look of these bars is the “parchment sling.” Line your baking pan with parchment paper, leaving an overhang on two sides. This allows you to lift the entire block of dough out of the pan once chilled, making it easy to cut clean, sharp-edged squares. For the cleanest cuts, run a sharp knife under hot water and wipe it dry between every single slice.
Frequently Asked Questions
Is raw flour really unsafe to eat?
Yes, raw flour can contain bacteria. That is why we heat-treat the flour to 160°F before mixing it into the dough, making it perfectly safe for everyone to enjoy.
Can I use chocolate chunks instead of chips?
You certainly can, though the bars may be slightly harder to slice cleanly. Large chunks can cause the dough to crumble around the edges when cutting.
Why are my bars too soft?
This usually happens if the butter was too warm (melted) or if they haven’t chilled long enough. Give them at least two hours in the fridge to fully firm up.
Can I use an alternative flour like almond flour?
Yes, almond flour works well and doesn’t require heat-treating. However, it will yield a grainier texture and a more prominent nut flavor.
Do I have to use a mixer?
While a hand mixer makes the creaming process easier, you can definitely make these by hand with a sturdy spatula and a bit of elbow grease.
Recipe Card
Prep time: 15 minutes
Cook time: 2 minutes (for heat-treating flour)
Total time: 17 minutes (plus chilling)
Servings: 16 bars
Category: Dessert
Difficulty: Easy
Cuisine: American
Yield: 1 8×8 inch pan
Equipment: 8×8 inch square baking pan, parchment paper, mixing bowl, hand mixer, sifter.
Ingredients
-
2 cups all-purpose flour (heat-treated)
-
1 cup (2 sticks) salted butter, softened
-
1 cup light brown sugar, packed
-
1/4 cup granulated sugar
-
2 tablespoons whole milk
-
1 tablespoon vanilla extract
-
1/2 teaspoon fine sea salt
-
1 cup mini semi-sweet chocolate chips
Instructions
-
Heat-treat the flour by microwaving it in 30-second intervals until it reaches 160°F, then let it cool completely.
-
Sift the cooled flour to remove any lumps.
-
In a large bowl, cream together the softened butter, brown sugar, and granulated sugar until light and fluffy.
-
Beat in the milk, vanilla extract, and salt until well combined.
-
Gradually add the sifted flour, mixing on low speed until a thick dough forms.
-
Fold in the mini chocolate chips by hand.
-
Line an 8×8 pan with parchment paper and press the dough firmly and evenly into the pan.
-
Chill in the refrigerator for at least 2 hours before lifting out and slicing into squares.
Notes
If you use unsalted butter, increase the salt measurement to 3/4 teaspoon to maintain the flavor balance. Ensure the flour is completely cool before adding it to the butter mixture to prevent melting.
Nutrition
Calories: 280 kcal | Carbohydrates: 34g | Protein: 2g | Fat: 15g | Saturated Fat: 9g | Fiber: 1g | Sugar: 22g
