Sour Cream Chocolate Cake with Glossy Chocolate Frosting
Moist and Velvety Sour Cream Chocolate Cake with Glossy Chocolate Frosting
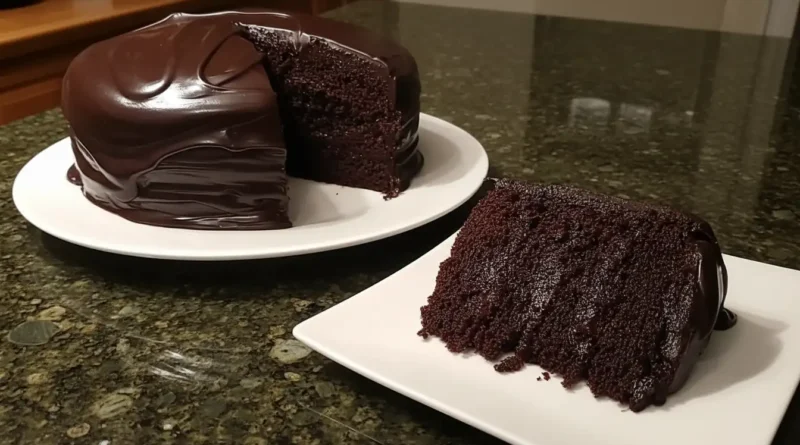
There is something deeply nostalgic about the smell of a chocolate cake baking on a quiet afternoon. It is the kind of scent that fills the corners of a kitchen, promising a reward that is both simple and profound. This Sour Cream Chocolate Cake isn’t trying to be a towering, five-layer masterpiece. Instead, it is an honest, single-layer cake that focuses entirely on texture and depth. I remember the first time I pulled this from the oven; the surface was perfectly springy, and the kitchen smelled of dark, bloomed cocoa and warmth. It’s the cake you make when you want to show someone you care without the fuss of complicated decorating, relying instead on a thick, glossy frosting that catches the light like silk.
Why You’ll Love This
-
The Texture is Unrivaled: The addition of sour cream creates a tight, velvety crumb that stays moist for days, unlike standard sponge cakes that can dry out quickly.
-
A Sophisticated Sweetness: By using Dutch-process cocoa and a touch of hot coffee, the flavor profile is rich and dark rather than sugary-sweet.
-
Stress-Free Assembly: Since it is a single-layer cake, there is no worrying about structural integrity or crumbling layers; it’s rustic yet elegant.
-
The Glossy Finish: The frosting is a hybrid between a ganache and a buttercream, offering a mirror-like shine that looks professional with zero effort.
Last summer, I served this cake at a small gathering where one guest famously claimed to “not be a cake person.” He usually found them too airy or cloyingly sweet. I watched him take a polite, skeptical first bite of this Sour Cream Chocolate Cake. Halfway through the slice, the conversation stopped. He ended up asking for a second piece to take home, admitting that the tang of the sour cream and the intensity of the chocolate finally changed his mind about what a cake could be. It is the kind of dessert that wins over the skeptics because it tastes like real ingredients, not just sugar.
What Makes It Special
-
Full-Fat Sour Cream: This provides the necessary acidity to react with the baking soda, ensuring a tender rise and a richness that butter alone can’t achieve.
-
Dutch-Process Cocoa Powder: Unlike natural cocoa, this is treated to reduce acidity, resulting in a deeper color and a smoother, more mellow chocolate flavor.
-
Hot Brewed Coffee: You won’t actually taste the coffee in the finished cake. Instead, the hot liquid “blooms” the cocoa powder, dissolving any lumps and intensifying the chocolate notes.
-
High-Quality Dark Chocolate: Using a bar with 60-70% cacao for the frosting ensures a complex flavor and a beautiful, glossy sheen.
Making It Happen
The process begins by creating a foundation of dry ingredients, whisking together the flour, sugar, and sifted cocoa to ensure everything is light and aerated. In a separate bowl, the sour cream, oil, egg, and vanilla come together into a thick, pale gold mixture. When you pour the wet into the dry, it feels like a standard batter until the magic happens: the hot coffee. As you pour the steaming liquid in, the batter thins out significantly, becoming almost like a dark soup. Don’t worry; this high hydration is exactly what gives the cake its signature silkiness.
Once the cake is tucked away in the oven, your focus shifts to the frosting. Heating the cream and butter together creates a warm, golden base that melts the chopped chocolate into a pool of liquid velvet. Whisking in the cocoa and sugar gives it body, but the real secret is the final addition of room-temperature sour cream. This transforms the frosting from a simple glaze into a thick, spreadable, and incredibly shiny coating. By the time the cake has cooled and the frosting has sat for twenty minutes to firm up, you’re ready to swirl it across the top in thick, generous waves.
You Must Know
-
Temperature Matters: Ensure your egg and sour cream are at room temperature before you start. Cold ingredients don’t emulsify as well, which can lead to a less consistent crumb.
-
Sift Your Cocoa: Cocoa powder is notoriously clumpy. Taking thirty seconds to sift it into your flour and again into your frosting will save you from biting into a pocket of dry, bitter powder.
-
Don’t Overbake: Because this cake is so dark, it is hard to tell when it’s done by sight. Start checking at the 35-minute mark; you want a few moist crumbs on the toothpick, not a clean exit.
-
Cool Completely: Never frost a warm cake. The glossy frosting relies on a stable temperature to set correctly; otherwise, it will simply slide off the sides.
Serving Ideas
This cake is bold enough to stand on its own, but a handful of fresh raspberries or sliced strawberries provides a bright, tart contrast to the deep chocolate. If you are serving this after dinner, a glass of cold milk is the classic choice, but a dry red wine like a Cabernet Sauvignon or a stout beer with notes of chocolate and coffee also pairs beautifully. For an afternoon treat, a simple cup of Earl Grey tea balances the richness of the glossy frosting perfectly.
Make It Different
-
For a Spice Twist: Add half a teaspoon of ground cinnamon and a pinch of cayenne pepper to the dry ingredients for a “Mexican Chocolate” inspired version.
-
Dairy-Free Option: You can substitute the sour cream with a thick dairy-free Greek-style yogurt and use a high-quality vegan butter and cream alternative in the frosting.
-
The “Blackout” Version: As noted in the recipe, use a small amount of black cocoa powder for an even darker, Oreo-like aesthetic, though keep the Dutch-process as the base for moisture.
Storage and Reheating
This Sour Cream Chocolate Cake is remarkably hardy. It can sit covered at a cool room temperature for a few hours, but because of the dairy in the frosting, it is best kept in the refrigerator for longer periods. In an airtight container, it will stay fresh and moist for up to five days. If you prefer your cake at room temperature, simply take a slice out 20 minutes before you plan to eat it. Avoid reheating the frosted cake in the microwave, as the glossy frosting will melt and lose its beautiful texture.
Success Tips
To get the most professional look, use an offset spatula to apply the frosting. Start in the center and push the frosting toward the edges, creating a slightly thicker border. If your frosting seems too thin, let it sit for another five minutes; it thickens as it cools. Also, when greasing your pan, use a light hand. Too much butter on the sides can cause the edges of the cake to “fry” and become tough, which clashes with the soft center.
Frequently Asked Questions
Can I use natural cocoa powder instead of Dutch-process?
While you can, the cake will be lighter in color and have a slightly more acidic, sharper flavor. Dutch-process is highly recommended for that deep, classic “blackout” look and mellow taste.
I don’t have a coffee maker. Can I use water?
Absolutely. Hot water works perfectly fine for blooming the cocoa. The coffee simply acts as a flavor enhancer, much like salt does for savory food, without making the cake taste like a latte.
Why did my frosting turn out grainy?
This usually happens if the sugar wasn’t fully incorporated while the mixture was warm, or if the cocoa powder wasn’t sifted. Make sure the butter and cream are hot enough to dissolve the sugar when you whisk it in.
Can I make this into cupcakes?
Yes, this batter works well for cupcakes. Reduce the baking time to approximately 18–22 minutes and keep a close eye on them to ensure they don’t dry out.
Can I freeze this cake?
You can freeze the unfrosted cake layer wrapped tightly in plastic wrap and foil for up to three months. The frosting is best made fresh, as the sour cream can sometimes change texture after being frozen and thawed.
Recipe Details
Prep time: 20 minutes
Cook time: 35-40 minutes
Total time: 1 hour
Servings: 8
Category: Dessert
Difficulty: Intermediate
Cuisine: American
Yield: One 8-inch cake
Equipment: 8-inch round baking pan, parchment paper, whisk, medium bowl, small saucepan, offset spatula.
Ingredients
For Cake:
-
⅞ cup / 110 g all-purpose flour
-
⅞ cups / 175 g granulated sugar
-
½ cup / 45 g Dutch-process cocoa powder, sifted
-
1 teaspoon baking powder
-
¼ teaspoon baking soda
-
¼ teaspoon fine sea salt
-
⅓ cup / 80 g full fat sour cream
-
¼ cup / 56 g vegetable oil
-
1 large egg, at room temperature
-
2 teaspoons vanilla extract
-
scant ½ cup / 100 g hot brewed coffee or hot water
For Frosting:
-
⅓ cup / 80 g heavy cream
-
¼ cup / 56 g unsalted butter, cut into chunks
-
2 oz / 56 g good quality dark chocolate (60-70%), finely chopped
-
⅓ cup / 67 g granulated sugar
-
⅓ cup / 30 g Dutch-process cocoa powder, sifted
-
⅓ cup / 80 g full fat sour cream, at room temperature
-
1 teaspoon vanilla extract
-
pinch fine sea salt
Instructions
For Chocolate Cake:
-
Preheat your oven to 325°F. Lightly grease an 8-inch round baking pan and line the bottom with a circle of parchment paper to ensure easy removal.
-
In a large bowl, whisk together the flour, sugar, cocoa powder, baking soda, baking powder, and salt until well combined.
-
In a separate bowl or a glass measuring cup, whisk the sour cream, vegetable oil, egg, and vanilla until the mixture is smooth.
-
Create a well in the center of your dry ingredients. Pour in the sour cream mixture and stir until just combined, leaving a few visible streaks of flour.
-
Add the hot coffee (or water) and stir gently. The batter will be very thin and look slightly separated at first, but continue whisking until it becomes a smooth, uniform liquid.
-
Pour the batter into the prepared pan and bake for 35 to 40 minutes. It is done when the center springs back to the touch and a toothpick comes out with only a few moist crumbs.
-
Let the cake cool in the pan for about 10 minutes, then carefully invert it onto a wire rack to cool completely.
For Frosting & Assembly:
-
In a small saucepan over medium heat, combine the heavy cream and butter. Stir until the butter is completely melted and the mixture begins to simmer.
-
Remove the pan from the heat and add the finely chopped dark chocolate. Let it sit for a minute, then stir until the chocolate is melted and the mixture is glossy.
-
Whisk in the sugar, sifted cocoa powder, and salt. The mixture will look thick and slightly grainy at this stage.
-
Add the sour cream and vanilla. Whisk vigorously until the frosting becomes smooth, dark, and very shiny.
-
Let the frosting sit at room temperature for 15 to 30 minutes. Stir it occasionally; it will thicken as it cools to a spreadable consistency.
-
Spread the frosting generously over the cooled cake using an offset spatula or the back of a spoon to create decorative swirls.
-
Slice and serve. Store any leftovers in an airtight container in the refrigerator for up to 5 days.
