
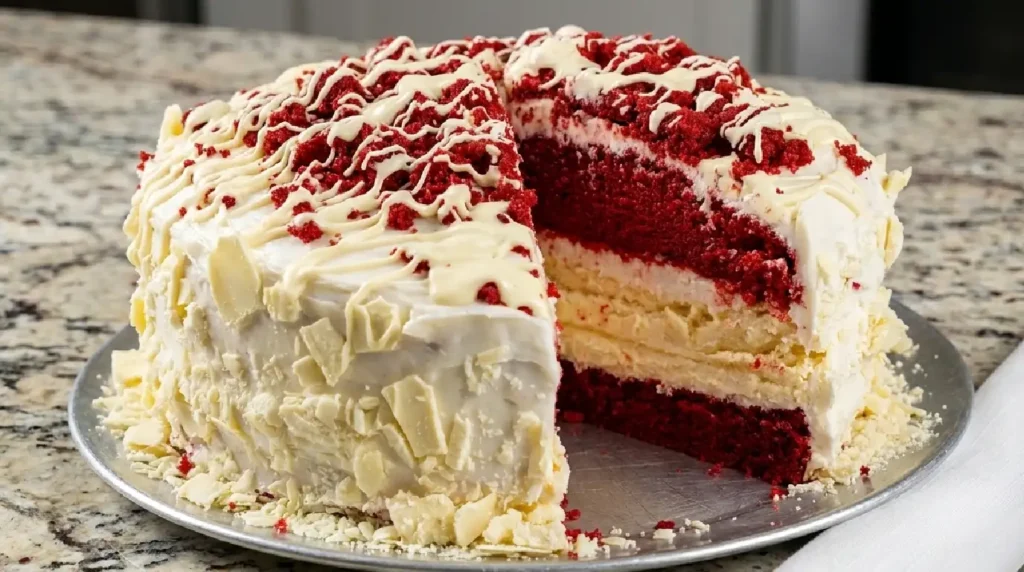
Classic Homemade Red Velvet Cake Recipe
Table of Contents
ToggleClassic Homemade Red Velvet Cake Recipe with Cream Cheese Frosting
Finding a truly great cake can transform a simple afternoon into something memorable. My first real attempt at baking a Red Velvet cake happened on a rainy Sunday morning when I wanted a dessert that felt traditional yet distinct. The vibrant crimson color immediately caught my attention, but the tender crumb and velvety texture kept me coming back. A genuine classic doesn’t rely on artificial gimmicks or overwhelming sugar. Instead, it relies on a delicate touch of cocoa balanced by the tangy bite of real buttermilk and a smooth cream cheese frosting that melts effortlessly.
Why You’ll Love This
-
The crumb stays moist and tender for days without getting dense.
-
Natural cocoa powder creates a subtle, sophisticated chocolate profile.
-
Tangy homemade frosting balances the sweetness perfectly.
-
Simple baking steps mean high reliability, even for beginners.
The Backstory
My uncle spent decades claiming he disliked cake, usually opting for pie or fruit whenever dessert came around. He insisted most layered cakes were dry and covered in sickly sweet icing. During a family gathering a few years ago, I brought this dessert out on a whim. He took a polite, minimal bite just to be courteous. Within ten minutes, his plate was clean, and he was asking for a second piece to take home. That single moment converted a lifelong skeptic into a believer.
What Makes It Special
-
Real Buttermilk: Adds essential moisture and a gentle acid that tenderizes the gluten structure.
-
Unsweetened Cocoa Powder: Delivers a deep, subtle earthiness without turning the batter into a heavy chocolate cake.
-
Distilled White Vinegar: Reacts with the baking soda to build an airy, cloud-like texture.
-
Block Cream Cheese: Forms the dense, tangy base of the frosting for ideal structural stability.
Making It Happen
Start by sifting together your dry ingredients—flour, cocoa powder, baking soda, and fine salt—into a large bowl to eliminate lumps and ensure an even rise. In a separate bowl, cream softened unsalted butter and granulated sugar together until the mixture turns pale and fluffy. Beat in room temperature eggs one at a time, followed by a splash of pure vanilla extract.
Next, mix your liquid ingredients. Whisk buttermilk with vegetable oil and vivid red food coloring. Alternate adding the dry flour mixture and the wet buttermilk liquid into your butter base, starting and ending with the dry ingredients. Stir just until combined to keep the batter tender. Finally, quickly fold in a mixture of baking soda and white vinegar, pouring the bubbling batter into greased, flour-dusted round baking pans. Bake in a preheated oven until a toothpick inserted into the center comes out clean, then let the layers cool completely on wire racks before spreading thick cream cheese frosting between layers and over the top.
You Must Know
-
Bring eggs, butter, and buttermilk to room temperature before mixing to prevent batter separation.
-
Measure flour by spooning it into the measuring cup and leveling it off with a knife.
-
Use gel food dye rather than liquid dye for a deep color without watering down the batter.
-
Chill the cake layers for thirty minutes before frosting to minimize loose crumbs.
Serving Ideas & Pairings
Slice this dessert thinly and serve it alongside freshly brewed dark roast coffee or a hot pot of Earl Grey tea. The astringency of black tea cuts through the rich cream cheese beautifully. For special celebrations, pair each slice with fresh raspberries or a handful of tart blackberries to complement the subtle cocoa flavor.
Make It Different
If you prefer a natural color base, swap synthetic dye for concentrated beet juice powder mixed into the buttermilk. For an extra rich twist, replace half of the vegetable oil with browned butter to add a nutty aroma. Gluten-free bakers can substitute the cake flour with a high-quality 1-to-1 baking flour blend without sacrificing the cake’s delicate texture.
Storage & Reheating
Store the frosted cake in an airtight container inside the refrigerator for up to five days. Because cream cheese frosting softs at room temperature, keep it chilled until about twenty minutes before serving. If you prefer a warm slice, microwave an unfrosted slice for roughly eight to ten seconds to revive that fresh-from-the-oven softness.
Success Tips
Be careful not to over-mix the batter once the flour hits the wet ingredients; over-working gluten leads to a tough texture. Always check that your baking soda is fresh, as the chemical reaction between vinegar and fresh baking soda provides the lift needed for that iconic fluffy crumb.
Frequently Asked Questions (FAQ)
Can I bake this dish in advance?
Yes, you can bake the cake layers a day early. Wrap the cooled layers tightly in plastic wrap and store them at room temperature overnight before frosting.
Why is my red velvet cake turning brown instead of bright red?
Using Dutch-processed cocoa powder can darken the color and neutralize the acids. Stick to natural unsweetened cocoa powder to preserve the bright red tone.
Can I substitute buttermilk with regular milk?
If you lack buttermilk, add one tablespoon of fresh lemon juice or white vinegar to a cup of whole milk and let it sit for five minutes before using.
How do I prevent the cream cheese frosting from becoming runny?
Use full-fat block cream cheese instead of cream cheese spread from a tub, and ensure your butter and cream cheese are cool rather than warm.
Can I freeze the assembled cake?
Yes, freeze the unfrosted or frosted cake. Flash-freeze the frosted cake for an hour until solid, then wrap tightly in plastic and foil for up to three months.
Recipe Card Info
Prep time: 25 minutes
Cook time: 30 minutes
Total time: 55 minutes
Servings: 12
Category: Dessert
Difficulty: Intermediate
Cuisine: American
Yield: One 9-inch 2-layer cake
Equipment: Mixing bowls, whisk, hand mixer or stand mixer, two 9-inch round cake pans, wire cooling rack
Ingredients
Cake Batter:
-
2 1/2 cups cake flour
-
2 tablespoons natural unsweetened cocoa powder
-
1 teaspoon baking soda
-
1 teaspoon fine sea salt
-
1 1/2 cups granulated sugar
-
1/2 cup unsalted butter, softened
-
1 cup vegetable oil
-
2 large eggs, room temperature
-
1 cup full-fat buttermilk, room temperature
-
1 tablespoon liquid or gel red food coloring
-
1 teaspoon pure vanilla extract
-
1 teaspoon distilled white vinegar
Cream Cheese Frosting:
-
16 ounces block cream cheese, slightly softened
-
1/2 cup unsalted butter, softened
-
4 cups powdered sugar, sifted
-
1 teaspoon pure vanilla extract
-
1 pinch sea salt
Directions
-
Preheat your oven to 350 degrees Fahrenheit (175 degrees Celsius). Grease two 9-inch round cake pans and line the bottoms with parchment paper rounds.
-
In a medium bowl, sift together the cake flour, cocoa powder, baking soda, and salt. Set aside.
-
In a large bowl or stand mixer, beat the softened butter and granulated sugar together on medium speed until fluffy.
-
Add the eggs one at a time, beating well after each addition. Mix in the vegetable oil and vanilla extract until fully incorporated.
-
In a measuring cup, whisk together the buttermilk and red food coloring.
-
Alternate adding the flour mixture and buttermilk mixture to the butter base in three additions, starting and ending with the dry ingredients. Mix on low speed until just combined.
-
Stir the white vinegar into the batter quickly, ensuring it is evenly distributed.
-
Divide the batter evenly between the prepared pans. Smooth the tops with a spatula.
-
Bake for 28 to 32 minutes, or until a toothpick inserted into the center comes out clean.
-
Remove from the oven and cool in the pans for 10 minutes, then invert the cakes onto wire racks to cool completely.
-
To make the frosting, beat the cream cheese and butter together until smooth. Gradually add the powdered sugar, vanilla extract, and salt, beating until creamy and spreadable.
-
Place one cooled cake layer on a serving platter. Spread a thick layer of frosting over the top. Place the second layer on top and cover the top and sides with the remaining frosting.
Notes
Ensure the cake layers are completely cold before applying frosting. If the frosting feels too soft while working, chill it in the refrigerator for fifteen minutes to firm up.
Nutrition
Serving size: 1 slice
Calories: 580
Fat: 34g
Saturated Fat: 14g
Carbohydrates: 65g
Sugar: 48g
Protein: 6g
Sodium: 320mg
