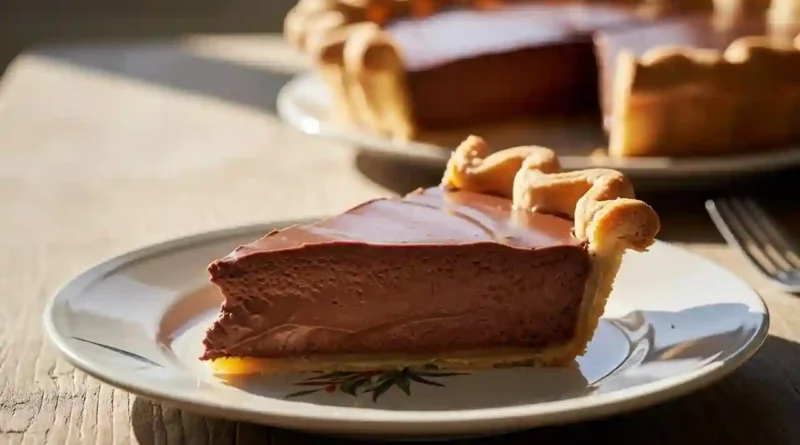
Chocolate Pie
The Only Chocolate Pie Recipe You’ll Ever Need | Creamy, Dreamy & Simple
A Pie That Feels Like a Hug
There are pies, and then there is this chocolate pie. This isn’t just a dessert; it’s a memory. I remember the first time I made it, the rich, chocolatey scent filled the entire house, pulling everyone from their corners into the kitchen with curious, hopeful smiles. It’s the pie I make for potlucks when I want to be a hero, for birthdays when a layer cake feels like too much, and for quiet Tuesday nights when the soul needs a little comfort. The filling is impossibly smooth and creamy, cradled in a flaky, buttery crust, and it has this magical way of making everything feel just a little bit better.
Why You’ll Love This Chocolate Cream Pie
-
It’s Deceptively Simple: You don’t need to be a pastry chef. This is a stovetop pudding method that feels approachable and forgiving.
-
The Ultimate Comfort Food: The deep, silky chocolate filling is pure nostalgia, reminiscent of the best homemade pudding you’ve ever had, but elegantly set in a pie crust.
-
A Crowd-Pleasing Classic: From kids to grandparents, it’s a universally beloved flavor that never goes out of style.
-
Make-Ahead Magic: This pie demands to be made in advance, chilling for hours, which means zero dessert stress on the day you plan to serve it.
The Ultimate Compliment
I once brought this chocolate pie to a gathering where a friend’s father, a man known for his staunch “I don’t do dessert” policy, was visiting. He watched as slice after slice was devoured, finally conceding to a “tiny sliver, just to be polite.” That tiny sliver disappeared in seconds. He then quietly got up, cut himself a full quarter of the pie, and declared it the best thing he’d eaten all year. It’s that kind of pie—it wins over even the most stubborn skeptics.
What Makes It Special
This pie’s magic lies in the quality and balance of its core components.
-
Bittersweet Chocolate: Using a good quality 60-70% bittersweet chocolate is the secret. It provides a deep, sophisticated chocolate flavor that isn’t overly sweet, creating a rich and complex taste.
-
The Custard Base: The combination of whole milk and egg yolks creates a luxuriously creamy and tender custard structure that melts on the tongue.
-
Flaky, Buttery Crust: A pre-baked, classic pie crust provides a textural contrast—a crisp, golden, and savory counterpoint to the smooth, sweet filling.
-
A Hint of Vanilla and Butter: These two ingredients round out the sharp edges, adding warmth and a velvety mouthfeel that makes the chocolate sing.
Making It Happen: A Step-by-Step Narrative
Let’s walk through the process together. First, grab your medium saucepan. In it, you’ll want to whisk together the sugar, cornstarch, and salt. This dry team is what will thicken our glorious filling. Now, pour in the whole milk and add those four golden egg yolks, whisking everything until it’s a smooth, pale yellow liquid.
Place the saucepan over medium heat. This is where a little patience comes in. Stir it constantly with a whisk or a wooden spoon, making sure to scrape the bottom and corners. You’ll feel the mixture start to resist your whisk, slowly transforming from a thin liquid into a luxurious, thick pudding. The moment you see a few lazy bubbles plop to the surface and the texture is unmistakably thick, take it off the heat immediately.
Now for the grand finale. Add the finely chopped bittersweet chocolate, the vanilla extract, and the butter. The residual heat is all you need. Stir gently and watch as the chocolate melts and the butter swirls in, creating a single, glossy, and profoundly chocolatey universe. Pour this warm, heavenly mixture into your waiting, cooled pie crust. If you have a little extra, consider it your well-earned chef’s treat—spoon it into a ramekin.
Now, the hardest part: the wait. Slide the pie into the refrigerator, uncovered, and let it chill for a solid four hours, or ideally, overnight. This allows the filling to set perfectly.
You Must Know: Tips for a Flawless Pie
-
Chop Chocolate Finely: Finely chopped chocolate will melt instantly and evenly into the hot custard, preventing any grainy bits.
-
Constant Stirring is Non-Negotiable: To avoid a scorched bottom or lumpy filling, you must stir consistently from the moment you turn on the heat.
-
Trust the Thicken: The filling will seem thin at first but will thicken up dramatically right as it approaches a boil. Have faith!
-
Cool Your Crust Completely: Pouring the hot filling into a warm crust can make it soggy. Ensure your crust is fully cooled to room temperature.
Serving It Up
This chocolate pie is a star on its own, but a dollop of freshly whipped cream is its perfect partner, adding a light, airy contrast. For a festive touch, shave a little extra chocolate on top. Pair a slice with a cup of strong black coffee to balance the sweetness, or with a glass of cold milk for the ultimate classic combo.
Make It Different: Your Pie, Your Rules
-
Crust Swap: For a quicker, no-fuss option, use a pre-made graham cracker or Oreo cookie crust.
-
Dairy-Free: Use full-fat canned coconut milk and a vegan butter substitute. Ensure your chocolate is dairy-free.
-
Flavor Twists: Add a tablespoon of orange zest or a pinch of espresso powder to the filling for a sophisticated flavor dimension.
-
Milk Chocolate Lover: Swap the bittersweet chocolate for high-quality milk chocolate for a sweeter, milder pie.
Storing Your Masterpiece
Store any leftover pie covered loosely with plastic wrap in the refrigerator for up to 4 days. This pie does not freeze well, as the custard filling can become watery and separate upon thawing. For the best texture and flavor, enjoy it within 2-3 days.
Success Tips for the Perfect Slice
For those beautiful, clean slices you see in magazines, dip a sharp knife in hot water and wipe it dry before each cut. The heat will glide smoothly through the creamy filling and crisp crust. Let the pie sit at room temperature for about 10 minutes before serving to take the extreme chill off.
Frequently Asked Questions
Can I use a store-bought pie crust?
Absolutely! A quality store-bought crust works wonderfully. Just be sure to blind-bake it according to the package directions and let it cool completely before filling.
My filling is a bit lumpy. What can I do?
Don’t panic! Simply pour the finished filling through a fine-mesh sieve into your pie crust. This will catch any little cooked egg bits or lumps, leaving you with a perfectly silky texture.
Why does my filling look dull and not glossy?
This usually means the chocolate was heated for too long or at too high a temperature. Always remove the pan from the heat before adding the chocolate, and let the residual heat do the melting.
Can I make this without eggs?
This specific recipe relies on egg yolks for its structure and creaminess. For an egg-free version, you would need to seek out a recipe specifically designed to use a different thickener, like a chocolate tart thickened with cream.
How long does it really need to set?
A minimum of 4 hours is essential, but for the cleanest, most perfect slices, letting it chill overnight is the ultimate pro-move.
Recipe Card: Classic Chocolate Cream Pie
Prep time: 20 minutes
Cook time: 10 minutes
Total time: 4 hours 30 minutes (includes chilling)
Servings: 8
Category: Dessert
Difficulty: Easy
Cuisine: American
Yield: One 9-inch pie
Ingredients
-
1 1/2 cups granulated sugar
-
1/4 cup cornstarch
-
1/4 tsp. salt
-
3 cups whole milk
-
4 large egg yolks
-
6 1/2 oz. bittersweet chocolate, finely chopped
-
2 tsp. vanilla extract
-
2 Tbsp. unsalted butter
-
1 (9-inch) pie crust, baked and cooled
-
Whipped cream, for serving
Directions
-
In a medium saucepan, whisk together the sugar, cornstarch, and salt. Gradually whisk in the milk and egg yolks until the mixture is smooth.
-
Place the saucepan over medium heat. Cook, stirring constantly with a whisk or wooden spoon, until the mixture thickens and just begins to bubble, about 6-10 minutes.
-
Immediately remove from heat. Add the finely chopped chocolate, vanilla extract, and butter. Stir until the chocolate and butter are completely melted and the filling is smooth.
-
Pour the warm filling into the baked and cooled pie crust. Smooth the top with a spatula.
-
Place the pie in the refrigerator, uncovered, and chill for at least 4 hours, or until completely set.
-
Serve chilled, topped with freshly whipped cream.
Notes
Allergy Info: Contains dairy, eggs, gluten (in crust), and soy (possible in chocolate).
Nutrition (per slice, estimated): Calories: 480 | Fat: 22g | Carbs: 65g | Protein: 7g
