Butter Cake, Moist Old Fashioned Recipe (Sugar-Free)
The Ultimate Moist Old-Fashioned Butter Cake (Surprisingly Sugar-Free)
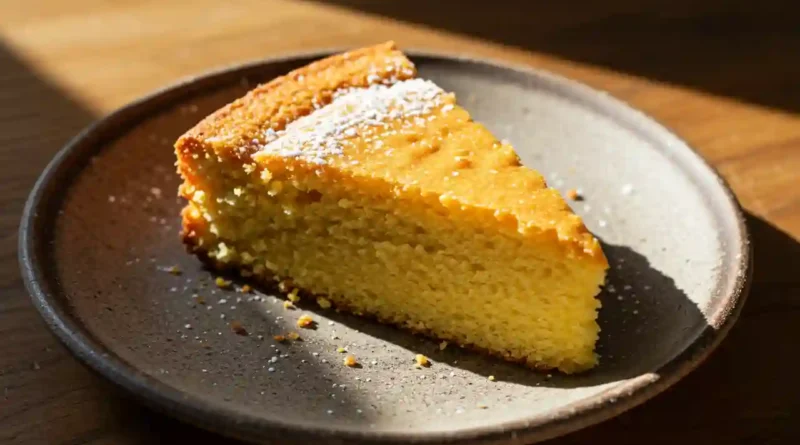
There’s a certain magic to an old-fashioned butter cake. It’s not the fanciest dessert on the block, but its humble charm is undeniable. It’s the cake you dream of—the one with a fine, tender crumb, a golden-brown crust, and a rich, buttery aroma that fills your kitchen with a sense of home. This particular recipe holds a special place in my heart. It was born out of a desire to recreate my grandmother’s legendary cake for my father, who has had to watch his sugar intake. After much tweaking and testing, we landed on this masterpiece. The result? A cake so incredibly moist and bursting with buttery flavor, you’ll find it hard to believe it’s completely sugar-free. This isn’t a “diet” cake; it’s a genuine, soul-warming classic.
Why You’ll Love This Sugar-Free Butter Cake
-
Indulge Without the Guilt: Enjoy a rich, decadent-tasting slice of cake that aligns with a sugar-free lifestyle.
-
Unbelievably Moist Texture: Thanks to a specific mixing method and the right balance of ingredients, this cake stays supremely tender for days.
-
Pure, Simple Comfort: It’s a nostalgic trip back to basics—a simple, honest cake that feels like a warm hug.
-
Surprisingly Easy to Make: You don’t need any fancy skills, just a few bowls and a mixer. It’s a straightforward process with a spectacular payoff.
I’ll never forget the look on my friend’s son’s face. He’s a renowned picky eater, the type who can detect a “healthy” ingredient from a mile away. I nervously offered him a slice without any mention of it being sugar-free. He took a bite, then another, and finally looked up with a crumb-covered smile and said, “This is the best cake ever.” His mother’s jaw nearly hit the floor. It was the ultimate stamp of approval, proving that this cake wins over even the toughest critics.
What Makes It Special
The magic of this moist butter cake lies in its ingredients and how they work together.
-
The Butter Base: Using a full 170g of high-quality, softened unsalted butter creates an incomparably rich flavor and that signature tender crumb.
-
Smart Sweetening: Stevia sweetener stands in for sugar perfectly, providing the necessary sweetness without any of the glycemic spike, allowing the true buttery notes to shine.
-
The Moisture Magic: Fresh milk is the key player here, interacting with the flour and butter to create a soft, delicate, and incredibly moist texture that defines an old-fashioned cake.
-
Flavor Foundation: A generous pour of real vanilla extract and a pinch of fine salt are not afterthoughts; they deepen the buttery flavor and balance the sweetness perfectly.
Making It Happen: A Step-by-Step Narrative
Before you begin, take a moment to ensure your butter and eggs are at true room temperature; this is non-negotiable for a creamy, well-emulsified batter. Preheat your oven to 170°C (338°F) with the fan setting. Now, take your cake pan and give it a light coating with a bit of butter from the wrapper, then dust it with a tablespoon of flour, tapping out the excess. This old-school method guarantees a clean release every time.
In a separate bowl, whisk together your plain flour, baking powder, and salt. This aerates the dry ingredients and ensures the leavening is evenly distributed. Now, to your mixer bowl. Add the softened butter and beat it on high speed with the paddle attachment until it’s pale, creamy, and smooth. This is where you build the foundation. Gradually add the Stevia sweetener and continue to beat for a good 4-5 minutes until the mixture becomes noticeably paler and fluffy. This step incorporates air, which is crucial for the cake’s lift.
Next, add the eggs one at a time, letting each one fully incorporate into the buttery mixture on a medium-low speed before adding the next. Don’t rush this. Scrape down the sides of the bowl with a spatula to ensure everything is homogenous, then beat in the vanilla extract.
Now for the final mix. With the mixer on its lowest speed, you’ll add the dry ingredients and the milk in alternating batches. Start and end with the dry ingredients (Dry-Milk-Dry-Milk-Dry). Mix only until the flour streaks disappear after each addition. The moment you see no more dry pockets, stop the mixer. Overmixing is the enemy of a tender texture.
Pour the thick, velvety batter into your prepared pan. Smooth the top with your spatula, then give the pan a few firm taps on the counter to settle it. Take a chopstick and gently swirl it through the batter to release any trapped air bubbles. Slide the pan into the center of your preheated oven and let it work its magic.
You Must Know: Tips for a Perfect Cake
-
Room Temperature is Key: Cold butter won’t cream properly, and cold eggs can cause the batter to curdle. Plan ahead!
-
Don’t Overmix: Once the flour is added, mix on low speed and stop as soon as the ingredients are combined. A few tiny lumps are better than a tough cake.
-
The Creaming Step is Crucial: Don’t skimp on the 4-5 minutes of creaming the butter and Stevia. This incorporates air and gives the cake its structure.
-
Test for Doneness Correctly: The toothpick test is your best friend. It should come out with a few moist crumbs, not wet batter. The top should also spring back when lightly touched.
Serving Your Masterpiece
This butter cake is sublime all on its own, still slightly warm from the oven. For a simple dessert, a handful of fresh berries and a dollop of lightly sweetened whipped cream are perfection. It pairs wonderfully with a cup of black coffee, which complements its richness, or a glass of cold milk for the ultimate classic combination.
Make It Different: Customization Ideas
-
Lemon Zest: Add the zest of one lemon to the batter for a bright, citrusy twist.
-
Warm Spices: A teaspoon of ground cinnamon or nutmeg would add a lovely warmth.
-
Almond Extract: Swap half the vanilla extract for almond extract for a different aromatic flavor profile.
-
Gluten-Free: Use a 1:1 gluten-free flour blend in place of the plain flour.
Storing and Reheating Your Cake
To keep your cake moist, store it in an airtight container at room temperature for up to 3 days. For longer storage, you can freeze the whole cake or individual slices wrapped tightly in plastic wrap and then in foil for up to 3 months. Thaw at room temperature. If you desire a warm slice, a quick 10-second burst in the microwave will bring back that fresh-from-the-oven feel.
Frequently Asked Questions (FAQ)
1. Can I use a different sugar-free sweetener?
Yes, most granulated sugar substitutes like erythritol or monk fruit blends will work in a 1:1 ratio with the Stevia. The texture and browning may vary slightly.
2. My cake is dense. What went wrong?
This is usually due to overmixing the batter after the flour was added, or the butter and eggs were too cold, causing the batter not to emulsify properly.
3. Can I make this cake by hand without a mixer?
Absolutely! Use a sturdy wooden spoon and a strong arm to cream the butter and Stevia until light and fluffy. It will take a bit longer, but it’s completely doable.
4. Why did the top of my cake crack?
A slight crack in the center is often a sign of a well-risen butter cake and is nothing to worry about! It can happen if the oven is a bit too hot.
5. Can I add frosting?
Of course! A simple sugar-free cream cheese frosting or a dusting of powdered erythritol would be delightful.
Butter Cake, Moist Old Fashioned Recipe (Sugar-Free)
Prep time: 20 minutes
Cook time: 30 minutes
Total time: 50 minutes
Category: Dessert
Difficulty: Easy
Cuisine: American
Yield: One 9-inch square cake
Ingredients
-
200 g plain flour (all-purpose flour)
-
1.5 tsp baking powder
-
1 tsp fine salt
-
170 g unsalted butter, softened
-
150 g Stevia sweetener (or granulated sugar of choice, up to 225g for a sweeter cake)
-
2 medium eggs, room temperature
-
1.5 tsp vanilla extract
-
170 ml fresh milk (lactose-free works perfectly)
Instructions
-
Preheat oven to 170°C / 338°F (fan setting). Grease a 9-inch square cake pan with butter and dust with flour, tapping out the excess.
-
In a medium bowl, whisk together the flour, baking powder, and salt. Set aside.
-
In a mixer fitted with the paddle attachment, cream the softened butter on high speed until smooth and pale.
-
Gradually add the Stevia sweetener and continue beating on high for 4-5 minutes, until the mixture is light and fluffy.
-
Reduce speed to medium-low and add the eggs one at a time, fully incorporating each before adding the next. Scrape down the bowl. Mix in the vanilla extract.
-
With the mixer on low speed, add the dry ingredients in three parts, alternating with the milk in two parts, beginning and ending with the dry ingredients. Mix only until just combined. Do not overmix.
-
Pour the batter into the prepared pan, smooth the top, and tap the pan firmly on the counter to release air bubbles.
-
Bake for 25-30 minutes (or 35-45 minutes for a non-fan oven), until a toothpick inserted into the center comes out clean and the top springs back when lightly touched.
-
Let the cake cool in the pan on a wire rack for at least 15 minutes before transferring it out of the pan to cool completely.
Allergy Info: Contains dairy, eggs, gluten.
Nutrition: (Per slice, estimated) Calories: ~210, Fat: 14g, Carbohydrates: 18g (Sugar Alcohols), Protein: 3g.
