Cheesy Pepperoni Pizza Roll-Ups
Easy Cheesy Pepperoni Pizza Roll-Ups: Your New Favorite Snack
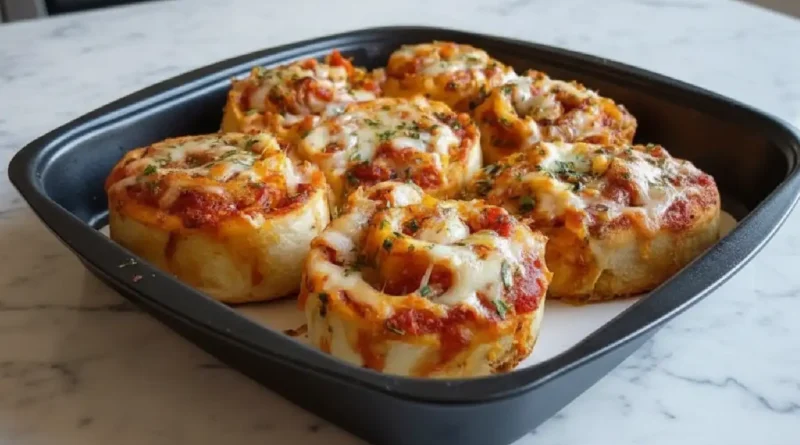
There is something incredibly nostalgic about the smell of bubbling cheese and toasted crust wafting through the kitchen. While we all have memories of the frozen snacks from our childhood, nothing compares to a tray of fresh, homemade Pepperoni Pizza Rolls pulled straight from the oven. These rolls are a sensory delight: the outer crust is brushed with a savory garlic butter that crisps up to a perfect golden brown, while the inside remains soft and pillowy, hugging a molten center of gooey mozzarella and zesty pepperoni. Whether it is a frantic Tuesday night or a slow Sunday afternoon, these little rolls have a way of making the house feel cozy and the kitchen feel like the heart of the home.
Why You’ll Love This
-
They offer the perfect balance of a crispy, buttery exterior and a tender, cheesy interior.
-
This recipe is incredibly adaptable, making it a reliable go-to for clearing out the deli drawer.
-
They are a massive time-saver for busy families, taking less than thirty minutes from dough-rolling to the first bite.
-
The individual portions make them the ultimate mess-free appetizer for game days or movie nights.
I remember serving these during a casual get-together where one of my friends, a self-proclaimed “pizza purist” who usually turns his nose up at anything that isn’t a traditional thin-crust pie, was in attendance. I watched him skeptically eye the tray as I set it down. He took one hesitant bite of a roll dipped in warm marinara, and the room went silent. After a second, he reached for two more, admitting that the combination of the salty deli ham and that specific garlic-butter finish actually beat out his favorite local slice. It is now the only thing he asks me to make when he visits.
What Makes It Special
-
Refrigerated Pizza Dough: This provides a consistent, reliable base that crisps up beautifully without the wait time of proofing your own yeast.
-
Deli Ham and Pepperoni Duo: Using both meats adds layers of savory flavor and varying textures that elevate these above a standard pepperoni-only snack.
-
Shredded Mozzarella: High-quality mozzarella ensures that signature cheese pull and a mild, creamy finish that balances the spice of the pepperoni.
-
Signature Garlic Butter: A blend of melted unsalted butter, Italian seasoning, and garlic powder creates an aromatic crust that tastes like it came from a professional bakery.
Making It Happen
The journey to the perfect pizza roll starts with a bit of patience and a lightly floured surface. Begin by preheating your oven to 400°F and prepping a sheet pan with parchment paper to ensure nothing sticks. Gently roll out your dough into a generous rectangle. You want it about a quarter-inch thick; if you go too thin, the steam from the melting cheese might cause the rolls to burst. Once the dough is ready, spread a thin, even layer of your favorite marinara sauce, leaving just enough room at the edges to create a clean seal.
Layering is key. Scatter your pepperoni, chopped deli ham, and shredded mozzarella across the sauce. The goal is a uniform layer that isn’t overstuffed, which keeps the rolls light and airy. Starting from the long side, roll the dough up into a tight, snug log. This tension is what keeps the spirals looking beautiful once they are sliced. Use a serrated knife to gently saw through the log, creating twelve equal rounds. Place them on your pan with plenty of breathing room between them. Before they hit the heat, give them a generous brush of the seasoned garlic butter. After about fifteen minutes in the oven, they will emerge puffed and radiant. A final coat of garlic butter while they are still steaming hot is the secret to that irresistible, professional finish.
You Must Know
-
Avoid overstuffing the dough with too much sauce or cheese; excess moisture can lead to a “blowout” where the filling leaks out onto the pan.
-
Use a serrated knife (like a bread knife) to cut the rolls to prevent squishing the dough and losing those distinct internal spirals.
-
Always leave about half an inch of dough bare at the edges to allow the seam to pinch shut properly, keeping the filling trapped inside.
Serving Ideas
These Pepperoni Pizza Rolls are stars on their own, but they truly shine when paired with a bowl of warm, chunky marinara or a cool, zesty ranch dressing for dipping. For a complete meal, serve them alongside a crisp Caesar salad or a tray of roasted Italian vegetables. If you are looking for a drink pairing, a cold craft lager or a sparkling herb-infused lemonade provides a refreshing contrast to the rich, buttery garlic crust.
Make It Different
-
The Veggie Twist: Swap the meats for finely chopped bell peppers, spinach, and black olives for a vegetarian-friendly version.
-
Spicy Kick: Add a pinch of red pepper flakes to the garlic butter or use “hot” pepperoni to give the rolls some heat.
-
Three-Cheese Blend: Replace half of the mozzarella with provolone and a dusting of parmesan for a deeper, sharper cheese profile.
-
Gluten-Free: Use a gluten-free pizza dough mix; just be sure to handle the dough gently, as it can be more fragile during the rolling process.
Storage and Reheating Recipe Tips
To keep these rolls tasting fresh, store any leftovers in an airtight container in the refrigerator for up to three days. When you are ready for round two, skip the microwave—it tends to make the dough rubbery. Instead, pop them into a 350°F oven for a few minutes until the cheese is melted and the crust regains its crunch. If you are planning ahead, you can freeze unbaked rolls for up to three months; just bake them straight from the freezer and add a few extra minutes to the timer.
Success Tips
For the best results, always use a high-quality parchment paper or a silicone baking mat. This doesn’t just prevent sticking; it helps the bottoms of the rolls caramelize evenly without burning. Also, if your dough feels too springy and keeps shrinking back while you roll it, let it sit at room temperature for ten minutes to relax the gluten. A relaxed dough is much easier to shape into a perfect 12×10 rectangle.
Frequently Asked Questions
Can I use homemade pizza dough instead of store-bought?
Absolutely. Homemade dough works wonderfully; just ensure it is rolled out to the same thickness (about 1/4 inch) to ensure the bake time remains consistent.
How do I prevent the rolls from unrolling in the oven?
The secret is in the “pinch.” Once you have rolled the log, spend an extra second pinching the long seam firmly into the dough. Placing the rolls cut-side up on the pan also helps them expand upward rather than outward.
Can I make these ahead of time for a party?
Yes! You can assemble and slice the rolls a day in advance. Keep them covered in the fridge, then brush with garlic butter and bake right before your guests arrive.
Why did my pizza rolls turn out soggy?
This usually happens if too much sauce is used or if they are reheated in a microwave. Stick to a thin layer of sauce and always use the oven or an air fryer for reheating.
What is the best way to freeze them after they are baked?
Let them cool completely first. Freeze them in a single layer on a tray before transferring them to a freezer bag. This prevents them from sticking together.
Prep time: 15 minutes
Cook time: 15 minutes
Total time: 30 minutes
Servings: 12 rolls
Category: Appetizer / Snack
Difficulty: Easy
Cuisine: American / Italian-Fusion
Yield: 12 pieces
Equipment: Large sheet pan, parchment paper, rolling pin, serrated knife, pastry brush
Ingredients
-
14 ounces refrigerated pizza dough
-
¾ cup marinara sauce or pizza sauce
-
12 slices pepperoni
-
6 slices deli ham, roughly cut into squares
-
¾ cup shredded mozzarella cheese
-
Dipping sauce of your choice (Marinara or Ranch)
-
4 tablespoons unsalted butter, melted
-
½ teaspoon Italian seasoning
-
½ teaspoon garlic powder
-
Salt and pepper to taste
Instructions
-
Preheat oven to 400 degrees F. Line a large sheet pan with parchment paper.
-
Roll out dough into a rectangle approximately 12×10 inches, or about ¼ inch thick. Do not roll too thin.
-
Spoon the marinara sauce over the dough, leaving about ½ inch around the edges. Evenly top with pepperoni, ham, and mozzarella cheese.
-
Roll it up tightly starting from the longer side. Pinch the dough to seal the seams.
-
Cut into 12 equal pieces using a serrated knife. Arrange the rolls on the pan, 3 to 4 inches apart.
-
Mix melted butter, Italian seasoning, garlic powder, salt, and pepper.
-
Brush the tops and edges with some of the garlic butter.
-
Bake for 15 minutes until puffed and golden brown.
-
Brush with the remaining garlic butter immediately after removing from the oven. Serve warm.
Nutrition (Per Roll)
-
Calories: 185 kcal
-
Carbohydrates: 18g
-
Protein: 7g
-
Fat: 9g
-
Saturated Fat: 5g
-
Sodium: 420mg
