Cherry Bars Recipe for a Crowd
Ultimate Cherry Bars Recipe for a Crowd – Easy, Delicious & Perfect for Any Event
Introduction
If you’re planning an event or simply want to impress your guests with a classic dessert that everyone will love, cherry bars for a crowd are a fantastic choice. These sweet and tangy treats combine a buttery crust, gooey cherry filling, and a crumbly streusel topping — making them irresistible to people of all ages.
Whether you’re preparing for a school bake sale, church potluck, or backyard barbecue, this guide will walk you through everything you need to know about making large batch cherry bars that taste homemade but can be scaled up easily.
Why You’ll Love This Cherry Bar Recipe
Before we dive into the recipe, let’s explore why cherry bars are a go-to dessert for big groups:
- ✅ Easy to Make : No fancy techniques or equipment needed.
- ✅ Perfect for Crowds : Easily double or triple the recipe to feed more people.
- ✅ Make Ahead Friendly : Can be baked and stored for several days.
- ✅ Budget-Friendly : Uses affordable ingredients like canned cherries or frozen fruit.
- ✅ Versatile : Customize the crust, add nuts or chocolate drizzle for extra flair.
Ingredients for Cherry Bars (Serves 24)
Here’s what you’ll need to make a large batch of cherry bars in a half-sheet pan (18×13-inch) or two 9×13-inch pans:
For the Crust and Topping:
- 6 cups all-purpose flour
- 2 tsp baking powder
- 1 tsp salt
- 2 ½ cups (5 sticks) unsalted butter, softened
- 2 ½ cups powdered sugar
- 1 tbsp vanilla extract
For the Cherry Filling:
- 6 (21 oz) cans cherry pie filling (or 6 lbs fresh/frozen pitted cherries + thickener)
- 1 tbsp almond extract (optional, for enhanced flavor)
Step-by-Step Instructions
Step 1: Preheat and Prepare the Pan
Preheat your oven to 350°F (175°C). Grease a half-sheet pan (18×13-inch) or two 9×13-inch baking pans thoroughly. Line with parchment paper for easier removal.
Step 2: Mix the Crust Dough
In a large bowl, combine flour, baking powder, and salt. Add softened butter and mix until crumbly. Stir in powdered sugar and vanilla extract until a soft dough forms.
Reserve 2/3 of the mixture for the topping. Press the remaining 1/3 evenly into the bottom of the prepared pan(s).
Step 3: Bake the Base
Bake the crust for 15–20 minutes or until lightly golden around the edges. Remove from oven and immediately spread the cherry filling over the hot crust.
Step 4: Add the Cherry Filling
Evenly spread the cherry pie filling (mixed with almond extract if using) over the warm crust. If using fresh or frozen cherries, cook them down with sugar and cornstarch to make a thick filling before spreading.
Step 5: Add the Streusel Topping
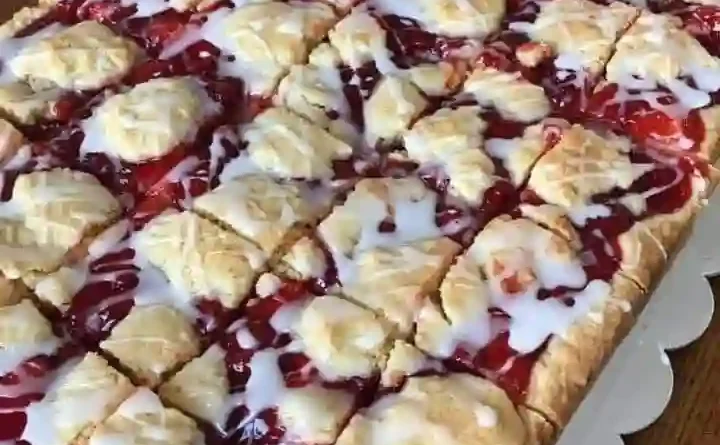
Crumble the reserved dough over the top of the cherry layer. Don’t worry about being too neat — the uneven texture adds to the charm!
Step 6: Bake Again
Return the pan to the oven and bake for another 25–30 minutes, or until the top is golden brown and crisp.
Step 7: Cool and Cut
Let the bars cool completely in the pan on a wire rack (at least 2 hours). Once cooled, lift out using the parchment paper and cut into squares.
Tips for Making Perfect Cherry Bars for Large Groups
- Use Canned Cherry Pie Filling for Convenience : Saves time and ensures consistent results.
- Double or Triple the Batch with Ease : Simply multiply each ingredient accordingly.
- Add Texture with Nuts : Chopped pecans or walnuts in the topping add a delightful crunch.
- Drizzle with Chocolate or Glaze : Elevate the presentation by adding a simple chocolate glaze or icing drizzle.
- Store Properly : Keep in an airtight container at room temperature for up to 5 days, or freeze for longer storage.
Customizations and Variations
Want to switch things up? Try these fun variations:
- White Chocolate Cherry Bars : Add white chocolate chips to the topping or drizzle melted white chocolate over the cooled bars.
- Almond Cherry Bars : Increase almond extract to 2 tablespoons and sprinkle sliced almonds on top.
- Gluten-Free Option : Use gluten-free flour blend in place of regular flour.
- Lower Sugar Version : Substitute reduced-sugar cherry pie filling and use less powdered sugar in the crust.
Frequently Asked Questions (FAQs)
Can I make cherry bars ahead of time?
Yes! These bars taste even better the next day. Store them in an airtight container at room temperature for up to 5 days.
Can I freeze cherry bars?
Absolutely. Wrap individual bars in plastic wrap and store in a freezer-safe bag for up to 3 months. Thaw at room temperature or microwave briefly.
What kind of cherries should I use?
You can use canned cherry pie filling, frozen cherries (thawed and drained), or fresh pitted cherries. Adjust sweetness and thickener accordingly.
Can I make this in a different size pan?
Yes, but adjust baking time accordingly. A 9×13-inch pan works best for standard batches.
Conclusion: Serve Cherry Bars with Confidence
Now that you have the ultimate cherry bars for a crowd recipe, you’re ready to impress any group with a delicious, homemade dessert. Whether it’s a birthday party, church gathering, or holiday celebration, these cherry bars are sure to be a hit.
So grab your mixing bowls, preheat the oven, and get ready to enjoy the sweet aroma of success — and cherries — wafting through your kitchen.
