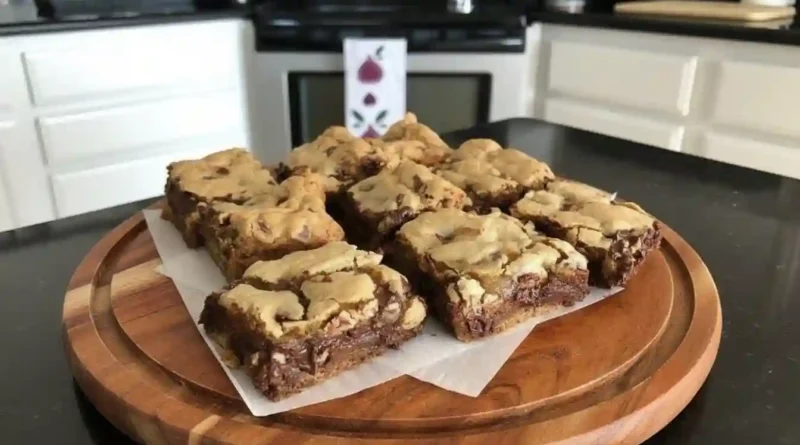
Chocolate Chip Cookie Bars
The Best Chocolate Chip Cookie Bars Recipe: Chewy, Buttery, and Easy
There is a specific kind of magic that happens when the scent of browning butter and warm vanilla starts to drift through the hallways. It’s a signal that the day is about to get a whole lot better. While I love a classic round cookie, there is something deeply comforting about a Chocolate Chip Cookie Bar. They are thicker, softer, and arguably more indulgent than their individual counterparts.
I remember the first time I pulled these out of the oven. The edges were just beginning to turn a beautiful golden brown, while the center remained tender and heavy with melted chocolate. It’s the kind of treat that demands you stand in the kitchen for a moment, enjoying the warmth of the pan, before you even think about grabbing a glass of milk.
Why You’ll Love This
-
Effortless Prep: No rolling individual balls of dough or chilling for hours; you just press the dough into the pan and let the oven do the work.
-
The Perfect Texture: These bars achieve that elusive balance of a slightly crisp top and a dense, chewy interior.
-
Crowd-Pleasing Consistency: Unlike cookies that can spread too thin, these bars stay thick and satisfying every single time.
The Skeptic at the Table
I once brought a batch of these to a neighborhood block party. My neighbor, Sarah, is notoriously picky about sweets—she usually claims things are “too sugary” and politely declines. I saw her eyeing the tray and offered her a small square. She took one bite, paused, and then immediately asked for the recipe. She couldn’t believe how the sea salt balanced the richness of the chocolate. By the end of the night, she had eaten three. If these can win over a “non-dessert person,” they can win over anyone.
What Makes It Special
-
Pantry Staples: This recipe uses simple ingredients like flour, butter, and sugar that you likely already have on hand.
-
The Sugar Balance: By using an equal mix of granulated and light brown sugar, we get a deep caramel-like flavor without it being cloyingly sweet.
-
Pure Vanilla Extract: It’s the backbone of the flavor profile, providing that nostalgic bakery aroma.
-
Semi-Sweet Chocolate: Using high-quality chips ensures you get those gooey pockets of melted chocolate in every bite.
Making It Happen
Success starts with a hot oven. Set yours to 350°F and prepare your baking pan. I find that lining a 9×9-inch pan with parchment paper makes life so much easier later on when you’re trying to lift the bars out.
In a small bowl, whisk together your dry ingredients—the flour, baking soda, baking powder, and salt. Setting this aside ensures that when you finally combine everything, the leavening agents are evenly distributed.
In your mixer, you’ll want to cream the softened butter with both sugars. You’re looking for a mixture that is pale and fluffy. Once you reach that stage, beat in the egg and the vanilla until the batter looks smooth. Gradually add your dry ingredients. The key here is to mix just until the flour disappears; over-mixing can lead to tough bars, and we want them tender.
Finally, fold in your chocolate chips. Once the dough is ready, press it firmly into the bottom of your prepared pan. If you’re feeling extra indulgent, sprinkle a few more chips on top. Slide it into the oven for 18 to 25 minutes. You’re looking for the edges to be set and the top to be just barely browned.
The hardest part is the wait. Let them cool in the pan for at least 30 minutes. This allows the structure to set so you get clean, beautiful squares when you slice them.
You Must Know
-
Parchment is Key: Leave a little overhang on the sides of the pan to create “handles” for easy removal.
-
Don’t Overbake: The bars will continue to cook slightly from the residual heat of the pan after you take them out.
-
Room Temperature Ingredients: Make sure your egg and butter are at room temperature to ensure a smooth, emulsified dough.
Serving Ideas
These are spectacular on their own, but they play well with others too. Serve a warm bar with a large scoop of vanilla bean ice cream for a decadent sundae.
For drink pairings, you can’t go wrong with a cold glass of whole milk. If it’s later in the evening, a bold cup of black coffee or a smooth espresso cuts through the richness of the chocolate perfectly.
Make It Different
-
For a Molasses Kick: Swap the light brown sugar for dark brown sugar to get a deeper, more robust flavor.
-
Go Nutty: Fold in a half-cup of toasted walnuts or pecans for added crunch.
-
Gluten-Free: Use a high-quality 1:1 gluten-free baking flour.
-
Browned Butter: For a gourmet twist, brown your butter in a saucepan first, let it solidify slightly, and then cream it with the sugar.
Storage and Reheating
These bars keep remarkably well. Store them in an airtight container at room temperature for up to 3 days, or in the refrigerator for up to a week.
If you want to enjoy that “just-out-of-the-oven” experience, pop a bar in the microwave for about 10-15 seconds. It will soften the dough and melt the chocolate chips instantly. You can also freeze these for up to 2 months; just wrap them individually in plastic wrap and place them in a freezer bag.
Success Tips
The secret to the best Chocolate Chip Cookie Bars is the salt. If you are using table salt instead of sea salt, remember to cut the measurement in half. Table salt is much finer and more concentrated. Also, if you want a thicker, more “blonde” style bar, use an 8×8-inch pan instead of the 9×9-inch, though you may need to add a few minutes to the bake time.
FAQ
Can I use a chocolate bar instead of chips?
Absolutely. Chopping up a high-quality chocolate bar creates puddles of chocolate rather than distinct chips, which is a delicious variation.
Why are my cookie bars dry?
This usually happens from over-measuring the flour or over-baking. Try using the “spoon and level” method for your flour to ensure accuracy.
How do I double the recipe?
Simply double all ingredients and use a 9×13-inch baking dish. Increase the bake time to approximately 25-28 minutes.
Can I make these without a mixer?
Yes. As long as your butter is very soft, you can cream it with the sugar using a sturdy wooden spoon or a handheld whisk and some elbow grease.
How do I get clean cuts?
Wait until the bars are completely cool. A slightly warm bar will crumble or smear the chocolate. For the cleanest lines, wipe your knife with a damp cloth between cuts.
Chocolate Chip Cookie Bars
Prep time: 15 minutes
Cook time: 20 minutes
Total time: 35 minutes
Servings: 16 bars
Category: Dessert
Difficulty: Easy
Cuisine: American
Yield: 1 pan
Equipment
-
9×9 inch square baking pan
-
Parchment paper
-
Standing mixer or hand mixer
-
Wire cooling rack
Ingredients
-
1/2 cup butter, softened
-
1/2 cup granulated sugar
-
1/2 cup light brown sugar, packed
-
1 egg, large
-
1 teaspoon pure vanilla extract
-
1 1/2 cups all-purpose flour
-
1/2 teaspoon baking soda
-
1/4 teaspoon baking powder
-
1/2 teaspoon sea salt
-
1 cup chocolate chips (plus extra for topping)
Instructions
-
Preheat your oven to 350°F. Line a 9×9-inch square baking pan with parchment paper and lightly grease any exposed sides.
-
In a small bowl, whisk together the flour, baking soda, baking powder, and sea salt.
-
In the bowl of a standing mixer, cream the softened butter, light brown sugar, and granulated sugar together until the mixture is light and fluffy.
-
Add the egg and vanilla extract to the butter mixture. Beat until fully incorporated.
-
Turn the mixer to low and add the dry ingredients. Mix until just combined.
-
Fold in the chocolate chips by hand or on a very low mixer setting until evenly distributed.
-
Transfer the dough to the prepared pan and press it into an even layer. Sprinkle extra chocolate chips on top if you like.
-
Bake for 18-25 minutes. The edges should be golden and the top should be set but not hard.
-
Transfer the pan to a wire rack and let the bars cool for at least 30 minutes.
-
Lift the bars out using the parchment paper, slice into squares, and enjoy.
Would you like me to create a printable PDF version of this recipe card for your readers?
