Chocolate Intense Cheesecake
Ultimate Chocolate Intense Cheesecake Recipe – Rich, Decadent & Irresistible
Introduction: The Ultimate Dessert Dream – Chocolate Meets Cheesecake
There’s something undeniably magical about the combination of chocolate and cheesecake. When done right, a Chocolate Intense Cheesecake becomes more than just a dessert—it’s an experience. With its velvety texture, deep cocoa flavor, and luxurious finish, this dessert is perfect for birthdays, holidays, or simply treating yourself to a slice of heaven.
If you’re looking for a show-stopping dessert that combines the best of both worlds—creamy cheesecake and rich chocolate—then this is the ultimate recipe for you.
In this article, we’ll walk you through a step-by-step guide to creating the most indulgent Chocolate Intense Cheesecake , including tips for baking perfection, ingredient substitutions, and how to store your masterpiece.
Why This Chocolate Intense Cheesecake Stands Out
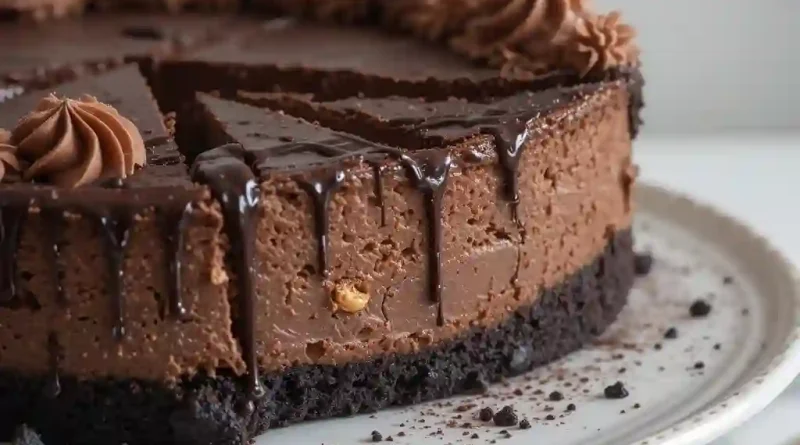
While traditional cheesecakes are beloved for their tangy richness, adding intense chocolate elevates the dessert into a new realm of decadence. Here’s what makes this version special:
- Deep Chocolate Flavor : Using a mix of cocoa powder and melted dark chocolate ensures a bold, complex chocolate taste.
- Silky Texture : A carefully balanced batter results in a smooth, creamy mouthfeel.
- Perfect Crust : A chocolate cookie crust adds crunch and complements the soft filling.
- Make-Ahead Friendly : It tastes even better the next day after chilling overnight.
Whether you’re a seasoned baker or a beginner, this recipe is designed to be foolproof and delicious.
Ingredients for Chocolate Intense Cheesecake
For the Crust:
- 1 ½ cups (150g) chocolate cookie crumbs (like Oreo or graham crackers)
- ¼ cup (30g) unsweetened cocoa powder
- 6 tablespoons (85g) unsalted butter, melted
- 2 tablespoons granulated sugar
For the Filling:
- 4 (8 oz / 226g each) packages cream cheese, softened
- ¾ cup (90g) all-purpose flour
- 1 ½ cups (180g) granulated sugar
- 1 teaspoon vanilla extract
- 4 large eggs
- 2/3 cup (60g) unsweetened cocoa powder
- ½ cup (120ml) heavy cream
- 1/3 cup (80ml) sour cream
- 4 oz (115g) high-quality dark chocolate, melted and slightly cooled
Step-by-Step Instructions
Step 1: Prepare the Crust
- Preheat your oven to 325°F (160°C).
- In a medium bowl, combine cookie crumbs, cocoa powder, sugar, and melted butter until moistened.
- Press the mixture firmly into the bottom of a 9-inch springform pan.
- Bake for 10 minutes. Let cool while preparing the filling.
Step 2: Make the Chocolate Cheesecake Filling
- In a large mixing bowl, beat the cream cheese until smooth and creamy.
- Add sugar and flour, and mix until well combined.
- Mix in vanilla extract.
- Add eggs one at a time, mixing on low speed after each addition until just incorporated.
- In a separate bowl, whisk together cocoa powder and heavy cream until smooth.
- Gradually blend the cocoa mixture into the cheesecake batter.
- Stir in sour cream and melted dark chocolate until fully incorporated.
Step 3: Bake the Cheesecake
- Pour the batter over the cooled crust.
- Place the springform pan inside a larger roasting pan and fill the roasting pan with hot water until it reaches halfway up the sides of the cheesecake pan (this creates a water bath to prevent cracking).
- Bake for 1 hour and 30 minutes, or until the edges are set but the center still jiggles slightly.
- Turn off the oven and let the cheesecake cool in the oven with the door slightly open for about 1 hour.
- Remove from oven and refrigerate for at least 6 hours, preferably overnight.
Tips for the Perfect Chocolate Intense Cheesecake
- Use Room Temperature Ingredients : Cold cream cheese can lead to lumps. Let it sit out for at least 30 minutes before mixing.
- Don’t Overmix the Batter : Once you add the eggs, mix on low speed to avoid incorporating too much air, which can cause cracks.
- Chill Overnight : This allows the flavors to meld and the texture to firm up perfectly.
- Avoid Sudden Temperature Changes : Cooling the cheesecake gradually helps prevent surface cracks.
- Top with Ganache or Shavings : For extra indulgence, drizzle with chocolate ganache or sprinkle with dark chocolate shavings before serving.
Serving Suggestions
This Chocolate Intense Cheesecake pairs beautifully with:
- Whipped cream or vanilla ice cream
- Fresh berries like raspberries or strawberries
- A glass of red wine or dessert wine
- Dusting of powdered sugar or cocoa powder for presentation
How to Store Chocolate Intense Cheesecake
- Refrigerator : Wrap tightly with plastic wrap or store in an airtight container. Keeps well for up to 5 days.
- Freezer : Freeze individual slices wrapped in plastic and foil for up to 2 months. Thaw in the refrigerator overnight before serving.
Frequently Asked Questions (FAQs)
Q: Can I use a different type of crust?
A: Yes! While a chocolate cookie crust enhances the chocolate flavor, you can also use a classic graham cracker crust or even a nut-based crust.
Q: Why did my cheesecake crack?
A: Cracks usually occur due to overbaking or rapid cooling. Using a water bath and allowing the cake to cool slowly in the oven helps prevent this.
Q: Can I make mini cheesecakes?
A: Absolutely! Pour the batter into lined muffin tins and reduce the baking time to 25–30 minutes.
Q: Can I substitute the dark chocolate with milk chocolate?
A: Yes, but keep in mind that milk chocolate will result in a sweeter, less intense chocolate flavor.
Conclusion: Elevate Your Dessert Game with Chocolate Intense Cheesecake
A Chocolate Intense Cheesecake is the perfect fusion of two beloved desserts. Whether you’re hosting a dinner party or simply craving something ultra-rich and satisfying, this recipe delivers every time.
With its silky-smooth texture, deep chocolate flavor, and irresistible crust, it’s no wonder this cheesecake is a crowd favorite. Plus, it’s surprisingly easy to make once you have the right steps and ingredients.
So go ahead—treat yourself or impress your guests with this stunning dessert. Your taste buds (and your guests!) will thank you.
