Easy Marble Drip Icing
The Ultimate Marble Drip Icing: Your Guide to a Show-Stopping Cake
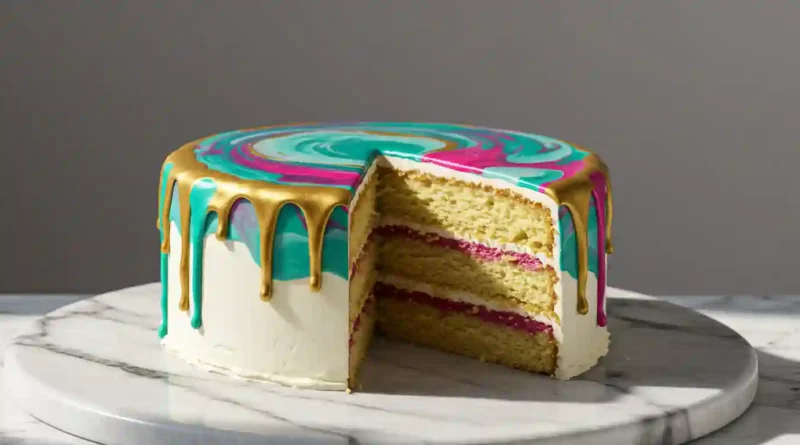
There’s a moment of pure magic in cake decorating, a fleeting second where artistry and chaos collide to create something breathtaking. For me, that moment is the pour. I discovered this recipe after a near-disaster for my niece’s birthday—a fondant-covered cake that was pristine but, frankly, a little boring. In a last-minute act of bravery (or panic), I whipped up this simple glaze, swirled in some color, and let it cascade over the sides. The result wasn’t just saved; it was spectacular. The way the colors marbleized and the glossy drips solidified into a beautiful, sugary stained-glass window captivated everyone. It’s a technique that looks incredibly professional but secretly couldn’t be easier.
Why You’ll Love This Marble Drip Icing
-
It’s Deceptively Simple: With just a handful of pantry staples, you can create a high-impact, professional-looking finish.
-
Unleashes Your Inner Artist: No two pours are ever the same. It’s a fun, creative process that encourages playful experimentation.
-
The Perfect Texture: This icing sets with a firm, smooth, crackly shell that cuts beautifully and protects the fondant underneath.
-
Total Crowd-Pleaser: It transforms any simple cake into the dazzling centerpiece of any celebration.
I’ll never forget serving this cake at a family gathering. My uncle, a man whose dessert reviews typically begin and end with “it’s fine,” actually stopped mid-bite. He peered at the slice on his plate, studying the intricate web of color. “How on earth did you get the icing to do that?” he asked, genuinely impressed. That’s the power of this marble drip—it charms even the toughest critics.
What Makes It Special
-
Confectioners’ Sugar: The base of our glaze, it creates an ultra-smooth, opaque canvas that dries to a perfect, crackable finish.
-
Light Corn Syrup: This is the secret weapon! It adds incredible shine and a slight flexibility to the set icing, preventing it from shattering.
-
Gel Food Coloring: Using highly-pigmented gel colors (instead of liquid) allows for vibrant hues without thinning out the glaze’s crucial consistency.
-
Edible Disco Dust: The optional final flourish that catches the light and adds a whisper of whimsy and sparkle to every slice.
Making It Happen
First, ensure your fondant-covered cake is at room temperature; a cold cake can cause the glaze to set too quickly and not drip properly. Prepare your workstation by lining a baking sheet with aluminum foil and placing a wire cooling rack on top. This will catch all the excess glaze for a clean finish.
Now, for the alchemy. In a medium bowl, whisk together the confectioners’ sugar, warm water, corn syrup, and vanilla extract. Keep whisking until every last lump is gone and you have a perfectly smooth, thick, but pourable glaze. This is where you need to work with a bit of speed and confidence. Add your first color of gel food coloring in a few random drops. Without mixing it in, add drops of your second color, and then a third if you’re using one. Do not stir. You want those distinct pools of color to remain separate.
Carefully place your cake on the wire rack. Starting in the center, pour the entire bowl of glaze over the top of the cake. The force of the pour will naturally push the glaze over the edges, creating those beautiful, elegant drips. The colors will swirl and marbleize on their own as they flow—this is the magic happening. If you’re using it, immediately sprinkle the edible disco dust over the wet glaze. Now, the hardest part: walk away. Let the cake sit undisturbed, right on the rack, for several hours or ideally overnight to set completely.
You Must Know
-
Consistency is Key: The glaze should be thick but pourable, like a heavy cream. If it’s too thin, add a bit more sugar; if too thick, a tiny drop of warm water.
-
Embrace the Chaos: Don’t overthink the color placement. Random drops create the best marbled effect.
-
Room Temp Matters: A cold cake will shock the glaze, inhibiting flow and leading to shorter drips.
Serving Ideas
This icing is the star, so let it shine. Serve your masterpiece on a simple cake stand. Pair a slice with a cup of hot coffee to cut through the sweetness, a glass of cold milk for classic comfort, or a sparkling prosecco to turn dessert into a true celebration.
Make It Different
-
Flavor Twist: Swap the vanilla extract for almond, citrus, or even a tiny drop of mint extract.
-
Dairy-Free/Vegetarian: The recipe is naturally dairy-free. Ensure your fondant and underlying cake recipe align with dietary needs.
-
Color Theme: Match the colors to any holiday or party theme. Pastels for Easter, deep red and green for Christmas, or bold neons for a birthday.
Storing Your Masterpiece
Because this icing sets into a hard shell, storing is simple. Storage: Keep the cake in a cake box or under a cake dome at room temperature for up to 3 days. Do not refrigerate, as condensation will ruin the glossy finish. Freezing: It is not recommended to freeze the cake after the glaze has been applied.
Success Tips
For longer, dramatic drips, pour the glaze when it is slightly warmer. For shorter, more controlled drips, let the glaze cool for a minute or two before pouring. Always do a test drip on the side of the cake bowl or on the back of a spoon to check the flow before committing to the whole cake.
Frequently Asked Questions (FAQ)
Q: Can I use this icing directly on buttercream instead of fondant?
A: You can, but proceed with caution. Your buttercream must be perfectly smooth and chilled until very firm to prevent the warm glaze from melting it and muddying the colors.
Q: Why did my glaze not drip?
A: This means your glaze was likely too thick. Next time, whisk in warm water, a teaspoon at a time, until it reaches the desired consistency. Always do a test drip first!
Q: My colors blended together and turned muddy. What happened?
A: This occurs if you overmix the colors in the bowl. Remember, just drop them in and give it one very gentle swirl if desired, but let the pour do most of the marbling work.
Q: How far in advance can I make this?
A: You can make the glaze and apply it 1-2 days in advance. It sets perfectly and will still be gorgeous on day three.
Q: Can I use liquid food coloring?
A: It’s not ideal. Liquid coloring can thin out the glaze and produce less vibrant colors. Gel or paste food coloring is highly recommended for the best results.
Marble Drip Icing
Prep Time: 20 minutes (plus cake cooling and setting time)
Cook Time: 0 minutes
Total Time: 8 hours (includes setting time)
Category: Dessert, Frosting
Difficulty: Intermediate
Cuisine: American
Yield: Enough for one 8-inch cake
Ingredients
-
1 prepared/baked, frosted & fondant covered cake
-
3 cups confectioners’ sugar
-
1 tbsp light corn syrup
-
1/4 cup warm water
-
1/2 tsp vanilla extract
-
6-10 drops gel food coloring for EACH color desired
-
1/2 tsp edible disco dust (optional)
Instructions
-
Ensure your fondant-covered cake is at room temperature. Line a baking sheet with foil and place a wire cooling rack on top.
-
In a medium bowl, whisk together confectioners’ sugar, corn syrup, warm water, and vanilla extract until completely smooth.
-
Drop gel food coloring in sporadic pools around the surface of the glaze. Do not mix.
-
Place the cake on the prepared wire rack. Pour the glaze steadily over the top of the cake, starting in the center and letting it flow over the edges naturally.
-
Immediately sprinkle with optional disco dust. Let the cake sit undisturbed for several hours or overnight until the icing is completely firm and dry.
Notes
Allergy Info: This recipe is dairy-free. Check all ingredient labels (especially fondant and food coloring) for specific allergen information.
Nutrition: Nutritional information is highly variable based on the cake used. This icing is a sugar-based glaze.
