Garlic and Herb Baked Chicken Breast Recipe
The Ultimate Garlic and Herb Baked Chicken Breast Recipe | Juicy & Flavorful
There’s a certain kind of magic that happens when chicken, garlic, and herbs meet the heat of an oven. It’s a smell that fills your kitchen with a warmth that feels like home. For years, I struggled with baked chicken breast, often ending up with dry, disappointing results. That all changed when I discovered a simple, almost foolproof secret: brining. This Garlic and Herb Baked Chicken Breast recipe is my weekly workhorse, the dish I serve to company with pride and whip up for a quiet Tuesday night with equal ease. It’s consistently juicy, incredibly flavorful, and feels just a little bit fancy without any of the fuss.
Why You’ll Love This Garlic and Herb Baked Chicken Breast
-
Unbelievably Juicy Every Time: The quick brine is the game-changer you didn’t know you needed. It guarantees a moist, tender result, banishing dry chicken for good.
-
Effortless Elegance: With just a few minutes of active prep, this dish bakes itself into a beautiful, golden-brown centerpiece that looks and tastes like it came from a bistro.
-
Your New Weekly Staple: The ingredients are simple pantry staples, making this a reliable go-to for any night of the week.
-
A Fragrant Masterpiece: The aroma of roasting garlic, rosemary, and thyme that fills your home is almost as rewarding as the first delicious bite.
The Picky Eater Test
I once served this to my nephew, a dedicated member of the “beige food” club, whose diet largely consisted of pasta and chicken nuggets. He eyed the herb-speckled chicken with deep suspicion. After some gentle coaxing, he took a bite. Then another. Soon, he’d polished off the entire piece. His verdict? “This is the best chicken I ever had.” It’s a story I hear often from readers—this is the recipe that wins over the skeptics.
What Makes It Special
The magic of this dish isn’t in one single step, but in the combination of a few key elements.
-
The Brining Process: Soaking the chicken in a saltwater solution helps it retain its natural juices during cooking, leading to a profoundly tender and seasoned-from-within bite.
-
Fresh Herb Infusion: Using fresh thyme and rosemary, rather than dried, makes a world of difference. Their essential oils bloom in the oven, creating a vibrant, aromatic crust.
-
The Flavor Foundation: A blend of melted butter, grated fresh garlic, and a touch of white wine creates a rich, savory base that soaks into the chicken and the pan juices.
Making It Happen
Let’s transform these simple ingredients into something spectacular. Start by brining your chicken breasts. In a large bowl, dissolve a quarter cup of coarse salt in a quart of warm water. Submerge the chicken and let it sit for at least 15 minutes at room temperature. This short soak is the secret to its incredible juiciness.
While the chicken brines, preheat your oven to 400°F (200°C). This high heat is perfect for creating a beautifully cooked exterior without drying out the inside. After brining, rinse the chicken under cold water and pat it thoroughly dry with paper towels. This step is crucial for getting that lovely, golden sear.
Lightly coat a baking dish with a tablespoon of olive oil and arrange the dried chicken breasts in a single layer. Drizzle them with the dry white wine—this adds a subtle brightness and helps keep the environment moist. Now, season both sides generously with the remaining salt, black pepper, garlic powder, and paprika.
In a small bowl, whisk together the melted unsalted butter, the freshly grated garlic (this is where the powerful, true garlic flavor comes from!), the chopped fresh thyme, rosemary, and half of your chives. Brush this fragrant, buttery mixture liberally over both sides of each chicken breast, then finish with a drizzle of the final tablespoon of olive oil.
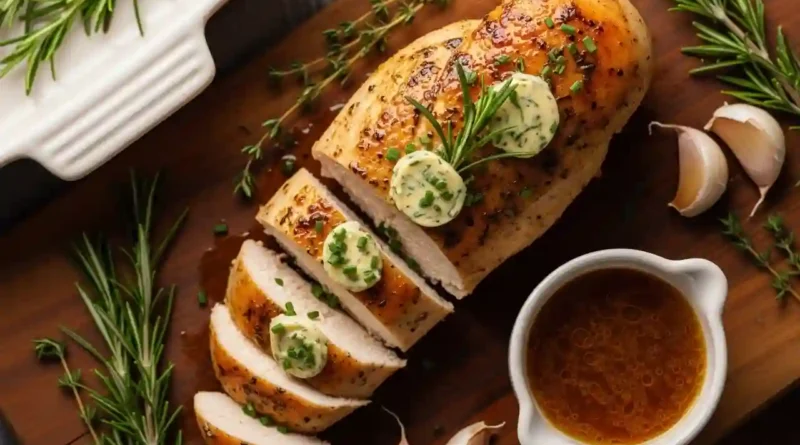
Slide the dish into your preheated oven and bake for 20-25 minutes. You’ll know it’s done when the chicken is golden and the internal temperature reads 160°F (71°C) on a meat thermometer in the thickest part. Resist the urge to cut into it right away! Transfer the chicken to a plate, tent it loosely with foil, and let it rest for a full 5 minutes. This allows the juices to redistribute, ensuring every slice is succulent. Slice against the grain, drizzle with those delicious pan juices, and garnish with the remaining fresh chives.
You Must Know
-
Don’t Skip the Dry: Patting the chicken completely dry after brining is non-negotiable for a good sear and proper browning.
-
Embrace the Thermometer: For perfectly cooked chicken every single time, a digital meat thermometer is your best friend. Pull it at 160°F, as it will carry over to 165°F while resting.
-
Rest is Best: That five-minute rest under foil is what locks in the juices, making the difference between good and great.
-
Fresh is Key for Herbs: For the most vibrant flavor, fresh thyme and rosemary are highly recommended.
Serving It Up
This versatile chicken is the perfect centerpiece for any meal. For a classic comfort food plate, serve it alongside creamy mashed potatoes and roasted green beans or asparagus, using the pan juices as a light sauce. For a lighter option, it’s wonderful sliced over a crisp garden salad or paired with a quinoa pilaf. A glass of crisp Chardonnay or a light Pinot Noir would complement the herbal notes beautifully, while a chilled glass of sparkling water with lemon is a lovely non-alcoholic pairing.
Make It Different
-
Dairy-Free: Simply substitute the melted butter with more olive oil or a vegan butter alternative.
-
Herb Variations: No fresh herbs? Use 1 teaspoon each of dried thyme and rosemary, but add them to the salt and pepper rub instead of the butter.
-
Lemon Lovers: Add the zest of one lemon to the butter-herb mixture for a bright, citrusy kick.
-
Spice It Up: Incorporate a pinch of red pepper flakes or a dash of cayenne pepper into the seasoning rub.
Storing and Reheating Your Leftovers
To store, place any cooled, leftover chicken in an airtight container in the refrigerator for up to 3 days. For longer storage, you can freeze it for up to 2 months. The best way to reheat it while preserving its moisture is gently. Place the slices in a baking dish with a tablespoon of water or chicken broth, cover with foil, and warm in a 325°F (163°C) oven until heated through. You can also reheat gently in the microwave, covered, with a damp paper towel on top.
Success Tips
For the most consistent results, try to buy chicken breasts that are similar in size and thickness. If one end is much thicker than the other, you can gently pound it with the flat side of a meat mallet or a rolling pin to an even thickness. This ensures everything cooks at the same rate. Finally, always let your chicken come to room temperature for about 15 minutes after brining and before seasoning and baking; this promotes more even cooking from edge to center.
Frequently Asked Questions
1. Can I use chicken thighs instead?
Absolutely! Bone-in, skin-on thighs are fantastic with this herb butter. You may need to add 5-10 minutes to the baking time. Ensure the internal temperature reaches 175°F for thighs.
2. I don’t have white wine. What can I use?
No problem. You can substitute it with an equal amount of chicken broth or even just a tablespoon of fresh lemon juice.
3. How long should I brine if I’m preparing ahead?
You can brine the chicken in the refrigerator for up to 6 hours. Any longer and the texture can become a little too soft. The 15-minute room temperature brine is perfectly effective for a weeknight.
4. Why is my chicken not browning?
This usually happens if the chicken was too wet going into the oven or if the oven wasn’t fully preheated. Ensuring you pat the chicken dry and preheat your oven are key steps for that beautiful golden color.
5. Can I make this entire recipe ahead of time?
You can prepare the herb butter and brine the chicken a day ahead. Keep the chicken in the brine in the fridge and store the herb butter separately. When ready, just pat the chicken dry, brush with the butter, and bake.
Recipe Card: Garlic and Herb Baked Chicken Breast
Prep time: 20 minutes (plus brining time)
Cook time: 25 minutes
Total time: 45 minutes
Servings: 4
Category: Main Course
Difficulty: Easy
Cuisine: American
Yield: 4 baked chicken breasts
Ingredients
-
1/4 cup coarse salt (plus 2 teaspoons)
-
4 boneless, skinless chicken breasts
-
2 tablespoons olive oil, divided
-
2 tablespoons dry white wine
-
1 1/2 teaspoons freshly ground black pepper
-
1 teaspoon garlic powder
-
1 teaspoon paprika
-
2 tablespoons unsalted butter, melted
-
2 large cloves garlic, grated
-
1 tablespoon chopped fresh thyme
-
1 tablespoon chopped fresh rosemary
-
2 tablespoons chopped chives, divided
Instructions
-
In a large bowl, whisk 1/4 cup salt with 1 quart warm water until dissolved. Add chicken breasts and brine for 15 minutes at room temperature or up to 6 hours in the refrigerator.
-
Remove chicken from brine, rinse with cold water, and pat completely dry with paper towels.
-
Preheat oven to 400°F (200°C).
-
Grease a baking dish with 1 tablespoon of olive oil. Arrange the dried chicken breasts in the dish in a single layer. Drizzle with white wine.
-
Season both sides of the chicken with the remaining 2 teaspoons salt, pepper, garlic powder, and paprika.
-
In a small bowl, whisk together the melted butter, grated garlic, thyme, rosemary, and 1 tablespoon of chives.
-
Brush the chicken on both sides with the garlic-herb butter, then drizzle with the remaining 1 tablespoon of olive oil.
-
Bake for 20-25 minutes, or until the internal temperature reaches 160°F (71°C).
-
Remove from oven, transfer chicken to a plate (with all its juices), and tent with foil. Rest for 5 minutes.
-
Slice against the grain, drizzle with reserved juices, and garnish with remaining chives before serving.
Notes: Brining is the key to exceptionally juicy chicken. For best results, do not skip the resting period after baking.
