Homemade Chalupa Shells
Unveiling the Art of Crafting Perfect Mexican Chalupas at Home
In the realm of culinary delights, Mexican Chalupas stand as a testament to the vibrant and rich flavors that Mexican cuisine has to offer. If you’ve ever yearned to recreate the magic of these soft, chewable, affordable, and utterly delicious treats in the comfort of your own kitchen, you’re in for a treat. Our comprehensive guide will take you through each step, ensuring that your homemade chalupas not only tantalize your taste buds but also outrank the competition.
Ingredients: Elevating the Culinary Symphony
To embark on this culinary journey, gather the following ingredients:
- 2 1/4 cups of all-purpose flour
- 1 tablespoon of baking powder
- 1/2 teaspoon of salt
- 1 ounce of shortening
- 1 cup of milk
- Canola oil for frying
- 1 pound of ground beef (cooked)
- Sharp cheddar cheese
- Lettuce
- Diced tomatoes
- Sour cream
- Taco sauce
Crafting the Dough: A Symphony of Flavors in the Making
The foundation of any great chalupa lies in the dough, and our recipe ensures perfection in every bite.
Mixing the Dry Ingredients
- In a large mixing bowl, combine 2 1/4 cups of all-purpose flour, 1 tablespoon of baking powder, 1/2 teaspoon of salt, and 1 ounce of shortening. Use a fork to expertly blend these elements.
Forming the Dough
- Pour 1 cup of milk into the dry ingredients. Utilize a wooden spoon to create a cohesive ball of dough that will be the cornerstone of your chalupas.
Rolling and Shaping
- Turn the dough onto a floured surface, rolling until it attains a smooth texture. Mold the dough into an 8-inch loaf. Divide it into halves and then quarters. Each section becomes a ball, rolled into a 4-5 inch round circle.
Frying the Chalupa Dough: Crispy Exterior, Tender Interior
To achieve the perfect texture, follow these steps for frying:
Heating the Oil
- Heat canola oil in a heavy-duty shallow skillet on medium heat. A cast-iron skillet works wonders for this purpose.
Submerging the Dough
- Carefully dip half of the chalupa dough into the hot oil. If you desire a unique presentation with a dip on the bottom for your fillings, flip the chalupa once one side is slightly fried. Otherwise, fry on both sides for approximately 2 minutes until the golden brown perfection is achieved.
Assembling the Chalupas: A Symphony of Toppings
With the foundation laid, it’s time to create a masterpiece with your toppings.
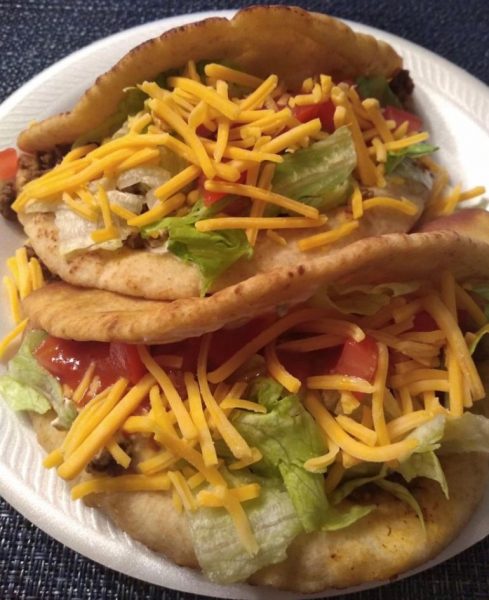
- Fill your chalupas with ground beef seasoned with taco seasoning, crisp lettuce, melted sharp cheddar cheese, fresh diced tomatoes, and a dollop of velvety sour cream.
- For an extra kick, top it all off with a drizzle of your favorite taco sauce.


!["Exquisite Italian Cream Stuffed Cannoncini: Crispy pastry cones filled with velvety mascarpone and whipped cream, a culinary masterpiece by [Your Brand Name]."](https://mygrandmaspie.com/wp-content/uploads/2021/08/Italian-Cream-Stuffed-Cannoncini-e1629558070565.jpg)
