How to Make a Cute Printed Panda Cake Roll
How to Make a Cute Printed Panda Cake Roll: A Step-by-Step Guide
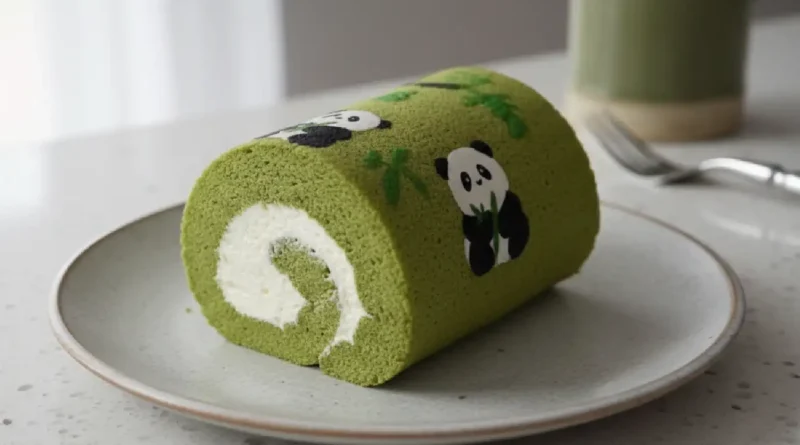
The first time I saw a patterned cake roll, I assumed it required some kind of professional pastry wizardry. There is something so whimsical about peeling back a sheet of parchment paper to reveal a perfect, edible design underneath. This Panda Cake Roll started as a rainy afternoon project to cheer up a friend, and it quickly became one of my most requested recipes. The smell of sweet vanilla and cocoa filling the kitchen is enough to make anyone feel at ease, but the real magic happens when you slice into that soft, pillowy sponge and see those little panda faces staring back at you. It is light, airy, and just the right amount of sweet.
Why You’ll Love This
- It is a total showstopper that looks far more complicated to make than it actually is.
- The texture is incredibly soft and flexible, meaning no stressful cracking when you roll it up.
- It uses simple pantry staples like eggs, sugar, and flour to create something extraordinary.
- It is a fun, creative outlet that lets you play with your food in the best way possible.
I remember serving this to my brother-in-law, who usually scoffs at anything labeled “cute” or “decorative” when it comes to food. He is a traditionalist who believes cake should just be cake. I set a slice down in front of him, and he paused, hovering his fork over a tiny panda ear. He took one bite of the whipped cream and fluffy sponge, looked up, and admitted that it was the lightest, most balanced dessert he had ever had. He even asked for a second slice to take home, proving that even the most serious critics can be won over by a little bit of charm and a lot of flavor.
What Makes It Special
- Cake Flour: This provides a fine, tender crumb that stays soft and supple even after being chilled.
- Fresh Eggs: Whipped to perfection, they act as the natural leavening agent that gives the sponge its characteristic lift.
- Pure Vanilla Extract: It adds a nostalgic, warm depth of flavor that balances the sweetness.
- Dark Cocoa Powder: Used for the panda features, it provides a sharp, chocolatey contrast to the vanilla base.
- Stabilized Whipped Cream: This ensures the filling stays firm and luscious without soaking into the cake.
Making It Happen
The process begins with creating the “ink” for your pandas. You will whisk together a small amount of cake batter with dark cocoa powder until it is smooth and pipeable. On a sheet of parchment paper, you carefully trace or freehand little panda faces. The secret is to pop this tray into the oven for just a minute or two. This sets the design so it does not smear when you pour the rest of the batter over the top.
Next, you prepare the main sponge. This involves whisking egg yolks with sugar until they are pale and creamy, then gently folding in the flour and oil. The most important part is whipping the egg whites to stiff peaks and folding them into the yolk mixture with a light hand. You want to keep as much air in the batter as possible. Pour this golden, airy mixture over your pre-baked panda designs and smooth it out into an even layer.
Once baked, the cake is flipped onto a clean kitchen towel while it is still warm. This is the crucial moment where you gently roll the cake up to “train” it into its final shape. As it cools, you whip up a cloud-like cream filling. Once the cake is completely cool, you unroll it, spread a generous layer of the creamy filling, and roll it back up. The result is a beautiful, patterned log that is ready to be sliced and shared.
You Must Know
- Always use room temperature eggs to ensure they reach their full volume when whipped.
- Do not over-bake the sponge; if it becomes too dry, it will lose its elasticity and crack during the rolling process.
- Use a high-quality, non-stick parchment paper to ensure the panda designs peel away cleanly.
- Make sure the cake is completely cool before adding the whipped cream filling, or the cream will melt and create a mess.
Serving Ideas
This Panda Cake Roll is best served chilled in thick, generous slices. To elevate the presentation, place each slice on a clean white plate with a few fresh raspberries or sliced strawberries on the side for a pop of color. For a drink pairing, a light matcha latte or a glass of cold milk complements the vanilla and cream perfectly. If you are serving this as an afternoon treat, a pot of Earl Grey tea provides a sophisticated contrast to the playful design.
Make It Different
- Matcha Twist: Add a tablespoon of matcha powder to the main batter for a vibrant green forest background for your pandas.
- Chocolate Filling: Swap the plain whipped cream for a rich chocolate ganache or a hazelnut spread.
- Berry Surprise: Scatter fresh blueberries or chopped strawberries over the cream before rolling for a fruity burst.
- Gluten-Free Option: Use a high-quality 1-to-1 gluten-free flour blend in place of the cake flour.
Storage and Reheating Recipe Tips
Because of the fresh cream filling, this cake must be stored in the refrigerator. Wrap it tightly in plastic wrap or place it in an airtight container to prevent it from drying out or absorbing other scents from the fridge. It will stay fresh and delicious for up to three days. This cake is meant to be eaten cold, so there is no need for reheating. In fact, the flavors often meld together even better after a few hours of chilling.
Success Tips
When folding the egg whites into the batter, use a large metal spoon or a silicone spatula and move in a “figure-eight” motion. This prevents the air bubbles from popping. If you are nervous about drawing the pandas, you can place a printed template under your parchment paper and trace the shapes. Just remember to slide the template out before you put the tray in the oven. Patience is your best friend when rolling; go slow and use the parchment paper to help guide the cake.
Frequently Asked Questions
How do I stop my cake roll from cracking?
The key is rolling the cake while it is still warm from the oven. This creates “muscle memory” in the sponge. Also, ensure you do not over-bake it, as moisture is what keeps the cake flexible.
Can I make this cake ahead of time?
Yes, you can bake and fill the cake a day in advance. Keeping it wrapped in the fridge overnight actually helps it hold its shape better when you go to slice it.
What if my panda design smears?
Make sure you bake the cocoa batter design for at least 90 seconds before pouring the main batter over it. If the design is set to the touch, it should stay perfectly in place.
Can I use butter instead of oil?
Oil generally produces a more flexible sponge for cake rolls. If you use butter, the cake might be slightly firmer and more prone to cracking when cold.
What is the best way to get clean slices?
Use a sharp, serrated knife and wipe it clean with a damp cloth between every single slice. This prevents the cream from smearing over the panda faces.
Panda Cake Roll Recipe Card
Prep time: 30 minutes
Cook time: 12 minutes
Total time: 42 minutes (plus cooling time)
Servings: 8 slices
Category: Dessert
Difficulty: Intermediate
Cuisine: Fusion / Japanese-Inspired
Yield: 1 cake roll
Equipment: 10×15 inch jelly roll pan, parchment paper, piping bag, electric hand mixer, large mixing bowls.
Ingredients
For the Pattern:
1 egg white
20g granulated sugar
20g cake flour
15g softened butter
1 tablespoon dark cocoa powder
For the Sponge:
4 large eggs (separated)
60g granulated sugar (divided)
50ml vegetable oil
60ml whole milk
80g cake flour
1 teaspoon vanilla extract
1/2 teaspoon cream of tartar
For the Filling:
200ml heavy whipping cream
2 tablespoons powdered sugar
1 teaspoon vanilla bean paste
Method
Preheat your oven to 340°F (170°C). Line your jelly roll pan with parchment paper. Mix the pattern ingredients together until smooth and transfer to a piping bag. Pipe small panda faces onto the parchment. Bake for 1.5 minutes, then remove and set aside.
In a large bowl, whisk the egg yolks with 20g of sugar until pale. Stir in the oil, milk, and vanilla. Sift in the cake flour and whisk until just combined.
In a separate clean bowl, whip the egg whites with the cream of tartar. Gradually add the remaining 40g of sugar until stiff peaks form.
Gently fold the egg whites into the yolk mixture in three batches using a spatula. Do not over-mix.
Pour the batter over the baked panda designs. Smooth the top with a spatula. Tap the pan on the counter to release air bubbles.
Bake for 10-12 minutes or until the top springs back when touched.
Immediately flip the cake onto a clean towel dusted with powdered sugar. Peel off the parchment paper carefully to reveal the pandas. Place the parchment back on and roll the cake up with the towel. Let it cool completely.
Whip the heavy cream with powdered sugar and vanilla bean paste until stiff peaks form.
Unroll the cooled cake, spread the cream evenly, and roll it back up tightly. Wrap in plastic wrap and refrigerate for at least 2 hours before slicing.
Notes
Ensure your mixing bowl for the egg whites is completely grease-free, or they will not whip properly. You can use a toothpick to refine the details of the panda faces after piping.
Nutrition
Per serving: 210 calories, 14g fat, 18g carbohydrates, 4g protein.
I hope you enjoy creating this adorable dessert as much as I do. It is a wonderful way to bring a bit of joy to the table. Please let me know if you have any other questions about the process or if you would like to try a different design next time.
