
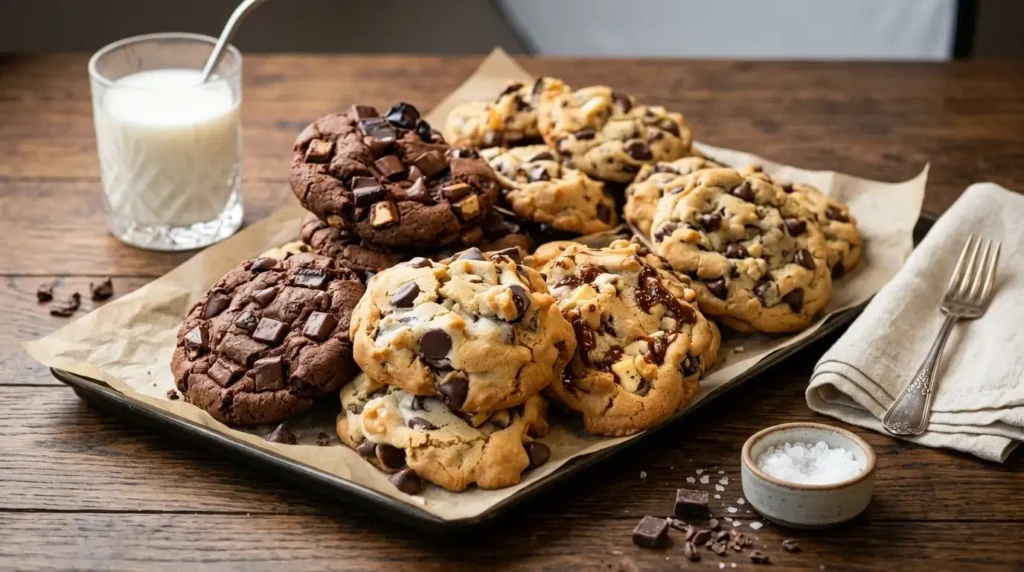
Levain Bakery NYC Cookies
Table of Contents
ToggleLevain Bakery NYC Cookies Recipe: The Copycat Version Worth Making at Home
There’s a reason people line up outside a tiny bakery on the Upper West Side no matter the weather. Levain Bakery’s cookies are enormous, six ounces of dough baked into something that looks almost underdone on purpose — crackled and golden on the outside, dense and molten in the center, with pools of chocolate that haven’t quite set. I first had one on a freezing February afternoon, walking back from a museum with my hands too cold to feel my own fingers, and that first bite through the crust into the gooey middle basically rewired how I think about cookies. Thin and crispy has its place. This is not that place.
This version gets you there without a flight to New York. Cold butter, a mix of bread flour and all-purpose, an oven cranked hot, and a short bake time that leaves the center underbaked in the best way. It sounds fussy but it’s really just a handful of deliberate choices that add up to that specific texture — crisp shell, soft crumbling edges, a center that’s barely holding itself together.
Why You’ll Love This
- The contrast between the crackly crust and the almost-raw center is unlike anything from a standard cookie recipe
- You only need one bowl and no mixer if you don’t have one — a wooden spoon and some arm strength will do
- These freeze beautifully, so you can bake one giant cookie at a time whenever the craving hits
- The recipe is genuinely forgiving; even a slightly overmixed batch still turns out good
- They look bakery-made, which makes them a easy way to impress people without much extra effort
The Backstory
My mother-in-law is not a dessert person. She’ll pick at a slice of cake to be polite and leave most of it on the plate. So when she picked up one of these cookies at Thanksgiving, broke it in half, and just stopped talking for a second, I noticed. She ate the whole thing, went back for the smaller broken piece I’d set aside for myself, and then asked — twice — where I’d bought them. When I told her I’d made them in my kitchen, she didn’t believe me until she watched me pull the next batch out of the oven. She’s asked for the recipe three times since, and I’m pretty sure she still doesn’t believe there’s no bakery involved.
What Makes It Special
- Cold, cubed butter — instead of creaming softened butter, keeping it cold means it doesn’t fully melt into the dough, which is part of what gives these cookies their craggy, uneven top
- A blend of bread flour and all-purpose flour — bread flour adds structure and chew that all-purpose alone can’t give you
- Both baking powder and baking soda — this combination is what makes the cookies puff up tall instead of spreading flat
- Chopped chocolate instead of chips — chunks melt unevenly, leaving streaks and pockets of chocolate rather than uniform little discs
- Walnuts (if you’re doing the classic version) — they add a toasty, slightly bitter contrast that keeps the sweetness from feeling flat
Making It Happen
Start by whisking your dry ingredients together in one bowl — the flours, baking powder, baking soda, and a pinch of salt. In a separate bowl, cream the cold cubed butter with both sugars just until combined; you’re not looking for the light, fluffy texture you’d want in a normal cookie recipe, so don’t overdo it. Beat in the eggs and vanilla until just incorporated.
Fold the dry ingredients into the wet ones by hand, stopping the moment you don’t see streaks of flour anymore. Overmixing here is the main way people end up with a tough, dense cookie instead of a tender one. Stir in your chopped chocolate and walnuts, distributing them roughly rather than perfectly.
Now comes the part that makes these cookies look like the real thing: portion the dough into genuinely oversized mounds, somewhere around six ounces each, and shape them into rough, tall pillars rather than flattened balls. The taller and more irregular the shape going into the oven, the better the craggy top you’ll get coming out. Chill the shaped dough for at least an hour, longer if you can manage it — this keeps the cookies from spreading too thin during that hot, short bake.
Bake at a high temperature, around 410°F, for roughly 9 to 11 minutes. You’re watching for edges that have set and turned golden while the center still looks pale and slightly underdone. Pull them while they still look a little raw in the middle. They’ll keep cooking on the hot pan for a few minutes after they come out, and that carryover is what gets you the gooey center without an actually raw interior.
You Must Know
- Do not skip the chilling step — warm dough spreads into flat, thin cookies instead of the tall bakery style
- Weigh your dough portions if you can; consistency in size means consistency in bake time
- Pull the cookies when they look slightly underdone in the center — they firm up as they cool on the pan
- Use a light-colored, heavy baking sheet; dark pans can cause the bottoms to overbake before the center catches up
- Let the cookies rest on the pan for at least 5 minutes before moving them, or they may fall apart
Serving Ideas & Pairings
Serve these barely warm, maybe 10 minutes out of the oven, with a tall glass of cold milk to cut through the richness. A scoop of vanilla ice cream sandwiched between two halves turns this into a proper dessert if you’re feeding a crowd. For something a little more grown-up, a small pour of espresso or a mug of strong black coffee plays nicely against the sweetness, especially with the walnut version.
Make It Different
- Dark chocolate and sea salt: swap the milk or semisweet chocolate for a dark chocolate bar, chopped roughly, and finish each cookie with a few flakes of sea salt before baking
- Nut-free version: leave out the walnuts entirely and add extra chocolate in their place; the texture stays chewy without them
- Peanut butter chip: swap half the chocolate for peanut butter chips for a different flavor angle
- Gluten-free adaptation: a 1:1 gluten-free flour blend can replace both flours, though you’ll lose a bit of the chew that bread flour provides
- Smaller cookies: if the giant size feels like too much, portion into 3-ounce mounds and reduce the bake time by about 2 minutes, watching closely
Storage & Reheating
Once fully cooled, store the cookies in an airtight container at room temperature for up to 3 days — any longer and the texture starts to dry out. For longer storage, freeze the shaped, unbaked dough portions on a tray until solid, then transfer to a freezer bag; they’ll keep for up to 3 months and you can bake straight from frozen, adding a couple extra minutes to the bake time.
To bring an already-baked cookie back to that fresh-out-of-the-oven feel, warm it in a 300°F oven for about 5 minutes. A microwave works in a pinch — 10 to 15 seconds is usually enough to soften the center again without turning it rubbery.
Success Tips
Weighing your ingredients rather than measuring by volume, especially the flour, makes a noticeable difference here; too much flour is the most common reason these turn out dry instead of gooey. If your kitchen runs warm, chill your mixing bowl beforehand so the butter doesn’t soften too fast while you’re working. And resist the urge to bake a test cookie straight from room-temperature dough just to check — the difference chilling makes really is that significant.
Frequently Asked Questions
Can I use all-purpose flour instead of a flour blend?
You can, but the cookies will spread a bit more and won’t have quite the same chew. If bread flour isn’t available, all-purpose alone still makes a good cookie, just slightly less structured.
Why did my cookies spread flat instead of staying tall?
This usually means the dough wasn’t chilled long enough, or the butter was too soft going into the mix. Give the shaped dough a full hour in the fridge, and don’t skip cubing the butter cold to start.
Is it safe to eat the center if it looks underbaked?
Yes — the center is meant to look soft and slightly glossy, not raw batter. As long as the eggs and flour have been properly baked at a high enough temperature for the recommended time, it’s safe; it’s just intentionally underbaked in texture, not undercooked in a food-safety sense.
Can I make the dough ahead of time?
Absolutely, and it actually helps. You can refrigerate the shaped dough for up to 3 days or freeze it for months, baking directly from cold or frozen whenever you want a fresh cookie.
What’s the best way to get that cracked, craggy top?
Shape the dough into tall, uneven mounds rather than smooth round balls. The irregular shape is what creates those signature cracks and ridges as it bakes and rises.
Recipe Card Info
Prep time: 20 minutes
Cook time: 10 minutes
Total time: 1 hour 30 minutes (includes chilling)
Servings: 8 large cookies
Category: Dessert
Difficulty: Easy to moderate
Cuisine: American
Yield: 8 cookies, approximately 6 ounces each
Equipment: Large mixing bowl, baking sheet, parchment paper, kitchen scale (optional but recommended)
Ingredients
- 2 cups bread flour
- 1 cup all-purpose flour
- 1 teaspoon baking powder
- 1/2 teaspoon baking soda
- 1/2 teaspoon salt
- 1 cup cold unsalted butter, cubed
- 3/4 cup granulated sugar
- 1/2 cup brown sugar, packed
- 2 large eggs, cold
- 1 teaspoon vanilla extract
- 2 cups chopped chocolate (dark or semisweet)
- 1 cup walnuts, roughly chopped (optional)
Directions
Step 1: Whisk together the bread flour, all-purpose flour, baking powder, baking soda, and salt in a bowl. Set aside.
Step 2: In a separate large bowl, cream the cold cubed butter with the granulated sugar and brown sugar until just combined — don’t overwork it into a fluffy texture.
Step 3: Beat in the cold eggs and vanilla extract until just incorporated.
Step 4: Fold the dry ingredients into the wet mixture by hand, stopping as soon as no flour streaks remain.
Step 5: Gently fold in the chopped chocolate and walnuts.
Step 6: Divide the dough into 8 portions of roughly 6 ounces each. Shape each into a tall, irregular mound rather than a smooth ball.
Step 7: Place the shaped dough on a parchment-lined tray and chill for at least 1 hour, or up to 3 days.
Step 8: Preheat the oven to 410°F. Arrange the chilled dough mounds on a baking sheet, spaced well apart.
Step 9: Bake for 9 to 11 minutes, until the edges are golden and set but the center still looks pale and slightly underdone.
Step 10: Let the cookies rest on the pan for at least 5 minutes before transferring to a wire rack. Serve warm.
Notes
The dough freezes exceptionally well, so consider doubling the batch and freezing half the shaped portions for later. Bake straight from frozen, adding 2 to 3 extra minutes to the bake time. Every oven runs a little differently, so keep a close eye the first time you make these to find the timing that gives you the texture you want.
Nutrition
(Per cookie, based on 8 servings)
Calories: approximately 620
Total fat: 34g
Saturated fat: 18g
Carbohydrates: 72g
Sugar: 42g
Protein: 8g
Fiber: 3g
Sodium: 220mg
