Molten Lava Brownies
The Ultimate Molten Lava Brownies Recipe: Fudgy, Gooey, and Irresistible
There is a specific kind of magic that happens in a kitchen when the scent of toasted hazelnuts begins to rise from a pan of browning butter. It is a warm, nutty aroma that promises something deep, complex, and comforting. These Molten Lava Brownies were born on a rainy Tuesday afternoon when a standard, box-mix brownie just would not suffice. I wanted something that felt like a culinary hug—crispy on the edges, crinkly on top, and almost impossibly gooey in the center. After several rounds of testing, I landed on this version, which balances the intensity of 70% dark chocolate with the silky richness of browned butter. It is, quite simply, the only brownie recipe you will ever need to satisfy a serious chocolate craving.
Why You’ll Love This
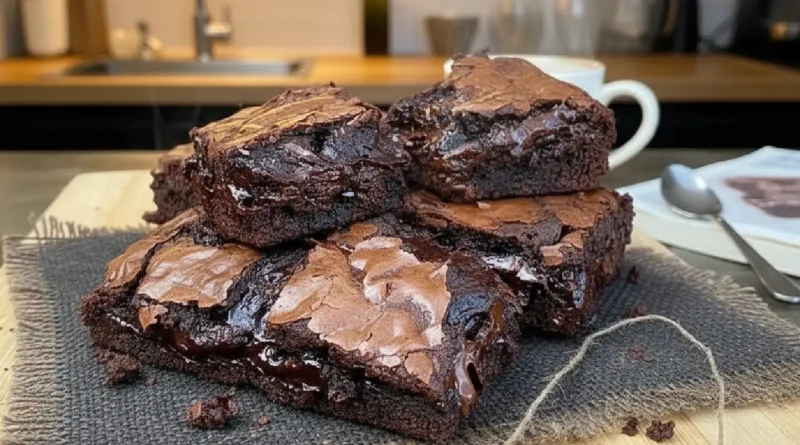
The texture is a masterclass in contrast, featuring a paper-thin, crackly top and a center that melts like warm ganache.
It utilizes browned butter, which adds a sophisticated, toasted undertone that elevates the chocolate from simple to gourmet.
This recipe is incredibly versatile, allowing you to control the lava factor just by adjusting the bake time by a few minutes to suit your preference.
A Crowd-Pleaser for Everyone
I once served these at a dinner party where one guest claimed they were not really a dessert person. I watched from across the room as they took a tentative first bite of a warm corner piece. Their eyes widened, the conversation stopped, and within five minutes, their plate was polished clean. They even asked for a small piece to take home for the next morning. When you can convert a self-proclaimed non-dessert eater with a single brownie, you know you have found something special.
What Makes It Special
Salted Pure Butter: Using a high-quality butter like Kerrygold introduces a creamy depth and a hint of salt that perfectly cuts through the sugar.
70% Dark Chocolate: Choosing a high-percentage cacao bar ensures the flavor is rich and sophisticated rather than cloyingly sweet.
Dutch Process Cocoa: This provides that iconic deep, dark color and a smooth, mellow chocolate flavor that regular cocoa powder cannot match.
Dark Chocolate Chips: These act as little pockets of molten gold throughout the fudgy base, ensuring every bite has a varied texture.
Making It Happen
We begin by setting the stage, preheating the oven to 350˚F and lining an 8×8 pan with parchment paper. Leaving a little overhang on the sides is a smart move for easy removal later. The real soul of this recipe happens on the stovetop. As you melt the butter over medium-low heat, you will hear it sizzle and pop. Keep a close eye on it for about five or six minutes. Once the foam subsides and you see little golden-brown bits at the bottom, remove it immediately to avoid burning. Pour that fragrant, hot liquid over your chopped chocolate and whisk until it becomes a glossy, mahogany pool.
In a separate bowl, the dry ingredients—cocoa, flour, and salt—get a quick sift to ensure no lumps ruin the silky texture. Then, in your main mixing bowl, whisk the eggs, white and dark brown sugars, and vanilla until the mixture is light and frothy. This aeration is the secret to that iconic crackly top. Slowly stream in the buttery chocolate mixture, then gently stir in the dry ingredients. Finally, fold in the dark chocolate chips. Pour the batter into the pan and bake for 15 minutes. Now comes the vital part: take the pan out and give it five firm drops against the counter. This collapses the air bubbles and creates the crinkly surface. Pop it back in for the final stretch, then let it cool until it is just set enough to slice.
You Must Know
Do not skip the pan-banging step; it is the difference between a cakey top and a professional-looking crinkle.
Quality ingredients matter here; since there are so few components, the flavor of your butter and chocolate will be the stars of the show.
Watch your brown butter like a hawk, as it can transition from perfect to burnt in a matter of seconds once it starts to color.
Serving Ideas and Pairings
Serve these brownies while they are still slightly warm with a generous scoop of cold vanilla bean gelato or a dollop of lightly sweetened crème fraîche. For a drink pairing, a robust espresso balances the richness perfectly. If you are feeling particularly indulgent, a tall glass of cold whole milk or even a glass of dark port wine works beautifully for an evening treat.
Make It Different
For a gluten-free version, a high-quality 1:1 gluten-free flour blend works surprisingly well in this dense batter. If you enjoy a bit of crunch, swap half of the chocolate chips for toasted walnuts or pecans. To lean into the lava theme even more, you can add a teaspoon of instant espresso powder to the egg mixture to intensify the chocolate notes without adding a coffee flavor.
Storage and Reheating
Store any leftovers in an airtight container at room temperature for up to three days. To regain that signature molten center after they have cooled, simply reheat a single brownie in the microwave for 15 to 20 seconds. They also freeze remarkably well for up to two months when wrapped tightly in plastic wrap and stored in a freezer bag.
Success Tips
Ensure your eggs are at room temperature before whisking to achieve the best volume and texture. If you prefer a more stable, fudge-like brownie rather than a molten one, let them cool completely in the refrigerator before cutting. For the ultimate molten experience, always serve them while they are still slightly warm to the touch.
Frequently Asked Questions
Can I use unsalted butter?
Yes, you can certainly use unsalted butter, but I recommend increasing the added salt to 3/4 teaspoon to maintain the necessary flavor balance.
Why didn’t my brownies get a crinkly top?
This usually happens if the eggs and sugar were not whisked long enough to become frothy, or if the pan-banging step was skipped during the baking process.
Can I double this recipe for a larger crowd?
Absolutely. You can double the ingredients and use a 9×13 pan. Just keep in mind that you may need to increase the total baking time by about 5 to 10 minutes.
What exactly is Dutch process cocoa?
It is cocoa powder that has been treated with an alkalizing agent. This process makes it darker in color, smoother in flavor, and less acidic than natural cocoa powder.
How do I know when the brownies are perfectly done?
The edges should be set and pulling away slightly from the sides of the pan, but the center should still have a slight, soft jiggle when you move the pan.
Recipe Card
Prep time: 15 minutes
Cook time: 28 minutes
Total time: 43 minutes
Servings: 9 to 12 squares
Category: Dessert
Difficulty: Medium
Cuisine: American
Yield: One 8×8 pan
Equipment: 8×8 baking pan, parchment paper, medium heat-proof bowl, small saucepan, small bowl, sifter, large mixing bowl, whisk.
Ingredients:
1 1/2 sticks salted pure butter (Kerrygold)
4 oz bar 70% chocolate, chopped
3 eggs
1/2 cup white sugar
1/2 cup dark brown sugar
1 Tablespoon pure vanilla extract
1/2 cup dutch process cocoa powder
1/2 cup all purpose flour
1/2 teaspoon salt
1 cup dark chocolate chips
Instructions:
- Preheat your oven to 350˚F, grease and line an 8×8 pan with parchment then set to the side. Put your chopped chocolate in a medium heat-proof bowl and set to the side.
- Place your butter into a small saucepan over medium-low heat. Stir frequently for 5-6 minutes until the butter is browned. This happens once the butter comes up into a foam and the foam turns a light brown. Once this happens remove from heat and pour the hot butter over the chopped chocolate, mix until the chocolate has melted, then set to the side.
- In a small bowl, sift the cocoa powder, flour and salt together then give it a mix to combine. Set to the side.
- In a large mixing bowl, whisk together the eggs, sugars, and vanilla until well combined and frothy. Once combined, slowly mix in the buttery-chocolate mixture until all is incorporated. Stir in the flour mixture until all is combined, then fold in the chocolate chips.
- Once the chocolate chips have been incorporated, pour the batter into your prepared pan and bake for 15 minutes. After 15 minutes, remove the pan and drop it gently against a hard surface 5 times. Put the pan back in the oven to bake another 13 minutes. For a less molten center, bake for 15-18 minutes instead. Once done let them cool in the pan on a cooling rack until room temp, then cut up and serve.
Notes:
For the cleanest cuts, use a sharp knife and wipe it clean with a warm, damp cloth between every slice.
Nutrition:
Approximate per serving: 340 calories, 22g fat, 36g carbohydrates, 4g protein.
