No Bake Cherry Cheesecake Bars
Easy No-Bake Cherry Cheesecake Bars: The Ultimate Creamy Dessert
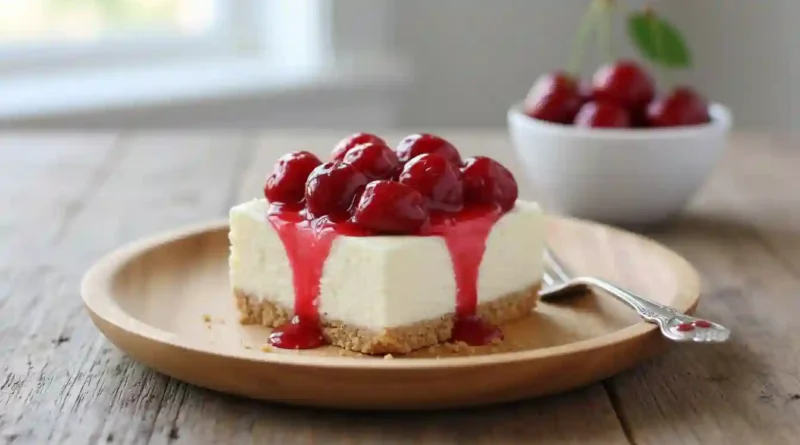
There is a specific kind of magic that happens when you combine a buttery graham cracker crust with a velvety, cloud-like cheesecake filling. These no-bake cherry cheesecake bars are my go-to when the weather gets warm or when the oven is already occupied by a Sunday roast.
I remember the first time I made these for a neighborhood block party. The sun was setting, the air was thick with the scent of charcoal grills, and I pulled these chilled bars out of the cooler. The contrast of the cold, tangy cream cheese against the sweet, ruby-red cherry topping was an instant hit. They are decadent yet light, offering a satisfying crunch from the golden crumbs followed by a smooth finish that melts in your mouth.
Why You’ll Love This
-
Zero Oven Time: You can skip the heat entirely, making this an ideal recipe for humid summer days or busy holidays.
-
Perfectly Balanced Flavors: The saltiness of the buttered crust cuts through the sweetness of the cherries and the richness of the cream.
-
Make-Ahead Convenience: This dessert actually improves with time, allowing you to prep it a full day before your event so you can focus on your guests.
The Skeptic’s Favorite
I once served these bars at a family reunion where my cousin’s husband, a self-proclaimed “dessert hater” who usually avoids anything fruit-related, was hovering near the food table. He took one small square out of politeness, but five minutes later, I saw him heading back for a second, much larger piece. He admitted that most cheesecakes felt too heavy or cloying, but the airy texture of the whipped cream in this version changed his mind. Now, he requests “those cherry bars” every single time we host a get-together.
What Makes It Special
-
Real Heavy Cream: Instead of using stabilized whipped toppings, we use fresh heavy cream to create a natural, rich mouthfeel.
-
Softened Cream Cheese: Using full-fat, room-temperature cream cheese ensures a lump-free, silk-smooth base.
-
Textured Graham Crust: A generous ratio of melted butter to crumbs ensures the base stays firm enough to hold but remains tender to the bite.
-
Glossy Cherry Topping: The vibrant cherry pie filling provides a nostalgic, tart finish that complements the sweet cream perfectly.
Making It Happen
The process begins with the foundation. You mix the golden graham crumbs with melted butter until it feels like wet sand, then press it firmly into your lined pan. There is something incredibly satisfying about smoothing out that base to create a perfectly even floor for the dessert.
Next, you move to the heart of the dish. While the cream cheese and sugar are whipping into a fluffy pale mixture, you’ll whip the heavy cream in a separate bowl. Watching the liquid cream transform into stiff, snowy peaks is the secret to the bar’s light texture. When you fold that whipped cream into the sweetened cheese, it creates a mousse-like consistency that is far more elegant than a traditional baked cheesecake.
Once the filling is smoothed over the crust, you crown it with the cherry filling. Spreading the glossy red fruit over the white cream is the finishing touch before the bars head into the refrigerator. The hardest part of this recipe isn’t the technique—it is the four-hour wait while the bars set into their final, sliceable form.
You Must Know
-
Patience is Key: Do not try to slice these before the four-hour mark. The filling needs time to stabilize so you get clean, beautiful layers.
-
Temperature Matters: Ensure your cream cheese is truly at room temperature. Cold cream cheese will result in tiny white lumps that are impossible to whisk away.
-
The Parchment Sling: Leave a little extra parchment paper hanging over the sides of the pan. This allows you to lift the entire block of bars out at once for easier cutting.
Serving Ideas
These bars are stunning on their own, but they pair beautifully with a few additions:
-
Drink Pairing: Serve with a cold glass of dry sparkling rosé or a strong, dark roast iced coffee to balance the sweetness.
-
Garnish: Add a sprig of fresh mint or a light dusting of lemon zest over the cherries for a pop of color and brightness.
Make It Different
-
Switch the Fruit: Not a fan of cherry? Swap it out for blueberry, strawberry, or even a thick lemon curd.
-
Change the Crust: Use crushed ginger snaps for a spicy kick or chocolate sandwich cookie crumbs for a “Black Forest” inspired version.
-
Dietary Adjustment: Use gluten-free graham crackers to make this accessible for those with gluten sensitivities.
Storage and Recipe Tips
Keep these bars stored in the refrigerator in an airtight container. They will stay fresh and delicious for up to five days. If you find the crust is getting a bit too firm, let the bars sit at room temperature for about ten minutes before serving to soften the butter in the base.
Success Tips
For the cleanest squares, use a sharp chef’s knife and wipe the blade clean with a damp cloth between every single cut. This prevents the white cheesecake layer from smearing into the red cherry topping, keeping your presentation professional and sharp.
Frequently Asked Questions
Can I use light cream cheese for this recipe?
While you can, the bars will not set as firmly. Full-fat cream cheese provides the structural integrity needed for a “no-bake” dessert to hold its shape.
How do I know if my heavy cream is whipped enough?
You are looking for “stiff peaks.” When you lift your whisk or beaters, the cream should stand straight up without the tip curling back over.
Can I freeze these cheesecake bars?
Yes. You can freeze them for up to one month. Thaw them in the refrigerator overnight before serving. Do not thaw them on the counter, as the texture may become too soft.
My crust is crumbling when I cut it. What happened?
This usually happens if the crust wasn’t pressed down firmly enough or if the butter wasn’t fully incorporated. Use the bottom of a flat measuring cup to really pack those crumbs in next time.
Can I use a different size pan?
If you use a larger pan without doubling the recipe, the bars will be very thin. It is best to stick to the 8×8 size or double everything for a 9×13 pan.
Recipe Card
-
Prep time: 15 minutes
-
Cook time: 0 minutes
-
Total time: 4 hours 15 minutes (includes chilling)
-
Servings: 9 to 12 bars
-
Category: Dessert
-
Difficulty: Easy
-
Cuisine: American
-
Yield: One 8×8 inch pan
-
Equipment: 8×8 inch square baking dish, parchment paper, hand mixer or stand mixer, mixing bowls, spatula.
Ingredients
-
2 cups graham crumbs
-
6 tablespoons butter, melted
-
16 ounces cream cheese, softened
-
1/2 cup granulated sugar
-
1/2 cup heavy cream
-
1 can cherry pie filling
Instructions
-
Line an 8 x 8 inch square baking dish with parchment paper, leaving a bit of overhang on the sides. Set aside.
-
In a small mixing bowl, combine the graham crumbs and melted butter. Mix until the crumbs are evenly moistened. Pour the mixture into the prepared baking dish and press down firmly with the back of a spoon or a flat cup to form an even crust.
-
In a mixer fitted with the paddle attachment, combine the softened cream cheese and the granulated sugar. Mix on medium-high speed until the mixture is light, fluffy, and completely smooth.
-
In a separate chilled bowl, whip the heavy cream. Start on low speed, then increase to high as it thickens. Continue mixing until the cream forms stiff peaks.
-
Gently fold the whipped cream into the cream cheese mixture. Once mostly combined, you can use the mixer on high for a few seconds to ensure it is fully incorporated and smooth.
-
Scoop the filling over the graham cracker crust. Use the back of a spoon or an offset spatula to smooth the top into an even layer.
-
Spoon the cherry pie filling over the cream layer. Spread it out carefully to reach the edges without disturbing the cream underneath.
-
Place the dish in the refrigerator to set for at least 4 hours, though overnight is recommended for the best texture.
-
Once set, lift the bars out using the parchment paper edges. Cut into squares and serve cold.
Notes
-
Double Up: This recipe can be easily doubled and prepared in a 9 x 13 inch dish for larger gatherings.
-
Shortcut Tip: You can substitute 1 cup of prepared whipped topping (like Cool Whip) if you prefer not to whip your own heavy cream.
Nutrition (Estimated per serving)
-
Calories: 345 kcal
-
Fat: 22g
-
Carbohydrates: 32g
-
Protein: 4g
-
Sugar: 18g
