Do Nothing Tornado Cake
Do Nothing Tornado Cake: The Effortless Retro Dessert Everyone Craves
There is a specific kind of magic that happens in a kitchen when a recipe requires almost no effort but yields results that taste like you spent hours at the stove. I first encountered the Do Nothing Tornado Cake on a humid Tuesday afternoon when the last thing I wanted to do was turn on the oven. An old, stained recipe card promised a cake that “made itself,” and while I was skeptical, the aroma of simmering butter and tropical pineapple quickly changed my mind. As the cake baked, the scent of caramelized fruit filled the air, and when that warm, nutty topping finally seeped into the golden sponge, I knew I had found a permanent addition to my recipe box. It is humble, rustic, and deeply comforting.
Why You’ll Love This
-
Zero Stress Preparation: You don’t even need a heavy stand mixer for this one; a simple bowl and a sturdy spoon will get the job done in minutes.
-
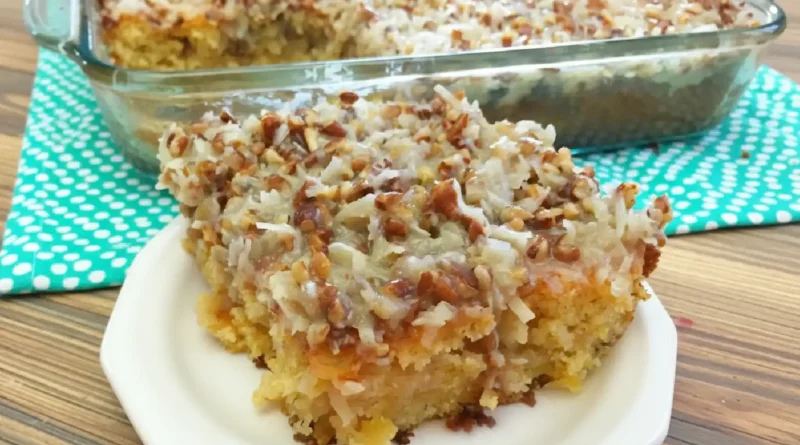
A Texture Marvel: The contrast between the soft, moisture-rich pineapple sponge and the crunchy, buttery pecan and coconut topping is purely addictive.
-
Pantry Staple Hero: Most of these ingredients are likely already sitting in your cupboard, making it the perfect solution for a last-minute dessert craving.
-
The Nostalgia Factor: It tastes like the classic “potluck” cakes of the mid-century, bringing a sense of warmth and tradition to your table.
I remember serving this to my uncle, a man who famously claims he “doesn’t do sweets” and usually skips dessert entirely. He watched me poke holes in the warm cake and pour the syrupy topping over the top, looking rather unconvinced. However, after one tentative bite of the tender, pineapple-infused crumb, he ended up reaching for a second, much larger slice. He couldn’t believe the base was made with crushed pineapple and no extra fat, and now, it’s the only cake he requests for his birthday every year.
What Makes It Special
-
Crushed Pineapple: This is the secret to the cake’s incredible moisture and subtle tang, acting as both the liquid and the flavor base.
-
Evaporated Milk: Used in the topping, it provides a creamy, concentrated richness that regular milk simply cannot match.
-
Chopped Pecans: These add a vital earthy crunch and a toasted flavor that balances the sweetness of the sugar.
-
Sweetened Coconut Flakes: When boiled with the butter and sugar, the coconut becomes chewy and slightly caramelized, creating a “tornado” of texture.
Making It Happen
The process begins quite simply. You’ll want to get your oven preheated to 350 degrees so it’s ready for the cake the moment the batter is mixed. In one large bowl, you combine the flour, sugar, and baking soda, then stir in the eggs, vanilla, and that entire can of crushed pineapple. Do not drain the fruit; that juice is exactly what makes the cake so tender. Once the batter is smooth and fragrant, pour it into your greased pan and let it bake until it reaches a beautiful golden brown.
While the cake is still hot from the oven, you take the handle of a wooden spoon and poke holes all across the surface. This ensures the topping doesn’t just sit on top but actually migrates into the heart of the cake. In a saucepan, you’ll melt the butter with the sugar, evaporated milk, and vanilla. Once it hits a rolling boil, you fold in the pecans and coconut. After five minutes of simmering and stirring, the mixture becomes a thick, syrupy glaze. Pouring this over the warm cake is the most satisfying part of the process, as you watch the holes fill up with nutty, buttery goodness.
You Must Know
-
Do Not Drain the Pineapple: The syrup in the can is essential for the chemistry of this cake; without it, the batter will be too dry and won’t rise correctly.
-
Poke Deep Holes: Ensure your wooden spoon handle goes almost to the bottom of the pan so the topping can saturate the entire height of the cake.
-
Watch the Topping: When boiling the topping, stay close to the stove and stir constantly to prevent the sugar and milk from scorching on the bottom of the pan.
Serving Ideas
This cake is best served slightly warm, allowing the topping to remain gooey and soft. It pairs beautifully with a scoop of cold vanilla bean ice cream or a dollop of unsweetened whipped cream to balance the sweetness. For a drink pairing, a strong, dark roast coffee or a spicy chai tea cuts through the richness of the coconut and pecans perfectly.
Make It Different
-
Nut-Free: If you have a nut allergy, swap the pecans for toasted sunflower seeds or simply leave them out and double the amount of coconut.
-
Tropical Twist: Add a half-cup of maraschino cherries to the batter for a “pineapple upside-down” inspired flavor profile.
-
Spice It Up: Add a teaspoon of ground cinnamon or a pinch of nutmeg to the dry ingredients for a warmer, autumnal vibe.
Storage and Reheating
If you happen to have leftovers, this cake stores surprisingly well. Keep it in an airtight container at room temperature for up to two days, or move it to the refrigerator for up to five days. Because of the butter in the topping, it may firm up when cold. To bring back that “just baked” texture, pop a slice in the microwave for about 15 seconds until the topping starts to glisten again.
Success Tips
For the best results, make sure your eggs are at room temperature before mixing; this helps them emulsify more easily into the pineapple juice. Also, be patient with the topping. Letting it boil for the full five minutes is crucial because it allows the evaporated milk to reduce slightly, creating a more fudge-like consistency rather than a thin syrup.
Frequently Asked Questions
Can I use fresh pineapple instead of canned?
Canned crushed pineapple is actually preferred here because it is softer and has a consistent juice-to-fruit ratio. If you use fresh, you would need to finely mince it and ensure you include enough extra juice to compensate for the liquid in the can.
Why is it called a “Do Nothing” cake?
The name comes from the fact that the recipe requires very little prep work—no creaming butter, no sifting flour, and no complex frosting techniques. You basically just stir and bake.
Does this cake need to be refrigerated?
While it can stay out for a day or two, the high moisture content from the fruit and the milk in the topping means it will stay fresh longer if kept in the fridge after the first 24 hours.
Can I use a different type of milk for the topping?
Evaporated milk is the gold standard for this recipe because of its creamy texture. You can use heavy cream as a substitute, but avoid regular whole milk as it may result in a runny topping.
What if I don’t like coconut?
The coconut provides a lot of the structural “body” to the topping. If you omit it, you might want to add extra pecans or a bit of oats to ensure the topping has some substance.
Recipe Details
Prep time: 10 minutes
Cook time: 45 minutes
Total time: 55 minutes
Servings: 12-15 servings
Category: Dessert
Difficulty: Easy
Cuisine: American
Yield: One 9×13 inch cake
Equipment: 9×13 inch baking pan, large mixing bowl, medium saucepan, wooden spoon
Ingredients
Cake
-
2 cups all purpose flour
-
1 teaspoons baking soda
-
2 cups granulated sugar
-
2 large eggs
-
1 teaspoon vanilla extract
-
20 oz can crushed pineapple (with juice)
Topping
-
1/2 cup salted butter
-
1/2 teaspoon vanilla extract
-
2/3 cup evaporated milk
-
1 cup granulated sugar
-
1 cup chopped pecans
-
1 cup sweetened coconut flakes
Instructions
-
Preheat your oven to 350 degrees and grease a 9×13″ baking pan with butter.
-
In a large mixing bowl, mix together your flour, sugar, baking soda, eggs, vanilla, and the entire can of crushed pineapple until well combined.
-
Pour the batter into your prepared baking pan and bake for 40-45 minutes, or until the top is golden brown and a toothpick comes out clean.
-
Remove the cake from the oven and immediately poke several holes across the entire surface of the cake using the handle of a wooden spoon.
-
In a medium-sized saucepan, combine the butter, sugar, evaporated milk, and vanilla. Heat over medium heat until the mixture reaches a rolling boil.
-
Stir in the chopped pecans and coconut flakes. Continue cooking for about 5 minutes on medium heat, stirring constantly to prevent burning.
-
Pour the hot topping evenly over the warm cake, ensuring it seeps into the holes. Allow it to set for a few minutes before slicing and serving.
Notes
Be sure to use “Sweetened” coconut flakes rather than unsweetened, as the texture and moisture levels differ significantly. If you only have unsalted butter, add a pinch of salt to the topping mixture to balance the sugar.
Nutrition
(Approximate per serving)
Calories: 385 | Total Fat: 16g | Saturated Fat: 8g | Cholesterol: 45mg | Sodium: 210mg | Total Carbohydrates: 58g | Dietary Fiber: 2g | Sugars: 42g | Protein: 4g
