The BEST Apple Pie Recipe
The Only Apple Pie Recipe You’ll Ever Need: A Classic Made Perfect
The Scent of Home
There’s a certain magic that fills a house when an apple pie is in the oven. It’s more than just a dessert; it’s a warm, cinnamon-scented hug. For me, that smell is the essence of my grandmother’s kitchen. This particular recipe is my ode to her, but with a small, crucial twist I discovered through happy accident—a simple simmered sauce that binds the apples in a lush, not-too-runny, gloriously sweet and tart embrace. It’s the pie that turns first-time bakers into confident bakers and has become my non-negotiable contribution to every family gathering.
Why You’ll Love This Apple Pie
-
The Perfect Slice, Every Time: The secret simmered sauce ensures your filling is thick, glossy, and never watery, so you get a beautiful, clean slice from the very first one.
-
A Truly Flaky, Buttery Crust: Using a quality double pie crust recipe means every bite has that satisfying contrast of tender, spiced apples and a crisp, golden shell.
-
It Feels Like an Accomplishment: Weaving that lattice top isn’t just for show. It’s a simple, meditative process that fills you with a deep sense of pride and creates a stunning centerpiece.
-
The Ultimate Comfort Food: This pie is a taste of pure nostalgia, capable of turning any ordinary day into a special occasion and comforting like nothing else can.
The Ultimate Test: A Picky Eater’s Approval
I’ll never forget the Thanksgiving I served this to my then-boyfriend’s father, a man famously skeptical of “from-scratch” desserts. He watched me weave the lattice with a quiet curiosity. When dessert was served, he took one bite, then another, and looked at me, saying, “Now this tastes like the pie my mother used to make.” The entire table fell silent. In that moment, the pie wasn’t just a dessert; it was a bridge, a welcome, and a memory shared. He asks for it every year now.
What Makes It Special
This recipe’s magic lies in the thoughtful combination of its core components.
-
Granny Smith Apples: These aren’t just green apples; they’re the backbone of the pie. Their firm texture holds up beautifully during baking, and their bright tartness perfectly balances the sweet sauce, preventing a cloying flavor.
-
The Simmered Sauce: Unlike recipes where you just toss raw apples with sugar, we create a proper sauce on the stovetop. Melting the butter and whisking in the flour first cooks out the raw taste, creating a rich, roux-like base that thickens the juices as the pie bakes, guaranteeing a set filling.
-
A Double-Crust Embrace: The bottom crust soaks up the flavorful juices without getting soggy, while the top, brushed with an egg wash, bakes into a deep golden, crispy lid that shatters delicately with each forkful.
-
Cinnamon’s Warm Embrace: We use just the right amount of cinnamon—enough to perfume the entire pie with its warm, familiar spice without overpowering the delicate, star-of-the-show apple flavor.
Making It Happen
Before you begin, ensure your prepared pie crust dough is chilled and firm. This is the secret to a flaky crust. Preheat your oven to a hot 425°F—this initial blast of heat is crucial for launching the rise and setting the structure.
Now, let’s make the magic sauce. In a medium saucepan, melt the unsalted butter over medium heat. Once it’s foaming, whisk in the all-purpose flour. You’ll whisk this for a full minute; this step is what cooks the floury taste out and creates our thickening agent. Now, whisk in the water and granulated sugar. Bring it all to a gentle boil, then reduce the heat and let it simmer for about three minutes, whisking frequently. You’ll see it transform into a beautifully thick, caramel-colored sauce. Take it off the heat and set it aside.
While your sauce cools slightly, tackle the apples. Peel, core, and thinly slice your Granny Smiths. You’re aiming for about seven cups of thin, even slices so they cook uniformly. Place them in a large bowl and shower them with the cinnamon, tossing until every slice is lightly dusted. Pour your warm sauce over the cinnamon-kissed apples and stir gently but thoroughly until the apples are luxuriously coated.
On a lightly floured surface, roll out your bottom pie crust until it’s about 12 inches in diameter. Gently wrap it around your rolling pin to transfer it effortlessly to your 9-inch pie plate. Let the edges drape over the sides. Now, pour in your saucy apple mixture, mounding it slightly higher in the center. Be careful to keep the filling away from the rim—this will give you a clean surface to seal the top crust.
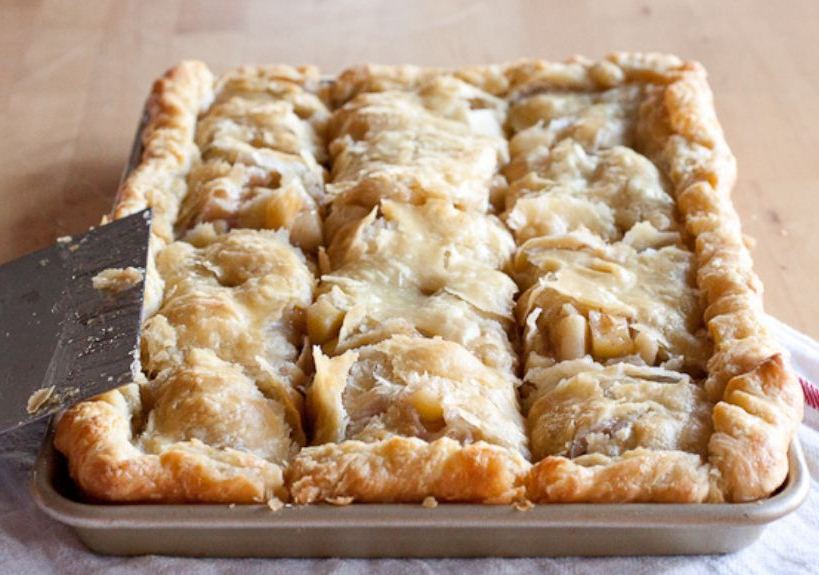
For the grand finale: roll your second crust into an 11-inch round. Using a pizza cutter or a sharp knife, cut it into ten even strips. Weave them over the filled pie into a classic lattice pattern. It’s easier than it looks! Crimp the edges to seal everything in. Finally, beat one egg with a tablespoon of water and brush this egg wash generously over the entire lattice top. This is what gives you that deep, professional, golden-brown shine.
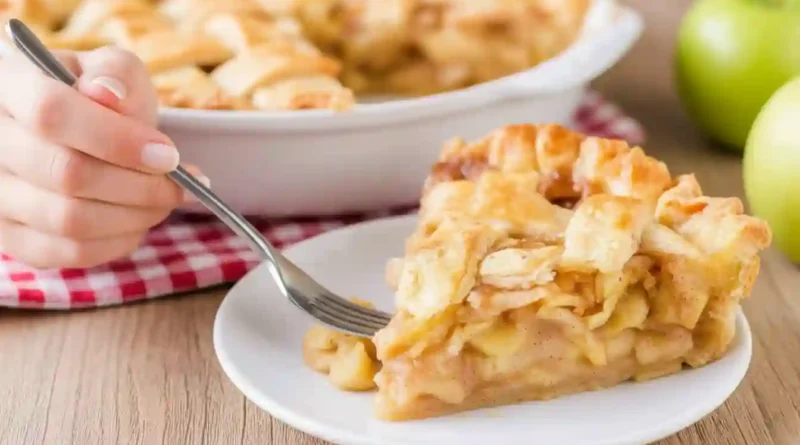
Place your pie on the center oven rack. For that first 15 minutes, let it bake at 425°F to set the crust. Then, without opening the door, reduce the temperature to 350°F and continue baking for another 45 minutes. You’ll know it’s ready when the apples are tender (a thin knife inserted meets little resistance) and the filling is bubbling actively through the lattice vents. For a truly set filling, let the pie rest at room temperature for a full hour before slicing. This patience is the final, non-negotiable step to pie perfection.
You Must Know
-
Keep it Cool: Always start with a cold crust. A warm crust is difficult to handle and can result in a tough, less flaky texture.
-
Slice Thin and Even: Taking the time to slice your apples uniformly is the key to ensuring they all cook at the same rate, giving you a filling with a consistent, tender bite.
-
The Bubbling Signal: Don’t pull the pie out until you see the filling bubbling through the lattice for a solid five minutes. This is the visual cue that the internal thickeners have fully activated.
-
The Rest is Non-Negotiable: Letting the pie rest for that full hour allows the filling to set up properly. Slicing into a steaming hot pie will result in a soupy plate, no matter how perfectly you baked it.
Serving It Up
Serve this apple pie warm, either on its own or with a melting scoop of high-quality vanilla bean ice cream. The contrast of warm pie and cold, creamy ice cream is a classic for a reason. For a decadent twist, a drizzle of salted caramel sauce is sublime. Beverage-wise, a cup of strong black coffee, a glass of cold milk, or even a sweet dessert wine like a Riesling or Moscato makes for a perfect pairing.
Make It Different
-
Spice It Up: Add a pinch of nutmeg, allspice, or cardamom to the cinnamon for a more complex spice profile.
-
A Nutty Crunch: Toss half a cup of chopped walnuts or pecans in with the apples for added texture.
-
Dairy-Free/Vegan: Use a vegan pie crust and substitute the butter with plant-based butter and the egg wash with a brush of almond or oat milk.
-
Different Apples: While Granny Smith is ideal, you can use a mix of Honeycrisp for sweetness and Braeburn for tartness for a more nuanced flavor.
Storing and Reheating Your Masterpiece
Once completely cooled, cover the pie loosely with foil or plastic wrap and store it at room temperature for up to two days. For longer storage, refrigerate it for up to four days. To reheat and recapture that just-baked warmth and crispness, place a single slice or the whole pie in a 350°F oven for 10-15 minutes until warmed through. Avoid the microwave, as it will make the crust soft and chewy.
Success Tips for the Perfect Pie
-
Catch the Drips: Place a baking sheet or a piece of foil on the rack underneath your pie while it bakes. This will catch any bubbling-over juices and save you from a smoky oven and a messy cleanup.
-
Prevent Browning: If the edges of your crust are browning too quickly during the second half of baking, tent them loosely with strips of aluminum foil.
-
Apple Alternatives: While Granny Smith is the gold standard for its structure and flavor, other great options include Golden Delicious, Pink Lady, or a mix for a balanced sweet-tart profile.
Frequently Asked Questions
1. Can I make this pie ahead of time?
Absolutely. You can assemble the entire pie, cover it tightly, and refrigerate it for up to 24 hours before baking. You may need to add a few extra minutes to the baking time since it will be going into the oven cold.
2. Why is my filling runny?
This is usually due to one of two reasons: not letting the filling bubble actively for long enough during baking (this activates the thickeners), or not allowing the pie to rest for the full hour after baking, which is when the filling fully sets.
3. Can I use a store-bought crust?
You can. For the best results, look for a high-quality brand in the refrigerated section, not the frozen pie shells. The flavor and texture will be superior.
4. My bottom crust is soggy. How can I prevent that?
Starting with a chilled crust and baking the pie on the center rack in a properly preheated oven is key. The initial high heat helps to set the bottom crust quickly before the juices can soak in.
5. Can I freeze an unbaked apple pie?
Yes. Assemble the pie but do not apply the egg wash. Wrap it tightly in several layers of plastic wrap and foil. Freeze for up to 3 months. When ready to bake, bake from frozen, brushing with the egg wash first, and expect to add 20-30 minutes to the baking time.
Apple Pie Recipe
| Prep Time: 30 minutes | Cook Time: 1 hour |
| Total Time: 1 hour 30 minutes (plus resting) | Author: [Your Blog Name] |
| Servings: 8 | Category: Dessert |
| Difficulty: Intermediate | Cuisine: American |
| Yield: One 9-inch pie | |
Ingredients
-
1 recipe for double pie crust
-
2 1/4 lbs Granny Smith Apples, peeled and cored (6-7 apples, about 7 cups thinly sliced)
-
1 1/2 teaspoons ground cinnamon
-
8 Tablespoons (1 stick) unsalted butter
-
3 Tablespoons all-purpose flour
-
1/4 cup water
-
1 cup granulated sugar
-
1 egg, beaten with 1 Tablespoon water (for egg wash)
Instructions
-
Prepare your pie crust dough according to its recipe and ensure it is well-chilled.
-
Preheat your oven to 425°F (220°C).
-
In a medium saucepan over medium heat, melt the butter. Whisk in the flour and continue to whisk constantly for 1 minute to cook the flour. Whisk in the water and granulated sugar and bring the mixture to a boil. Reduce heat and simmer for 3 minutes, whisking frequently. Remove from heat.
-
Place the thinly sliced apples in a large bowl. Sprinkle with cinnamon and toss to coat. Pour the warm sauce over the apples and stir until the apples are evenly coated.
-
On a floured surface, roll one disc of pie dough into a 12-inch circle. Transfer it to a 9-inch pie plate.
-
Pour the apple filling into the crust, mounding it slightly in the center. Keep the filling away from the edges.
-
Roll the second disc of dough into an 11-inch circle. Cut into 10 even strips. Weave the strips over the filling to create a lattice pattern. Trim and crimp the edges.
-
Brush the entire lattice top with the egg wash.
-
Place the pie on the center oven rack and bake for 15 minutes. Then, reduce the oven temperature to 350°F (175°C) and continue to bake for 45 more minutes, or until the filling is actively bubbling through the vents and the crust is deep golden brown.
-
Remove the pie from the oven and let it cool on a wire rack for at least 1 hour before serving to allow the filling to set.
Nutrition Information (per serving, estimated):
Calories: 450 | Total Fat: 22g | Saturated Fat: 11g | Cholesterol: 55mg | Sodium: 200mg | Total Carbohydrates: 62g | Dietary Fiber: 4g | Sugars: 40g | Protein: 3g