Classic Chocolate Cake
The Only Classic Chocolate Cake Recipe You’ll Ever Need
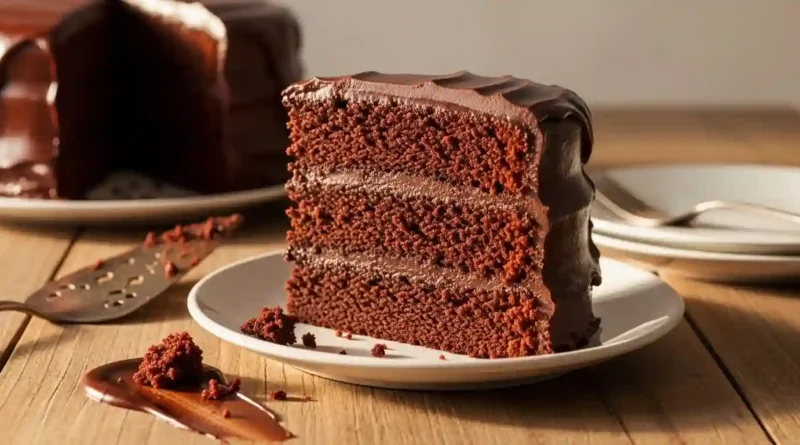
A Cake That Feels Like Home
I have a stack of cookbooks and a folder full of recipes, but when a birthday rolls around, a potluck is on the calendar, or I simply need a little comfort, my hand always reaches for this one, single, stained notecard. This classic chocolate cake is my culinary security blanket. It’s the one my grandmother would pull from the oven, its surface gleaming under a crackly, tender crust, filling the entire house with the warm, profound scent of cocoa and vanilla. It’s the cake that has seen me through celebrations and quiet afternoons alike. This isn’t just a recipe; it’s a memory waiting to be made in your own kitchen.
Why You’ll Love This Classic Chocolate Cake
-
It’s Unfailingly Reliable: This recipe uses the classic “reverse creaming” method, which results in a supremely tender, fine crumb with a velvety texture that never fails to impress.
-
It’s Deeply Chocolatey, Not Just Sweet: Using a combination of cocoa powder and hot coffee (don’t worry, you can’t taste the coffee!) intensifies the chocolate flavor to a rich, sophisticated level that satisfies a true cocoa craving.
-
It’s Incredibly Versatile: This cake is the perfect blank canvas. Dress it up with elegant frosting for a celebration or enjoy a simple, unfrosted slice with a glass of cold milk.
-
It Brings People Together: There’s something universally joyful about a slice of moist, homemade chocolate cake. It’s a guaranteed smile-maker.
I’ll never forget the time I brought this cake to a neighborhood gathering. My neighbor’s father, a man in his eighties known for his quiet demeanor and polite refusal of dessert, watched as the cake was sliced. He finally accepted a “small piece.” Ten minutes later, he was back, plate in hand, asking with a hopeful smile, “Is there any more of that real cake left?” It became our little joke, and I made sure he got the first slice every time after that.
What Makes It Special
-
Dutch-Processed Cocoa Powder: This type of cocoa is treated to neutralize its acidity, giving it a smoother, richer chocolate flavor that forms the deep, complex base of our cake.
-
Hot Brewed Coffee: This is the secret weapon! The hot liquid blooms the cocoa, releasing its full flavor potential, and the coffee itself enhances the chocolate notes without imparting a coffee taste.
-
Buttermilk & Vegetable Oil: This dynamic duo ensures an exceptionally moist and tender crumb. The buttermilk adds a subtle tang that balances the sweetness, while oil creates a softer texture than butter alone.
-
The Reverse Creaming Method: Instead of creaming butter and sugar first, we whisk the dry ingredients with the fats. This coats the flour particles, preventing too much gluten formation and resulting in a cake that is incredibly soft and delicate.
Making It Happen
First, preheat your oven and prepare your pans. Grease and line them with parchment paper for foolproof release later. Now, let’s build the batter. In the bowl of your stand mixer, whisk together the flour, sugar, cocoa, baking soda, baking powder, and salt. This ensures every ingredient is evenly distributed. With the mixer on low, slowly add the softened butter a few pieces at a time. The mixture will look like coarse, dark sand – that’s exactly what you want.
In a separate jug, combine the buttermilk, oil, eggs, and vanilla. Give it a good whisk until it’s smooth and homogenous. With the mixer still on low, slowly pour about half of this wet mixture into the dry ingredients. Let it mix for a minute; the batter will be very thick. Now, carefully pour in the hot coffee and the remaining wet ingredients. The batter will become thin and liquid – this is normal and promises a wonderfully moist cake.
Divide the thin batter evenly between your prepared pans. Slide them into the center of the oven and resist the urge to open the door! You’ll know the cakes are done when the tops are springy to the touch and a toothpick inserted into the center comes out with a few moist crumbs attached. Let them cool in the pans for just 10 minutes before turning them out onto a wire rack to cool completely. Patience is key here; a warm cake will melt your frosting.
You Must Know
-
Measure Your Flour Correctly: For the most accurate results, spoon your flour into the measuring cup and level it off. Scooping directly from the bag can pack in too much flour, leading to a dry cake.
-
Bring Ingredients to Room Temperature: This is non-negotiable for a smooth, emulsified batter that bakes up evenly. Cold ingredients can cause the batter to curdle.
-
Don’t Overmix: Once you add the wet ingredients, mix only until the batter is combined and smooth. Overmixing develops gluten and can make the cake tough.
-
Cool Completely Before Frosting: Applying frosting to a warm cake is a recipe for a melted, sliding mess. Let the cakes cool entirely for a perfect finish.
Serving It Up
This classic chocolate cake is sublime with a simple dusting of powdered sugar, but it truly shines when paired with a cloud of Vanilla Swiss Meringue Buttercream or a rich Dark Chocolate Ganache. For a decadent dessert, serve a slightly warmed slice with a scoop of vanilla bean ice cream and a drizzle of raspberry coulis. A glass of cold milk is the classic pairing, but a cup of strong black coffee or a glass of Cabernet Sauvignon also complements the deep chocolate notes beautifully.
Make It Different
-
Gluten-Free: Substitute a 1:1 gluten-free flour blend for the all-purpose flour.
-
Dairy-Free: Use your favorite plant-based milk mixed with a tablespoon of lemon juice or vinegar (to mimic buttermilk) and a dairy-free butter alternative.
-
Flavor Twists: Add a teaspoon of mint or orange extract to the batter. Or, fold in a cup of chocolate chips or chopped toasted nuts for texture.
-
Cupcakes: This recipe makes about 24 perfect cupcakes. Bake for 18-22 minutes.
Storing Your Masterpiece
An unfrosted cake can be stored, well-wrapped at room temperature, for up to 2 days. A frosted cake should be stored in a cake carrier or loosely covered in the refrigerator for up to 5 days. Let slices come to room temperature for about 30 minutes before serving for the best flavor and texture. You can also freeze the baked and cooled layers, tightly wrapped in plastic wrap and foil, for up to 3 months. Thaw overnight in the refrigerator.
Success Tips
For the flattest cake layers, use bake-even strips—they insulate the pan and promote even baking, preventing a domed top. If you don’t have them, a small spoonful of batter in the center of a Wilton cake nail placed upside down in the center of the pan works as a great DIY hack.
Frequently Asked Questions (FAQ)
Can I make this without coffee?
Absolutely. You can replace the hot coffee with an equal amount of hot water. The coffee simply enhances the chocolate flavor, but the cake will still be delicious without it.
My batter was very thin—is that right?
Yes! This recipe has a high liquid-to-dry ratio, which is the secret to its incredibly moist texture. It will bake up perfectly.
Can I use melted butter instead of oil?
You can, but the texture will be slightly different. Oil creates a more tender and moist crumb that stays soft for longer. Butter will give a firmer, more buttery flavor.
Why did my cake sink in the middle?
This is usually caused by underbaking, opening the oven door too early, or an incorrect amount of leavening (baking soda/powder). Make sure your ingredients are fresh and use the toothpick test to confirm it’s done.
How can I tell if my baking soda is still active?
Pour a small amount of vinegar over about 1/4 teaspoon of baking soda. If it doesn’t fizz and bubble vigorously, it’s time to replace it.
Classic Chocolate Cake Recipe
Prep Time: 30 minutes
Cook Time: 30-35 minutes
Total Time: 1 hour (plus cooling)
Servings: 12
Category: Dessert
Difficulty: Beginner
Cuisine: American
Yield: Two 8-inch round cake layers
Ingredients
-
2 cups (250g) all-purpose flour
-
2 cups (400g) granulated sugar
-
3/4 cup (75g) Dutch-processed cocoa powder
-
2 teaspoons baking soda
-
1 teaspoon baking powder
-
1 teaspoon fine sea salt
-
1 cup (240ml) buttermilk, room temperature
-
1/2 cup (120ml) vegetable oil
-
2 large eggs, room temperature
-
1 tablespoon pure vanilla extract
-
1 cup (240ml) hot brewed coffee
Instructions
-
Preheat oven to 350°F (175°C). Grease and line two 8-inch round cake pans with parchment paper.
-
In the bowl of a stand mixer fitted with the paddle attachment, whisk together the flour, sugar, cocoa, baking soda, baking powder, and salt.
-
With the mixer on low speed, add the softened butter a few pieces at a time. Mix until the mixture resembles coarse sand.
-
In a separate jug or bowl, whisk together the buttermilk, oil, eggs, and vanilla until smooth.
-
With the mixer on low, slowly pour in half of the wet ingredients. Mix for about 1 minute; the batter will be thick.
-
Carefully pour in the hot coffee and the remaining wet ingredients. Mix on medium-low speed just until the batter is smooth and combined, scraping down the sides as needed. The batter will be thin.
-
Divide the batter evenly between the prepared pans.
-
Bake for 30-35 minutes, or until a toothpick inserted into the center comes out with a few moist crumbs attached.
-
Let the cakes cool in the pans for 10 minutes before inverting them onto a wire rack to cool completely before frosting.
Notes
For a simple frosting, try whipping 1 1/2 cups of heavy cream with 1/2 cup of powdered sugar and 1/4 cup of cocoa powder until stiff peaks form.
Nutrition (per serving, unfrosted)
Calories: 325 | Carbohydrates: 55g | Protein: 5g | Fat: 12g | Saturated Fat: 8g | Cholesterol: 35mg | Sodium: 420mg | Fiber: 3g | Sugar: 35g
