Mini Pineapple Upside Down Cakes
Mini Pineapple Upside Down Cakes: Golden, Buttery, and Ready in Under an Hour
Introduction
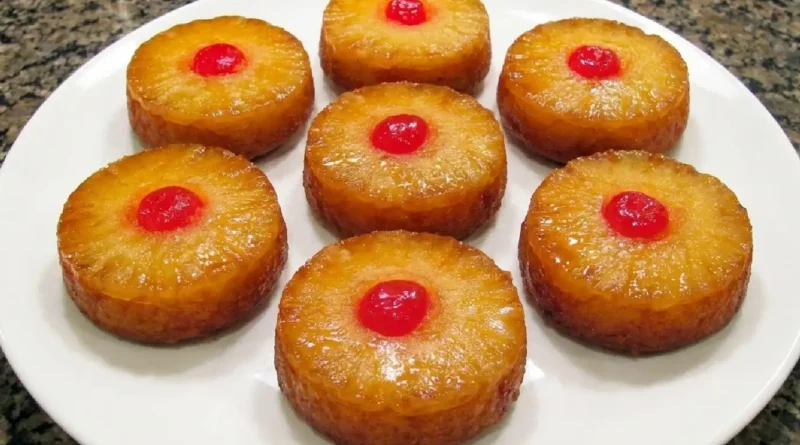
There is something quietly magical about pulling a pan of mini pineapple upside down cakes from the oven. The caramelized pineapple rings shimmer under a layer of amber brown sugar glaze, and the moment you flip them onto a rack, that warm, sticky sweetness hits your nose before your eyes even register what you are looking at.
I grew up watching my grandmother make a single large pineapple upside down cake in her cast iron skillet every Sunday. It was the kind of dessert that made the whole kitchen smell like a caramel-scented dream. But she always cut it into uneven wedges, and someone always ended up with a piece without a cherry. These mini versions solve that problem entirely. Every single cake gets its own golden pineapple crown and a maraschino cherry dead center. No arguments. No sad cherry-less slices.
These mini pineapple upside down cakes have become my go-to when I need something impressive without spending an entire afternoon in the kitchen. Individual portions bake faster, flip cleanly, and look like they came from a proper bakery. Whether you are hosting a dinner party or just want something sweet on a Tuesday, this recipe delivers every single time.
Why You’ll Love This
- Each cake is its own perfect portion, so presentation is effortless and no one fights over who got the best slice.
- The brown sugar and butter mixture that coats the bottom of each muffin cup transforms into a deeply rich, almost toffee-like glaze as it bakes.
- The batter comes together in one bowl with simple pantry staples, making cleanup fast and stress-free.
- Because they are individual-sized, they cool quickly and can be flipped and served within minutes of coming out of the oven.
- They are genuinely stunning without requiring any decorating skill whatsoever. The pineapple does all the work for you.
The Backstory
My brother-in-law, Marcus, is the kind of person who claims he does not like “fruity desserts.” Every holiday, he makes some offhand comment about preferring chocolate anything over fruit-based sweets. Last Fourth of July, I brought a platter of these mini pineapple upside down cakes to the backyard cookout, mostly for everyone else. I turned around from setting up the drinks, and Marcus had already eaten two of them before the burgers even came off the grill. When I pointed it out, he just shrugged and said, “These are different. The fruit tastes like candy.”
That is exactly the point. The pineapple in this recipe does not taste raw or sharp or overly tropical. It softens and concentrates under that buttery brown sugar mixture, becoming tender and syrupy, almost like a slow-cooked jam pressed right into the top of the cake. Even confirmed fruit-dessert skeptics tend to come around.
What Makes It Special
- Brown sugar and real butter form the glaze base. Together, they create a thick, caramel-like coating that seeps into the pineapple as it bakes, giving every bite a rich, toasty sweetness that plain white sugar simply cannot match.
- Canned pineapple rings are the practical hero here. They are pre-sliced to a consistent thickness, pack a concentrated pineapple flavor, and their natural juice can be stirred into the batter for an extra layer of fruitiness.
- Maraschino cherries add a pop of color and a gentle, candy-sweet contrast to the tangy pineapple. Visually, they anchor the whole presentation.
- Sour cream or buttermilk in the batter keeps the crumb moist and tender without making the cake feel heavy. It also balances the sweetness of the glaze.
- Vanilla extract ties everything together, rounding out the buttery, fruity notes and adding warmth to the overall flavor profile.
Making It Happen
Start by preheating your oven to 350 degrees Fahrenheit. While it warms up, place a standard 12-cup muffin pan on the counter and drop about half a teaspoon of softened butter into each cup. Follow that with a generous pinch of packed brown sugar, then use your fingertip to press a small pineapple ring into each cup. If the rings are too large to sit flat, simply trim them slightly or press them gently into shape. Tuck a maraschino cherry into the center of each ring and set the pan aside.
For the batter, whisk together your all-purpose flour, baking powder, a pinch of salt, and granulated sugar in a large bowl. In a separate smaller bowl, whisk together melted butter, eggs, sour cream (or buttermilk), a splash of the reserved pineapple juice, and vanilla extract until smooth and cohesive. Pour the wet ingredients into the dry ingredients and fold gently until just combined. Do not overmix. A few small lumps are perfectly fine and actually preferred. Overworking the batter develops gluten and can make the cakes tough.
Spoon the batter evenly over the pineapple and cherry layer in each muffin cup, filling each about two-thirds of the way full to leave room for rise. Slide the pan into the center rack of your preheated oven and bake for 18 to 22 minutes, until the tops are set and a toothpick inserted into the center comes out with just a few moist crumbs.
This next step is important: let the cakes cool in the pan for exactly five minutes. Not less, not more. Too short and the glaze is still liquid and will run everywhere. Too long and the caramel seizes up and the cakes stick. After five minutes, lay a large baking sheet or a piece of parchment over the top of the muffin pan and flip it in one confident, swift motion. Lift the pan off slowly, and the cakes should release cleanly with their glossy pineapple tops facing up.
You Must Know
- Cut the pineapple rings in half horizontally if you find they are too tall to sit flush in the muffin cups. A flat, even layer means a flat, even top on your finished cake.
- Room temperature eggs and sour cream blend into the batter far more smoothly than cold ones and help produce a more even crumb.
- Do not skip the butter in each muffin cup before the brown sugar. That layer of fat is what prevents sticking and creates the glossy glaze effect.
- If your cakes do stick after flipping, gently run a thin offset spatula or butter knife around the edge before attempting to unmold. A little patience goes a long way.
- Reserve the liquid from the canned pineapple. Swapping even two tablespoons of milk for pineapple juice in the batter adds a subtle, fruity depth that you will notice immediately.
Serving Ideas and Pairings
These mini cakes shine at room temperature, but they are genuinely extraordinary served slightly warm with a small scoop of vanilla bean ice cream melting over the top. The cold cream against the warm, sticky glaze creates a contrast that feels far more indulgent than the effort involved.
For a brunch spread, serve them alongside fresh berries, a lightly sweetened whipped cream, and good coffee. The brown sugar notes in the cake pair beautifully with a medium roast or a slightly nutty cold brew.
If you are serving them as a dinner party dessert, a glass of lightly sparkling Moscato d’Asti or a tropical fruit-forward cocktail makes a lovely pairing. The gentle effervescence cuts through the richness of the caramel glaze without competing with the pineapple flavor.
Make It Different
Gluten-free: Swap the all-purpose flour one-for-one with a certified gluten-free baking blend. Add a quarter teaspoon of xanthan gum if your blend does not already include it.
Dairy-free: Use melted coconut oil in place of butter throughout, and substitute full-fat coconut cream for the sour cream. The coconut notes actually complement the pineapple beautifully.
Fresh pineapple: If you have a ripe fresh pineapple, slice it into quarter-inch rounds and cut rounds to fit your muffin cups. Fresh pineapple tends to be less sweet and more acidic, which produces a brighter, more vibrant flavor.
Brown butter variation: Brown the butter for the glaze before adding it to the muffin cups. The nutty, toasty depth this adds to the caramel layer is worth the extra five minutes.
Rum glaze: Stir a tablespoon of dark rum into the melted butter and brown sugar mixture before spooning it into the muffin cups. The alcohol bakes off, leaving behind a warm, complex molasses note.
Upside down cherry cakes: Replace the pineapple with pitted fresh cherries or canned sour cherries for a completely different but equally gorgeous variation. Pair with almond extract instead of vanilla in the batter.
Storage and Reheating
Mini pineapple upside down cakes keep well at room temperature, loosely covered, for up to two days. The glaze stays glossy and the crumb remains moist without refrigeration.
For longer storage, place them in an airtight container and refrigerate for up to five days. The cold does firm up the caramel layer, so bring them to room temperature before serving or warm them gently.
To reheat, place individual cakes on a microwave-safe plate and microwave for 15 to 20 seconds. This softens the glaze and warms the crumb without drying things out. Alternatively, set them on a baking sheet in a 300-degree oven for about eight minutes.
These cakes freeze surprisingly well. Wrap each one individually in plastic wrap and store in a zip-top freezer bag for up to two months. Thaw overnight in the refrigerator and warm before serving.
Success Tips
The single most important variable in this recipe is the five-minute rest before flipping. That window allows the glaze to firm up just enough to cling to the pineapple without running, but not so much that it hardens and causes sticking. Set a timer the moment the pan comes out of the oven.
When you spoon the batter over the pineapple, work slowly and deliberately. If you pour too quickly, the maraschino cherry can shift off-center. Use the back of the spoon to spread the batter gently outward from the center.
Uniformity matters here. Try to fill each muffin cup with the same amount of batter so all twelve cakes bake at the same rate. An ice cream scoop with a release lever makes this almost foolproof.
Finally, keep an eye on color rather than time alone. Oven temperatures vary, and the visual cue of a lightly golden, fully set top is more reliable than the clock. When the edges pull away from the sides of the muffin cups and the center no longer jiggles, they are ready.
Frequently Asked Questions
Can I make these ahead of time?
Yes, and they actually travel quite well. Bake them the night before, store them loosely covered at room temperature, and serve the next day. The glaze sets nicely overnight and the cakes stay moist. If you need more than a day of lead time, refrigerate and bring to room temperature before serving.
My cakes stuck to the pan. What went wrong?
This usually comes down to two things: not enough butter in the cups before the brown sugar, or waiting too long to flip. Make sure you are coating each cup thoroughly with softened butter before adding the sugar and pineapple. And aim to flip right at the five-minute mark, not ten or fifteen.
Can I use a silicone muffin pan instead of metal?
You can, but the results will differ. Metal pans conduct heat more aggressively, which is what creates that deeply caramelized, slightly crisp edge on the glaze. Silicone distributes heat more gently, so your glaze may be lighter in color and softer in texture. Both work, but the metal pan gives the more dramatic, traditional result.
What size pineapple rings work best?
Standard-cut canned pineapple rings are usually the right size for a standard 12-cup muffin pan. If they seem too wide, trim the edges with a paring knife or a small round cookie cutter. The ring should sit flat inside the cup without curling up the sides.
Can I double this recipe?
Absolutely. Simply double every ingredient and bake in two standard muffin pans simultaneously, rotating the pans halfway through to ensure even baking. If your oven runs hot, you may want to check for doneness a minute or two early.
Recipe Card
Recipe Name: Mini Pineapple Upside Down Cakes
Prep Time: 15 minutes
Cook Time: 20 minutes
Total Time: 35 minutes
Servings: 12 mini cakes
Category: Dessert
Difficulty: Easy
Cuisine: American
Yield: 12 individual mini cakes
Equipment
- Standard 12-cup metal muffin pan
- Two mixing bowls (one large, one medium)
- Whisk
- Rubber spatula or wooden spoon
- Ice cream scoop (optional, for even portioning)
- Cooling rack or large baking sheet for flipping
Ingredients
For the Pineapple Topping:
- 4 tablespoons unsalted butter, softened and divided
- 1/2 cup packed light brown sugar
- 1 can (20 oz) pineapple rings in juice, drained (reserve the juice)
- 12 maraschino cherries, drained and patted dry
For the Cake Batter:
- 1 1/2 cups all-purpose flour
- 1 teaspoon baking powder
- 1/4 teaspoon fine sea salt
- 3/4 cup granulated sugar
- 2 large eggs, room temperature
- 1/3 cup unsalted butter, melted and slightly cooled
- 1/2 cup full-fat sour cream or buttermilk, room temperature
- 2 tablespoons reserved pineapple juice
- 1 teaspoon pure vanilla extract
Directions
- Preheat your oven to 350 degrees Fahrenheit (175 degrees Celsius). Generously grease a standard 12-cup metal muffin pan with nonstick spray or additional softened butter.
- Divide the 4 tablespoons of softened butter evenly among the muffin cups, about 1/3 teaspoon per cup. Sprinkle roughly 2 teaspoons of packed brown sugar over the butter in each cup.
- Trim or press pineapple rings to fit flat inside each muffin cup. Place one ring per cup over the brown sugar layer. Set a maraschino cherry in the center of each pineapple ring.
- In a large bowl, whisk together the flour, baking powder, salt, and granulated sugar until well combined.
- In a separate medium bowl, whisk together the melted butter, eggs, sour cream, reserved pineapple juice, and vanilla extract until smooth.
- Pour the wet ingredients into the dry ingredients and fold with a rubber spatula until just combined. Stop mixing when no dry flour streaks remain. A few small lumps are fine.
- Using a spoon or ice cream scoop, distribute the batter evenly over the pineapple layer in each muffin cup, filling each about two-thirds full.
- Bake on the center rack for 18 to 22 minutes, until the tops are golden and set, and a toothpick inserted into the center comes out with just a few moist crumbs.
- Remove the pan from the oven and let the cakes rest in the pan for exactly 5 minutes.
- Place a large baking sheet or piece of parchment paper over the top of the muffin pan. In one swift, confident motion, flip the pan over. Lift the pan off slowly, allowing the cakes to release.
- If any pineapple sticks to the pan, use a spoon to scoop it out and press it back onto the top of the corresponding cake.
- Serve warm or at room temperature.
Notes
- For deeper caramel flavor, use dark brown sugar in place of light brown sugar.
- If any cakes resist releasing, gently run a thin knife around the edge before flipping.
- Pineapple juice from the can is the secret ingredient in the batter. Do not skip it.
- These cakes are best served the day they are made, but remain excellent for up to two days at room temperature.
- For a festive variation, use dark rum in place of pineapple juice in the batter.
Nutrition (Per Mini Cake, Approximate)
- Calories: 245
- Total Fat: 11g
- Saturated Fat: 6.5g
- Cholesterol: 55mg
- Sodium: 90mg
- Total Carbohydrates: 35g
- Dietary Fiber: 0.5g
- Total Sugars: 23g
- Protein: 3g
Nutrition values are estimates based on standard ingredients and may vary depending on specific brands and substitutions used.
