Oven Baked Bbq Ribs
Finger-Licking Good: Oven Baked BBQ Ribs Recipe
Are you a fan of BBQ ribs, but don’t have access to a grill or smoker? No problem! With this oven baked BBQ ribs recipe, you can enjoy tender, flavorful ribs that are cooked to perfection right in your own kitchen. In this article, we will guide you through every step of the process, from selecting the right cut of meat to preparing a mouth-watering dry rub, and finally, to baking the ribs to perfection.
Selecting the Right Cut of Meat
The first step in making oven baked BBQ ribs is selecting the right cut of meat. We recommend using baby back ribs or St. Louis style ribs for this recipe. These cuts are tender and flavorful, and they cook well in the oven.
When selecting your ribs, look for meat that is fresh and has a good amount of fat marbling. The fat will help keep the meat moist and tender during the cooking process.
Preparing the Dry Rub
A good dry rub is the key to flavorful BBQ ribs. To make the perfect dry rub, you will need:
- 1/4 cup brown sugar
- 2 tablespoons paprika
- 1 tablespoon garlic powder
- 1 tablespoon onion powder
- 1 tablespoon chili powder
- 1 tablespoon cumin
- 1 tablespoon salt
- 1 teaspoon black pepper
Mix all of these ingredients together in a bowl. This will create a dry rub that is smoky, spicy, and sweet all at once.
Applying the Dry Rub to the Ribs
Once you have your dry rub ready, it’s time to apply it to the ribs. Start by removing the membrane from the back of the ribs. This will help the dry rub penetrate the meat better and create more flavor.
Next, generously coat the ribs with the dry rub, making sure to cover all sides evenly. Use your hands to press the rub into the meat, so it adheres well.
Marinating the Ribs
To take the flavor of your BBQ ribs to the next level, you can marinate them in the dry rub for several hours or even overnight. Place the ribs in a large plastic bag, add any remaining dry rub, and seal the bag. Then, place the bag in the refrigerator and let the ribs marinate for at least 2 hours or up to 24 hours.
Preparing the Ribs for Baking
When you’re ready to bake the ribs, remove them from the refrigerator and let them sit at room temperature for about 30 minutes. This will help them cook more evenly.
Preheat your oven to 275°F. Line a large baking sheet with aluminum foil and place the ribs on the sheet, meaty side up. Cover the ribs with another sheet of aluminum foil and seal the edges tightly. This will create a steamy environment that will help the ribs cook to tender perfection.
Baking the Ribs
Place the baking sheet in the preheated oven and let the ribs cook for 3 to 4 hours, depending on the size of the ribs. After the first 2 hours, check on the ribs and add a little bit of a liquid to the baking sheet if it looks dry. You can use water, apple juice, or beer for added flavor.
The ribs are done when they are tender and the meat easily pulls away from the bone. If you’re unsure if they’re done, use a meat thermometer to check the internal temperature. The ribs should reach 190°F when they’re fully cooked.
Making the BBQ Sauce
While the ribs are baking, you can prepare the BBQ sauce. Here’s what you’ll need:
- 1 cup ketchup
- 1/2 cup brown sugar
- 1/4 cup apple cider vinegar
- 2 tablespoons Worcestershire sauce
- 2 teaspoons smoked paprika
- 1 teaspoon garlic powder
- 1/2 teaspoon onion powder
- 1/4 teaspoon cayenne pepper
- Salt and black pepper to taste
Combine all of the ingredients in a small saucepan and bring to a simmer over medium heat. Reduce the heat to low and let the sauce simmer for about 10 minutes, stirring occasionally.
Applying the BBQ Sauce to the Ribs
When the ribs are fully cooked, remove them from the oven and increase the temperature to 425°F. Carefully remove the top layer of aluminum foil from the baking sheet and brush the ribs generously with the BBQ sauce.
Return the ribs to the oven, uncovered, and let them cook for another 10 to 15 minutes, until the sauce is caramelized and sticky.
Broiling the Ribs
For an extra crispy finish, you can broil the ribs for a few minutes before serving. Simply turn on your broiler and place the baking sheet under it for 1 to 2 minutes, until the ribs are browned and crispy on top.
Serving and Enjoying Your Delicious BBQ Ribs
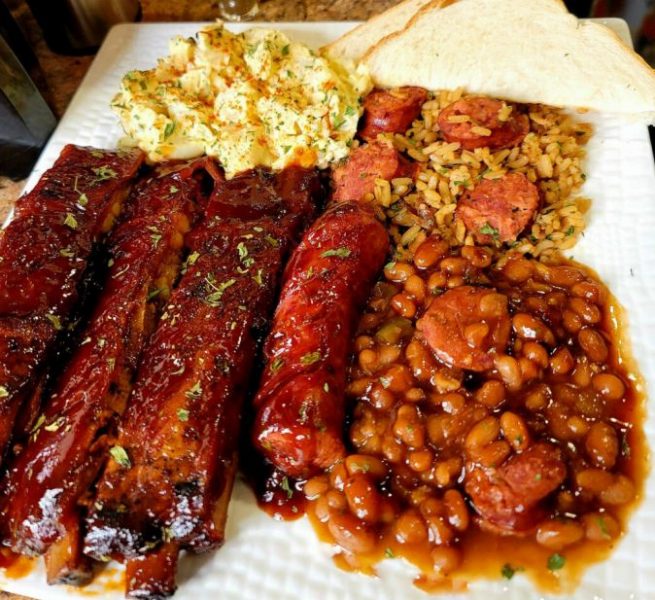
Once the ribs are done, remove them from the oven and let them rest for a few minutes. Then, transfer them to a cutting board and cut them into individual ribs.
Serve the ribs with extra BBQ sauce on the side and your favorite sides, such as coleslaw, baked beans, or cornbread.
Tips for Success
- Remove the membrane from the back of the ribs for more flavorful meat.
- Marinate the ribs in the dry rub for at least 2 hours for maximum flavor.
- Make sure to tightly seal the aluminum foil around the ribs to create a steamy environment for baking.
- Use a meat thermometer to check the internal temperature of the ribs for doneness.
- Broil the ribs for a few minutes for an extra crispy finish.
Frequently Asked Questions (FAQs)
- Can I use a different cut of meat for this recipe?
- While we recommend baby back ribs or St. Louis style ribs for this recipe, you can use other cuts of meat as well. Just keep in mind that cooking times may vary.
- Can I make this recipe without a dry rub?
- While the dry rub is an important part of this recipe, you can still make delicious BBQ ribs without it. Simply season the ribs with salt and pepper instead.
- Can I make the BBQ sauce ahead of time?
- Yes, you can make the BBQ sauce up to a week ahead of time and store it in an airtight container in the refrigerator.
- Can I freeze the cooked ribs?
- Yes, you can freeze the cooked ribs for up to 3 months. Simply wrap them tightly in foil and place them in a freezer-safe bag or container.
- Can I make this recipe in advance?
- Yes, you can prepare the ribs and dry rub in advance, and store them in the refrigerator until you’re ready to bake them.
Conclusion
With this oven baked BBQ ribs recipe, you can enjoy tender, flavorful, and delicious ribs without having to use a smoker or grill. By using a dry rub, creating a steamy environment for baking, and adding a homemade BBQ sauce, you’ll have a crowd-pleasing meal in no time.
Don’t forget to remove the membrane from the back of the ribs, marinate them in the dry rub, and tightly seal them with aluminum foil before baking. And for an extra crispy finish, broil the ribs for a few minutes before serving.
Serve your oven baked BBQ ribs with your favorite sides and extra BBQ sauce on the side. And with these helpful tips and frequently asked questions, you’ll be sure to impress your guests with your BBQ skills.
So fire up your oven, grab some ribs, and get ready to enjoy some finger-licking good BBQ!


