Peppermint Crisp Cheesecake
The Ultimate Peppermint Crisp Tart Cheesecake Recipe: A Creamy Twist on a Classic
There is a specific kind of magic that happens when the scent of peppermint and caramel fills a kitchen. For many of us, the traditional Peppermint Crisp tart is the undisputed king of Sunday lunches and family gatherings. It is a nostalgic staple, but sometimes, a special occasion calls for something with a bit more height, a bit more decadence, and a velvety finish that only a baked cheesecake can provide.
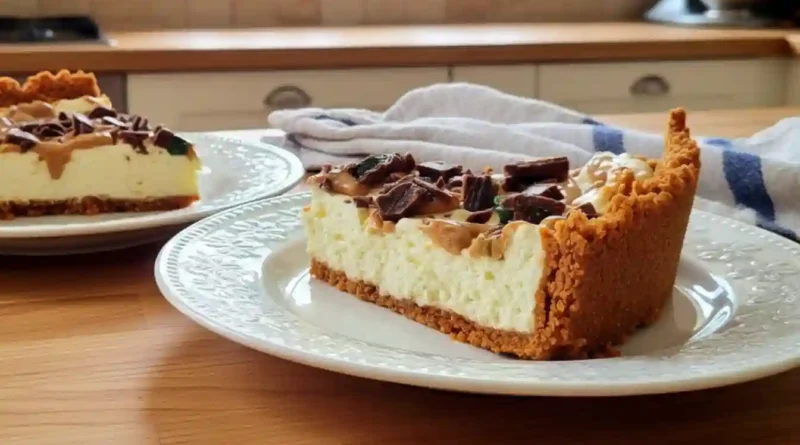
This Peppermint Crisp tart cheesecake is my love letter to those childhood memories. Imagine the iconic crunch of mint-infused chocolate and the deep, buttery notes of coconut biscuits, but swirled into a sophisticated, silky filling of cream cheese and ricotta. It is rich without being heavy, thanks to a hit of lemon zest that cuts through the sweetness of the caramel. Every bite is a journey through textures: the sandy crunch of the base, the cloud-like center, and that signature peppermint shatter on top.
Why You’ll Love This
-
The Perfect Texture Balance: By blending full-fat cream cheese with ricotta, you get a cheesecake that is remarkably light and airy rather than dense or cloying.
-
Zero-Cracking Confidence: Using an Instant Pot to “bake” this cheesecake creates a humid environment that ensures a perfectly smooth surface every single time.
-
Nostalgia in Every Bite: It carries all the beloved flavors of the classic South African tart but elevates them into a show-stopping dessert.
-
Make-Ahead Brilliance: This dish actually tastes better after a night in the fridge, making it the ultimate stress-free dessert for entertaining.
I once served this to my uncle, a man who believes that any “modern” take on a traditional recipe is a personal affront. He sat down at the table, skeptical of the height and the visible flecks of lemon zest. He took one bite, went silent for a full minute, and then reached for the serving spoon to help himself to a second slice before anyone else could finish their first. He admitted later that while he loved the original, the “fancy” cheesecake version had officially ruined him for the store-bought variety.
What Makes It Special
-
Tennis Biscuits: These coconut-flavored biscuits provide a unique, tropical toasted note to the base that plain graham crackers simply cannot match.
-
Caramel Treat: This thick, canned dulce de leche is the soul of the dish, providing a deep, toffee-like sweetness.
-
Peppermint Crisp Bars: The bright green, crystalline mint centers of these chocolate bars offer a refreshing contrast to the rich dairy.
-
Creme Fraiche & Lemon: Adding these to the topping provides a sophisticated tang that balances the sugar, ensuring the dessert isn’t “too sweet.”
Making It Happen
The journey to the perfect Peppermint Crisp tart cheesecake begins with the base. You’ll pulse those golden Tennis biscuits into fine crumbs, mixing them with melted butter until the mixture feels like wet sand. Pressing this firmly into your tin is key—use the bottom of a flat glass to get it even and tight, then let it chill in the freezer to firm up while you focus on the star of the show.
For the filling, simplicity is your friend. You’ll whirl the cream cheese, ricotta, sugar, and aromatics in a food processor until the mixture is glossy and completely smooth. Once you pour this over your chilled base, the Instant Pot takes over. By pressure cooking the cheesecake, you are essentially giving it a gentle steam bath. This results in a texture that is impossibly creamy and consistent from the edges right to the center.
The final flourish happens once the cake has chilled and set. You’ll whip together the Caramel Treat and creme fraiche to create a thick, luscious blanket. Slather this over the top and finish with a generous shower of crushed Peppermint Crisp. The result is a towering, beautiful dessert that looks as good as it tastes.
You Must Know
-
Room Temperature is Non-Negotiable: Ensure your cream cheese, ricotta, and eggs are at room temperature before mixing. Cold ingredients lead to a lumpy batter.
-
The Foil Shield: Wrapping the outside of your loose-bottomed tin in foil is vital to prevent any water from the Instant Pot from seeping into your buttery crust.
-
The Wobble Factor: When the timer goes off, the center should still have a slight jiggle. It will firm up perfectly as it cools in the refrigerator.
Serving Ideas
This cheesecake is a star on its own, but it pairs beautifully with a strong, dark roast coffee or a hot cup of Rooibos tea to lean into those South African roots. If you want to lean into the indulgence, serve it with a side of extra caramel sauce or a dollop of whipped cream.
Make It Different
-
The Chocolate Swap: If you can’t find Peppermint Crisp, you can use high-quality mint-infused dark chocolate shards, though you’ll miss the iconic green “crunch” centers.
-
The Base: For a deeper flavor, swap the Tennis biscuits for ginger snaps or chocolate digestive biscuits.
-
Low-Sugar Tweak: Use a sugar alternative in the cheesecake filling, though the topping requires the authentic Caramel Treat for the correct flavor profile.
Storage and Recipe Tips
Store your Peppermint Crisp tart cheesecake in the refrigerator in an airtight container for up to 5 days. I do not recommend freezing this specific recipe, as the texture of the caramel topping and the ricotta in the filling can change significantly once thawed.
Always wait until just before serving to add the final sprinkle of crushed Peppermint Crisp. The mint centers are sensitive to moisture and will eventually start to melt or “weep” if they sit on the caramel topping for too long in the fridge.
Success Tips
-
Don’t Over-Mix: Once you add the eggs to the processor, blend just until combined. Over-mixing incorporates too much air, which can cause the cheesecake to puff up and then sink.
-
Patience is Key: It is tempting to slice into it early, but a minimum of 6 hours (ideally overnight) in the fridge is essential for the flavors to meld and the structure to set.
-
Clean Slices: To get professional-looking slices, dip a sharp knife in hot water and wipe it dry between every single cut.
Frequently Asked Questions
Can I make this in a regular oven?
Yes. You can bake it at 150°C (300°F) in a water bath for about 50–60 minutes, or until the edges are set but the center still wobbles.
What is Caramel Treat?
It is a canned, pre-cooked sweetened condensed milk, often sold as “dulce de leche.” It has a thick, spreadable consistency.
Why use ricotta and cream cheese?
The ricotta adds a subtle grain and lightness that prevents the cheesecake from feeling too heavy or “sticky” on the palate.
Is the lemon juice necessary?
Absolutely. It acts as a flavor enhancer, brightening the dairy and making the peppermint notes pop.
My cheesecake looks soft in the middle, is it undercooked?
If it has a slight wobble like jelly, it is perfect. If it looks liquid, it may need a few more minutes. Remember, it firms up significantly during the cooling process.
Peppermint Crisp Tart Cheesecake
Prep time: 20 minutes
Cook time: 30 minutes
Total time: 50 minutes (plus chilling time)
Servings: 8–10
Category: Dessert
Difficulty: Medium
Cuisine: South African Fusion
Yield: 1 x 18cm Cheesecake
Equipment: 18cm loose-bottomed cake tin, Food processor, Instant Pot, Foil, Trivet.
Ingredients
Base
-
200 g tennis biscuits
-
70 g butter, melted
Filling
-
250 g full-fat cream cheese, at room temperature
-
250 g ricotta, at room temperature
-
90 g fine demerara sugar or castor sugar
-
2 eggs plus 1 egg yolk
-
20 ml corn flour
-
15 ml lemon juice
-
5 ml vanilla extract
-
2.5 ml salt
-
Finely grated zest of 1 lemon
Topping
-
1 tin caramel treat
-
125 ml creme fraiche
-
10 ml lemon juice
-
Good pinch of salt
-
1 large slab Peppermint Crisp, crushed into small pieces
Instructions
-
Grease an 18cm loose-bottomed cake tin and line the base with baking paper. Wrap the outside of the tin tightly with a double layer of foil to ensure it is water-tight.
-
Place the Tennis biscuits in a food processor and blitz until they reach a fine crumb consistency. Add the melted butter and pulse until the mixture resembles wet sand.
-
Tip the biscuit mixture into the prepared tin. Press firmly over the base and slightly up the sides using the bottom of a glass. Place the tin in the freezer to set while you prepare the filling.
-
Clean the food processor, then add all the filling ingredients. Process until the mixture is completely smooth and creamy.
-
Pour the filling into the biscuit-lined tin.
-
Pour 250ml (1 cup) of water into the Instant Pot. Place the trivet on the base and carefully lower the cake tin onto the trivet.
-
Close the lid, set the valve to “Sealing,” and select the Pressure Cook program on High pressure for 30 minutes.
-
Once the cooking time is finished, allow a natural pressure release for 10 minutes. Then, carefully release any remaining steam.
-
Remove the lid; the cheesecake should have a slight wobble in the middle. Lift the tin out and place it on a wire rack.
-
Cool to room temperature, then transfer to the fridge for at least 6 hours (preferably overnight) to set.
-
For the topping, place the Caramel Treat, creme fraiche, lemon juice, and salt in a bowl. Beat with a whisk or electric mixer until smooth and thick.
-
Gently spoon the caramel mixture over the set cheesecake, spreading it to the edges.
-
Generously sprinkle the crushed Peppermint Crisp over the top. Serve any remaining caramel mixture on the side.
Nutrition (Per Serving)
-
Calories: 485 kcal
-
Total Fat: 28g
-
Carbohydrates: 42g
-
Protein: 8g
Would you like me to suggest some alternative topping decorations or perhaps a version of this recipe that uses a different chocolate bar?
