Crispy Garlic Roasted Baby Potatoes
Crispy Garlic Roasted Baby Potatoes Recipe That Everyone Will Ask For
Introduction
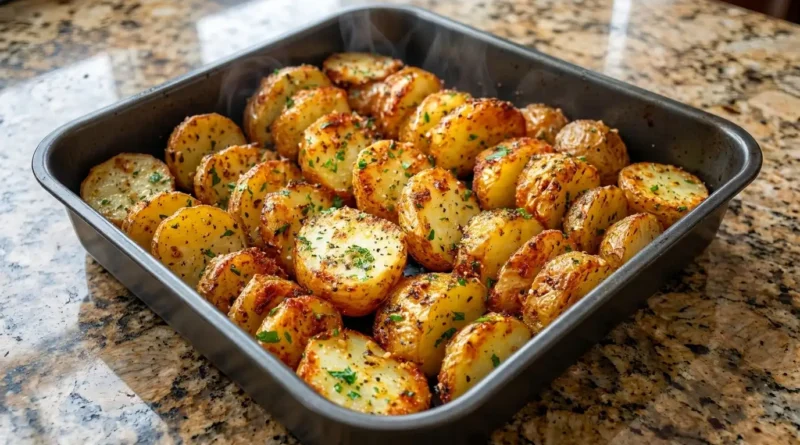
There is something quietly satisfying about a tray of baby potatoes pulled straight from a hot oven. The skin crackles. The garlic blooms. That sharp, toasty scent fills the kitchen before you even get close enough to taste one. This Crispy Garlic Roasted Baby Potatoes recipe is the kind of dish you make once, and then you make it forever.
I started making these on a rainy Thursday when I needed something fast, filling, and absolutely foolproof. No complicated technique. No fancy equipment. Just olive oil, fresh garlic, a handful of herbs, and potatoes small enough to cook whole. What came out of the oven was golden-edged, tender inside, and so fragrant that my partner wandered into the kitchen mid-meeting just to investigate. That was two years ago. They have been on our weekly rotation ever since.
This recipe works as a side, a snack, or even the star of a vegetarian spread. Once you understand the method — the smash, the coat, the high-heat roast — you will wonder why you ever bothered doing potatoes any other way.
Why You’ll Love This
- These potatoes are ready in under 45 minutes, which makes them perfect for weeknight dinners when time is short but flavor still matters.
- The technique of smashing the potatoes before roasting creates uneven, craggy surfaces that turn wonderfully crisp in the oven without any frying.
- Garlic and olive oil are pantry staples, meaning you can pull this recipe together without a special grocery run.
- They reheat beautifully the next day, staying crispy in a hot skillet or air fryer, unlike most roasted vegetables that go limp.
- This dish adapts easily — add paprika for a smoky edge, toss in fresh rosemary, or finish with parmesan for a richer, nuttier result.
The Backstory
My mother-in-law does not eat potatoes. She never has. She grew up in a household where potatoes were boiled until gray and served without ceremony, and she wrote them off entirely sometime in her twenties. When she came to visit last winter, I made these without thinking, mostly because they are what I make when I have not planned anything. She took one off the tray before they even hit the serving bowl, skeptical but polite. Then she took another. By the time we sat down to eat, she had eaten four standing at the counter and quietly asked how they were made. That is the power of a properly roasted potato. It does not announce itself. It just converts people.
What Makes It Special
- Baby potatoes: Small, waxy, and naturally buttery. Their thin skins crisp up fast and their interiors stay creamy without becoming waterlogged. Yukon Golds and red baby potatoes both work beautifully here.
- Fresh garlic: Not garlic powder, not pre-minced from a jar. Fresh cloves, roughly chopped or thinly sliced, so they roast alongside the potatoes and turn golden and slightly caramelized at the edges.
- Good olive oil: It coats every surface and carries the heat evenly across the pan, which is what produces that deep, amber crust.
- Flaky sea salt: Added at the end, not just before roasting. The texture contrast against the soft interior is part of what makes each bite so satisfying.
- Fresh herbs: Rosemary, thyme, or flat-leaf parsley — whatever you have. They add a layer of verdant, aromatic brightness that dried herbs cannot fully replicate.
Making It Happen
Start by preheating your oven to 220°C (425°F). High heat is not negotiable here — it is what separates a properly crispy potato from a merely soft one. While the oven climbs to temperature, bring a pot of well-salted water to a boil and add your baby potatoes whole. Boil them for around 12 to 15 minutes, until a knife slides in with only light resistance. You want them cooked through but not falling apart.
Drain the potatoes and let them sit uncovered for a few minutes. This steam-drying step matters more than it seems. Wet potatoes do not crisp; they steam instead of roast. Spread them across a heavy baking sheet — one with some rim to it — and use the flat bottom of a glass or a fork to gently press each potato until it splits open and flattens slightly. You are not mashing them; you are creating surface area.
Drizzle generously with olive oil. Scatter your fresh garlic across the tray. Add salt, black pepper, and whatever herbs you are working with. Toss everything together so each potato is well coated, then spread them in a single layer with enough space between each one so they roast rather than steam.
Slide the tray into the lower-middle rack and roast for 20 to 25 minutes, turning once about halfway through. In the last five minutes, watch them closely. The garlic should be golden and fragrant, the potato skins deeply browned at their edges. Pull them when they look almost too crispy to be true. They usually are exactly right.
Finish with flaky sea salt and a scatter of fresh parsley or chives. Serve immediately, straight from the pan.
You Must Know
- Do not skip the par-boiling step. It is tempting to go straight from raw potato to oven, but you will end up with a tough, unevenly cooked result. The pre-boil ensures a creamy interior before the exterior has a chance to harden.
- Give the potatoes room on the tray. Crowding is the single most common mistake in roasting. Overlapping potatoes trap moisture and end up soft rather than crispy.
- Use a heavy pan, not a thin one. A dark, heavy baking sheet conducts heat better and produces more even browning across the bottom of each potato.
- Add the garlic at the same time as the potatoes, not earlier. Garlic burns fast on a hot tray, and burnt garlic turns bitter in a way that is hard to fix.
- Season in layers — salt the boiling water, season again before roasting, and finish with flaky salt at the end. Each layer builds depth.
Serving Ideas and Pairings
These roasted baby potatoes are built to sit beside almost anything. They pair naturally with grilled chicken thighs, a simple roasted salmon fillet, or a slow-braised lamb shoulder. For a vegetarian plate, serve them alongside a roasted beet salad, a creamy hummus dip, or charred broccolini with lemon.
For beverages, a crisp dry white wine — a Sauvignon Blanc or an unoaked Chardonnay — cuts through the richness of the olive oil nicely. If you prefer something non-alcoholic, a sparkling water with lemon or a cold hibiscus iced tea brings a clean, citrusy contrast to the savory, garlicky warmth of the potatoes.
They also work as appetizers at a casual gathering. Arrange them on a board with a small bowl of aioli or Greek yogurt dip alongside, and watch them disappear before the main event arrives.
Make It Different
For a smoky version: Add a teaspoon of smoked paprika to the olive oil before tossing. It adds warmth and color without heat, and works especially well with red baby potatoes.
For a cheesy finish: In the final five minutes of roasting, scatter finely grated parmesan or pecorino over the tray. It melts, crisps at the edges, and creates a salty, nutty crust on each potato.
For a spicy kick: Add a pinch of crushed red pepper flakes or a half teaspoon of cayenne to the oil. Finish with a light drizzle of chili oil when serving.
For a vegan version: This recipe is already naturally vegan as written. Confirm your salt is additive-free and skip any cheese additions.
For a lower-oil version: Use an oil spray rather than a free-pour. You still get crispiness, though the result will be slightly less rich.
Swap the herbs: Try dill and lemon zest for a brightness that works beautifully in warmer months, or sage and brown butter drizzled over just before serving for a more autumnal feel.
Storage and Reheating
Leftover roasted potatoes keep well in an airtight container in the refrigerator for up to four days. The skin will soften overnight but the flavor deepens, which is its own kind of consolation.
To reheat and restore crispiness, spread them in a single layer in a dry skillet over medium-high heat and cook for four to five minutes, turning once, until the exterior crisps up again. An air fryer at 190°C (375°F) for about six minutes works equally well and requires even less attention.
Avoid reheating in the microwave if you want any texture back. It warms them through but produces a steamed, soft result that does not do the original any justice.
Success Tips
The potatoes smash better when they are still warm. If you let them cool completely before pressing, the skins sometimes tear unevenly and the potato can crumble rather than flatten cleanly.
Use a combination of garlic styles if you want layered flavor. Roughly chop some cloves for pieces that caramelize and crisp in the oven, and finely mince a small amount to stir into the oil beforehand so the flavor gets into every surface.
If your oven runs cool, consider using the broiler for the last three minutes rather than extending the bake time. It produces a more dramatic crust on the top without overcooking the interior.
Choose potatoes that are roughly the same size. Uneven sizes mean uneven cooking — some potatoes will be overdone before others have finished.
Finally, taste a potato before you add the final flaky salt. The salt in the boiling water and the seasoning before roasting may already be enough depending on your preferences and your salt’s intensity.
Frequently Asked Questions
Can I make these ahead of time? Yes. Par-boil and smash the potatoes up to 24 hours in advance, then store them covered in the refrigerator. When you are ready to cook, toss them in oil and garlic and roast straight from cold — just add five extra minutes to the roasting time.
What type of potato works best? Waxy baby potatoes are ideal — Yukon Gold, red bliss, or fingerlings all work. They hold their shape after boiling and their thin skins crisp beautifully. Starchy potatoes like russets tend to fall apart during the smashing step.
Can I make this without boiling the potatoes first? Technically yes, but the results are less reliable. Without par-boiling, the interior often stays firm or undercooked while the outside chars. The par-boiling step is what guarantees that creamy, fluffy center under the crispy skin.
How do I keep the garlic from burning? Place garlic pieces on top of or against the potatoes rather than directly on the bare pan surface. The potatoes act as a buffer. You can also add the garlic for the final 15 minutes of roasting rather than the full cooking time if your oven runs particularly hot.
Can I cook these in an air fryer instead? Absolutely. After par-boiling and smashing, toss them in oil and garlic, then air fry at 200°C (400°F) for 15 to 18 minutes, shaking the basket halfway through. The result is very crispy and works well for smaller batches.
Recipe Card
Recipe Name: Crispy Garlic Roasted Baby Potatoes
Prep Time: 10 minutes
Cook Time: 35 minutes (including par-boil)
Total Time: 45 minutes
Servings: 4
Category: Side Dish
Difficulty: Easy
Cuisine: International / Everyday
Yield: Approximately 4 generous side portions
Equipment
- Large pot for boiling
- Colander
- Heavy rimmed baking sheet (dark or stainless)
- Flat-bottomed glass or fork for smashing
- Mixing bowl or large spoon for tossing
Ingredients
- 700g (1.5 lbs) baby potatoes, Yukon Gold or red bliss, washed
- 3 tablespoons extra-virgin olive oil
- 4 to 5 cloves fresh garlic, roughly chopped or thinly sliced
- 1 teaspoon fine sea salt, plus more for the boiling water
- Half teaspoon freshly ground black pepper
- 1 teaspoon fresh rosemary leaves, chopped (or half teaspoon dried)
- 1 teaspoon fresh thyme leaves (or half teaspoon dried)
- Flaky sea salt, for finishing
- 2 tablespoons fresh flat-leaf parsley or chives, finely chopped, for garnish
Optional:
- Half teaspoon smoked paprika
- Pinch of red pepper flakes
- 3 tablespoons finely grated parmesan (add in final 5 minutes of roasting)
Directions
- Preheat your oven to 220°C (425°F). Line or lightly grease a heavy rimmed baking sheet and set it aside.
- Bring a large pot of generously salted water to a boil. Add the baby potatoes whole and boil for 12 to 15 minutes, until a knife inserts with only slight resistance. Do not fully cook them through — they should hold their shape.
- Drain the potatoes in a colander and let them sit uncovered for 3 to 5 minutes. This drying step is important for achieving a crispy exterior.
- Transfer the potatoes to the prepared baking sheet. Using the flat bottom of a glass or the back of a fork, press each potato until it is roughly flattened to about 1.5cm (half an inch). You want them split open but not completely broken apart.
- In a small bowl, whisk together the olive oil, chopped garlic, fine sea salt, pepper, rosemary, thyme, and paprika if using. Drizzle this mixture evenly over the smashed potatoes and toss gently to coat all sides.
- Spread the potatoes in a single layer with space between each one. Do not crowd the pan.
- Roast on the lower-middle rack for 20 to 25 minutes, turning once halfway through, until the skins are deeply golden and crispy at the edges and the garlic is fragrant and just browned.
- If adding parmesan, scatter it over the potatoes in the final 5 minutes of roasting.
- Remove from the oven. Immediately finish with flaky sea salt and fresh parsley or chives. Serve hot, directly from the pan.
Notes
- For extra crispiness, heat the baking sheet in the oven for 5 minutes before adding the potatoes — the hot surface starts crisping the bottoms immediately.
- Garlic pieces on the bare tray can burn. Keep them nestled against or on top of potatoes throughout roasting.
- These are best served right away, but leftovers reheat well in a skillet or air fryer.
- To make ahead: par-boil and smash up to 24 hours early, refrigerate, then roast when ready (add 5 minutes to cook time).
Nutrition (Per Serving, Approximate)
- Calories: 210 kcal
- Carbohydrates: 28g
- Protein: 3g
- Fat: 10g
- Saturated Fat: 1.5g
- Fiber: 3g
- Sodium: 390mg
- Potassium: 680mg
- Vitamin C: 22mg
Nutrition values are estimates and will vary based on specific ingredients used and portion sizes.
