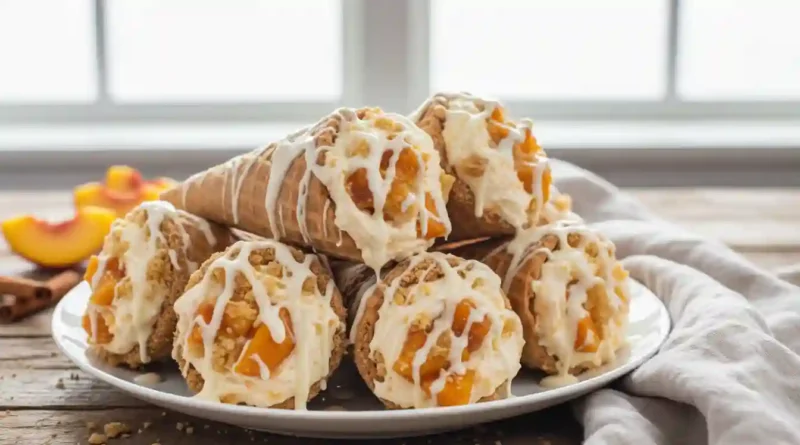
Peach Cobbler Cheesecake Cones Recipe
The Ultimate Peach Cobbler Cheesecake Cones
There is something about the smell of peaches and cinnamon wafting through a kitchen that feels like a warm hug. It takes me back to humid August afternoons, sitting on a porch swing with a bowl of cobbler and watching the sun dip below the tree line. But as much as I love a traditional cobbler, it’s not exactly the easiest thing to eat while mingling at a backyard barbecue.
That’s where the Peach Cobbler Cheesecake Cones come in. This recipe was born out of a desire to take those soulful, jammy flavors of a classic peach dump cake and marry them with the velvety, tangy luxury of a no-bake cheesecake. By tucking them into a chocolate-dipped waffle cone, you transform a messy comfort food into a sophisticated, handheld treat that’s as fun to look at as it is to eat. It’s crunchy, creamy, and buttery all at once.
Why You’ll Love This
-
The Ultimate Textural Contrast: You get the crunch of the waffle cone, the silkiness of the cheesecake, and the tender, syrupy bite of the peaches.
-
No Utensils Required: This is the perfect “walk-around” dessert for parties, showers, or family reunions.
-
Shortcut Magic: By using a cake mix and canned peaches, you get gourmet results without spending four hours in the kitchen.
The Skeptic’s New Favorite
I first made these for a neighborhood block party where my neighbor, a self-proclaimed “fruit dessert hater,” was in attendance. He usually heads straight for the triple-chocolate brownies and ignores anything with a peach in it. I handed him a cone, mostly because I ran out of plates, and watched him take a polite, tiny bite. His eyes widened. Within ten minutes, he was asking if there were any left in the kitchen. He told me it wasn’t just “fruit”—it was the way the salty butter from the cobbler topping hit the sweet cheesecake filling that changed his mind. Now, he requests them every time we have a get-together.
What Makes It Special
-
Dripping with Flavor: Using the peach juice ensures the cake mix transforms into a golden, buttery crust rather than staying powdery.
-
Velvety Cheesecake Base: The addition of a little lemon juice and real heavy cream makes the filling taste like it came from a high-end bakery.
-
Double Chocolate Seal: Coating the inside of the cone with chocolate doesn’t just add flavor; it creates a moisture barrier so your cone stays crispy.
-
Customizable Crumble: Whether you use golden Oreos or classic chocolate wafers, the cookie dust adds that final “wow” factor.
Making It Happen
To bring this masterpiece to life, start by getting your oven humming at 350°F. While that warms up, we focus on the “vessels.” Melt your chocolate gently—30-second bursts in the microwave are your best friend here to avoid scorching. Dip those waffle cones to your heart’s content; I like to do the rims and a little drizzle down into the bottom to act as a sweet “plug” for the filling. While the chocolate is still wet, roll them in your finely pulsed cookie crumbs.
Next, the cobbler. In a 9×13 dish, pour in those peaches and their syrup. Level them out and blanket them with the dry cake mix. Drizzle the melted butter over the top—don’t worry if it doesn’t cover every single speck of powder; those little crannies create the best texture. Bake this until it’s bubbly and golden, about 45 to 55 minutes.
While the cobbler cools (this is important, you don’t want to melt your cheesecake!), whip your heavy cream until it stands tall in stiff peaks. In a separate bowl, cream together the softened cream cheese, sugar, vanilla, and lemon juice until it’s perfectly smooth. Gently fold the two together like you’re tucking them into bed. Finally, grab a cone and layer: a spoonful of cheesecake, a scoop of warm cobbler, and repeat until it’s overflowing.
You Must Know
-
Temperature Matters: Make sure your cream cheese is truly at room temperature. If it’s cold, you’ll end up with tiny lumps in your filling that no amount of whisking can fix.
-
Don’t Drain the Peaches: That juice is the liquid that “cooks” the cake mix. Without it, your cobbler will be dry and floury.
-
Cool Before Filling: If you put the cheesecake into a cone with piping hot cobbler, it will turn into a milkshake. Let the cobbler sit for at least 20 minutes.
Serving Ideas
These are showstoppers on their own, but if you want to go the extra mile, serve them in a wire cone rack or even a glass filled with sprinkles to keep them upright.
-
Drink Pairing: A cold glass of Moscato or a sparkling peach iced tea complements the stone fruit beautifully.
-
The “A La Mode” Twist: If you aren’t worried about the mess, a tiny dollop of vanilla bean ice cream on top of the cobbler layer is heaven.
Make It Different
-
Gluten-Free: Swap the cake mix for a gluten-free version and use GF-certified waffle cones.
-
Berry Blast: Replace the peaches with canned blackberry or cherry pie filling for a different flavor profile.
-
Nutty Crunch: Add chopped pecans to the cake mix topping before baking for an extra layer of earthiness.
Storage and Reheating
These are best enjoyed immediately after assembly to keep the cone crunchy. However, you can store the cheesecake filling and the peach cobbler separately in the fridge for up to 3 days. To serve leftovers, reheat the cobbler portion in the microwave for 20 seconds before layering it back into a fresh cone.
Success Tips
For the most professional look, use a piping bag to swirl the cheesecake filling into the cones. It ensures the filling reaches all the way to the bottom and looks much cleaner than using a spoon. Also, if you want a deeper flavor, brown your butter on the stove before drizzling it over the cake mix.
FAQ
Can I use fresh peaches?
Yes! You will just need to toss them with about 1/2 cup of sugar and a splash of water or peach nectar to create the “juice” necessary for the cake mix to bake properly.
What kind of chocolate is best for dipping?
High-quality melting wafers or almond bark work best because they set up firmly and quickly at room temperature.
Can I make these ahead of time?
You can prep the components (the dipped cones, the baked cobbler, and the cheesecake mix) a day in advance. Assemble them right before you plan to serve.
How do I keep the cones from getting soggy?
The chocolate coating on the inside is the secret! Make sure you coat the inner walls of the cone thoroughly to create a waterproof seal.
My cake mix is still powdery after baking, what happened?
This usually happens if the butter wasn’t distributed evenly or there wasn’t enough juice. You can gently stir the very top layer of the cobbler halfway through baking to help the butter incorporate.
Recipe Card: Peach Cobbler Cheesecake Cones
Prep time: 30 minutes
Cook time: 50 minutes
Total time: 1 hour 20 minutes
Servings: 12 cones
Category: Dessert
Difficulty: Intermediate
Cuisine: American Fusion
Yield: 12 Filled Cones
Equipment
-
9×13 Baking dish
-
Food processor
-
Hand mixer or stand mixer
-
Microwave-safe bowls
-
Piping bag (optional)
Ingredients
For the cones:
-
16 oz cream-filled cookies (vanilla, chocolate, or wafer)
-
12 waffle-style cones
-
3 tbsp whipped cream (for the cookie dip) or 4 oz melted chocolate (recommended for sealing)
For the Peach Cobbler:
-
48 oz sliced peaches (with juice)
-
1 box cake mix (Yellow, White, French Vanilla, or Butter Pecan)
-
1 cup salted butter
-
1 ½ tsp cinnamon
For the cheesecake filling:
-
1 cup heavy whipped cream
-
1 cup confectioner’s sugar
-
1 tsp vanilla extract
-
16 oz cream cheese (softened)
-
½ tsp lemon juice
Nutrition (Per Serving)
-
Calories: 540 kcal
-
Fat: 28g
-
Carbohydrates: 68g
-
Protein: 5g
Final Note: These Peach Cobbler Cheesecake Cones are more than just a dessert; they are a conversation starter. The contrast between the chilled cheesecake and the warm, spiced peaches is a sensory experience your guests won’t forget.