The Best Chicken Fried Steak
The Best Chicken Fried Steak Recipe: A Crispy, Comforting Classic
There’s a certain magic to a dish that can quiet a room, where the only sounds are the gentle clinking of cutlery and soft murmurs of contentment. For me, that dish is Chicken Fried Steak. It’s not just food; it’s a warm, crispy hug on a plate. This recipe is my homage to the roadside diners and family kitchens of my childhood, where the gravy was always creamy, the steak was always tender, and every bite felt like coming home. After years of tweaking, I’ve landed on what I truly believe is the ultimate version—a perfect symphony of texture and flavor that’s surprisingly straightforward to create in your own kitchen.
Why You’ll Love This Recipe
-
The Ultimate Comfort Food: This dish delivers a deep, soul-satisfying comfort that’s hard to beat, turning an ordinary day into something special.
-
A Culinary Triumph: There’s a proud sense of accomplishment that comes with creating this classic from scratch, from the perfectly crispy crust to the silky, homemade gravy.
-
Surprisingly Approachable: While it seems like a diner-style feat, the process is broken down into simple, manageable steps that anyone can follow.
-
Feeds a Crowd Perfectly: It’s a hearty, crowd-pleasing meal that’s ideal for family dinners or weekend brunches, guaranteed to earn you rave reviews.
I’ll never forget the time I made this for my friend’s father, a man whose culinary preferences were famously limited to “plain and simple.” He eyed the plate piled high with golden, gravy-smothered steak with a hint of suspicion. After one tentative bite, followed by a second, more enthusiastic one, he looked up and simply said, “Now, this is real food.” It was a quiet victory, proving that a perfect Chicken Fried Steak can win over even the most skeptical of eaters.
What Makes It Special
The magic isn’t just in the method, but in the ingredients that work together to create something extraordinary.
-
Cube Steaks, Pounded Tender: Starting with cube steaks and gently pounding them ensures every single bite is melt-in-your-mouth tender.
-
The Double-Dredge: A first coat of flour, followed by a seasoned buttermilk bath, and a final flour coating is the secret to that famously thick, shatteringly crisp crust that stands up to the gravy.
-
The Buttermilk Batter: Buttermilk, with its gentle tang, works with the baking powder and soda to create an incredibly light and airy batter that fries up to a beautiful golden brown.
-
A Hint of Heat & Garlic: A dash of hot sauce and minced garlic in the batter adds a subtle, complex background note that elevates the entire dish beyond the ordinary.
-
The Pan-Drippings Gravy: The gravy is made right in the same skillet, using the flavorful, crispy bits left behind from frying the steak. This is where the deep, savory soul of the dish truly resides.
Making It Happen
First, let’s get our steaks ready. Place your cube steaks between two layers of plastic wrap and gently pound them until they’re an even ¼-inch thick. This isn’t just about thinning them out; it’s about tenderizing the meat, promising a final result that’s easy to cut with just a fork.
Now, set up your breading station. In one shallow bowl, you’ll have two cups of all-purpose flour. In another, we’ll whisk together the baking powder, baking soda, black pepper, and salt. To this dry mixture, we add the star players: the buttermilk, a generous tablespoon of hot sauce, a large egg, and the minced garlic. Whisk it until it’s just combined; a few small lumps are perfectly fine.
While you’re breading the steaks, pour the vegetable shortening into a deep, heavy cast-iron skillet and begin heating it slowly to 325°F (165°C). This is the ideal temperature for achieving a crispy, non-greasy crust. Place a wire rack on a baking sheet lined with parchment paper—this is where your breaded steaks will wait, allowing the coating to set perfectly before frying.
Take a pounded steak and dredge it thoroughly in the plain flour, shaking off any excess. Then, dip it completely into the buttermilk batter, letting the excess drip back into the bowl. For the final, crucial layer, press the steak back into the flour, ensuring it’s coated completely. This double-dredge is your ticket to that iconic, craggy crust. Place the finished steak on the wire rack and repeat with the remaining steaks.
Carefully lower the steaks into the hot oil—don’t crowd the pan; fry in batches if you need to. Let them cook for 3 to 5 minutes per side, until they’re a deep, even golden brown. You’ll hear that satisfying sizzle. Once done, transfer them to a plate lined with paper towels to drain, and cover them loosely with foil to keep warm.
Now, for the gravy. Carefully drain the hot oil from the skillet, but here’s the key: reserve about ¼ cup of the liquid and, more importantly, all those delicious browned, solid bits stuck to the bottom of the pan. Return the skillet to medium-low heat with the reserved oil. Sprinkle in the remaining ¼ cup of flour and whisk constantly for a minute to cook out the raw flour taste. As you whisk, use a spatula to scrape up all those flavorful bits—they are the foundation of your gravy.
Gradually whisk in the milk, increase the heat to medium, and bring the gravy to a gentle simmer. Keep stirring often as it thickens and becomes rich and creamy, which should take about 6 to 7 minutes. Season it generously with kosher salt and black pepper to your taste.
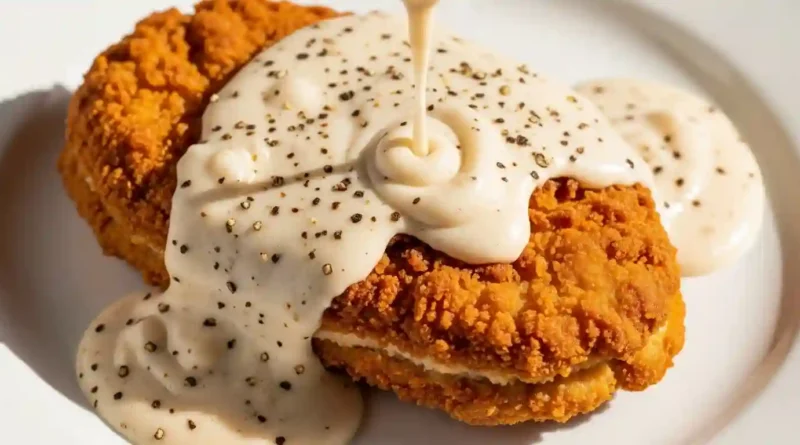
To serve, place the crispy steaks on a platter and pour that glorious, homemade gravy right over the top.
You Must Know
-
Temperature is Key: Use a cooking thermometer to ensure your oil is at 325°F. Too hot, and the coating will burn before the steak is cooked; too cool, and it will absorb oil and become greasy.
-
Let the Coating Set: Allowing the breaded steaks to rest on the wire rack for a few minutes before frying helps the coating adhere, preventing it from sliding off in the pan.
-
Don’t Crowd the Pan: Frying too many steaks at once will cause the oil temperature to plummet. Fry in batches for the crispiest results.
-
Scrape Those Bits: Those dark, stuck-on remnants in the skillet are pure flavor gold. Don’t skip the step of scraping them into your gravy for that authentic, deep taste.
Serving It Up
This is a hearty centerpiece that loves simple, classic companions. Serve it alongside creamy mashed potatoes or fluffy biscuits to soak up every last drop of gravy. For a fresh contrast, a crisp green salad or some steamed green beans work beautifully. To drink, a cold glass of sweet iced tea, a light lager beer, or even a crisp, unoaked Chardonnay would pair wonderfully.
Make It Different
-
Gluten-Free: Substitute the all-purpose flour with your favorite 1:1 gluten-free flour blend.
-
Dairy-Free: Use unsweetened almond milk mixed with a tablespoon of lemon juice (let it sit for 5 minutes) instead of buttermilk, and a dairy-free milk for the gravy.
-
Spice It Up: Add a teaspoon of smoked paprika or cayenne pepper to the flour mixture for a smoky or spicy kick.
-
Herb-Infused: Stir a teaspoon of dried thyme or rubbed sage into the final flour dredge for an aromatic twist.
Storing and Reheating Your Masterpiece
While best served immediately, leftovers can be stored in an airtight container in the refrigerator for up to 3 days. To reheat, avoid the microwave, which will make the crust soggy. Instead, place the steak on a wire rack set over a baking sheet and warm it in a 350°F (175°C) oven for 10-15 minutes, until hot and crispy again. The gravy can be reheated gently in a small saucepan over low heat, with a splash of milk to loosen it if needed.
Success Tips
For an extra-light crust, ensure your baking powder and soda are fresh. When pounding the steak, use smooth, even strokes from the center outward. And most importantly, have all your ingredients measured and your station set up before you start cooking—this “mise en place” makes the entire process smooth and enjoyable.
Frequently Asked Questions
Can I use a different cut of meat?
Cube steak is ideal because it’s already run through a tenderizer. If you can’t find it, you can use top round or sirloin steaks and pound them thoroughly yourself until tender.
What can I use if I don’t have buttermilk?
You can make a quick buttermilk substitute by adding 1 tablespoon of white vinegar or lemon juice to 1 ½ cups of regular milk. Let it sit for 5-10 minutes until it slightly curdles.
My gravy is too thin. How can I thicken it?
Let it simmer a bit longer; the milk proteins will continue to thicken as they heat. If it’s still too thin, make a quick slurry by mixing a tablespoon of flour with two tablespoons of cold milk and whisk it into the simmering gravy.
Can I bake this instead of frying?
For authenticity, frying is recommended to achieve the signature crispy texture. Baking will result in a softer, more oven-baked texture, but you can try it at 400°F (200°C) on a well-greased wire rack until golden.
Why did my coating fall off?
This usually happens if the oil wasn’t hot enough or if the steak was moved too much right after being placed in the oil. Ensure your oil is at 325°F and let the steak cook undisturbed for the first minute to set the crust.
Recipe Card
Prep time: 25 minutes
Cook time: 20 minutes
Total time: 45 minutes
Category: Main Course
Difficulty: Intermediate
Cuisine: American
Yield: 4 servings
Ingredients
-
4 (½ pound) beef cube steaks
-
2 ¼ cups all-purpose flour, divided
-
2 teaspoons baking powder
-
1 teaspoon baking soda
-
1 teaspoon black pepper
-
¾ teaspoon salt
-
1 ½ cups buttermilk
-
1 tablespoon hot pepper sauce (e.g. Tabasco™)
-
1 large egg
-
2 cloves garlic, minced
-
3 cups vegetable shortening for frying
-
4 cups milk
-
kosher salt and ground black pepper to taste
Directions
-
Place steaks between 2 layers of plastic and pound to a thickness of 1/4 inch.
-
Place 2 cups flour in a shallow bowl.
-
In a second shallow bowl, stir together baking powder, baking soda, 1 teaspoon pepper, and 3/4 teaspoon salt. Add buttermilk, hot sauce, egg, and garlic; stir to combine.
-
Heat shortening in a deep cast-iron skillet to 325 degrees F (165 degrees C). Place a wire rack over a sheet of parchment paper.
-
Dredge a steak in flour to coat; shake off excess. Dip into buttermilk batter, letting excess drip off. Press in flour again to coat. Place on the wire rack and repeat with remaining steaks.
-
Fry steaks, in batches if necessary, for 3 to 5 minutes per side, until golden brown. Remove to a paper towel-lined plate to drain. Cover with foil to keep warm.
-
Drain fat from skillet, reserving 1/4 cup of liquid and all solid remnants.
-
Return skillet to medium-low heat; add reserved oil. Whisk in remaining 1/4 cup flour. Scrape the pan to release solids.
-
Whisk in milk, increase heat to medium, and bring to a simmer. Cook, stirring often, for 6 to 7 minutes, until thickened. Season with kosher salt and pepper.
-
Transfer steaks to a platter and pour gravy over top.
The nutrition data for this recipe includes the full amount of the breading ingredients. The actual amount of the breading consumed will vary. We have determined the nutritional value of oil for frying based on a retention value of 10% after cooking. The exact amount will vary depending on cooking time and temperature, ingredient density, and the specific type of oil used.
