No Bake Coconut Cream Eggs
No-Bake Coconut Cream Eggs: An Easy, Elegant Easter Treat
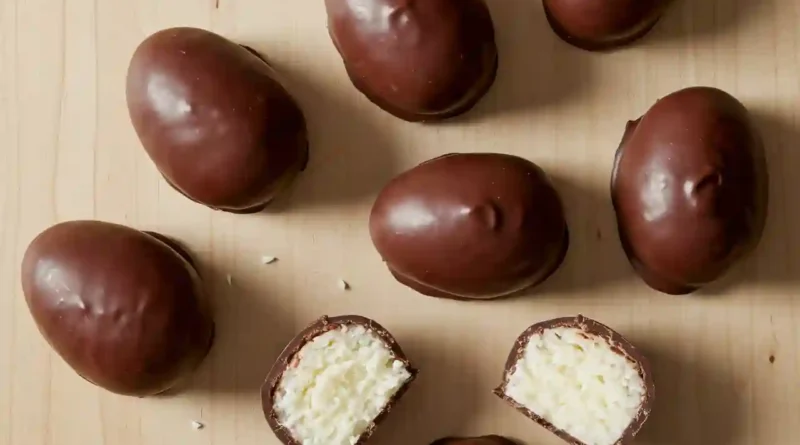
There’s a certain magic in recipes that require no oven, especially when they result in something that feels so decadent and special. These No-Bake Coconut Cream Eggs are a testament to that magic. For me, they’re a sweet echo of springtimes past, of helping my grandmother in the kitchen, our hands dusted with powdered sugar as we shaped the creamy coconut filling. The best part? There’s no fussy baking involved. It’s a simple, joyful process of mixing, shaping, and dipping that yields the most luxurious treats—creamy, rich coconut centers enveloped in a crisp, glossy shell of chocolate. They’re a homemade confection that looks and tastes like it came from a specialty chocolatier, with all the comfort of a family tradition.
Why You’ll Love This Recipe
-
Effortless Elegance: Impress your family and guests with a beautiful, professional-looking candy that’s surprisingly simple to make.
-
A Joyful Activity: This is a perfect recipe to make with little helpers or friends. Shaping the eggs is a fun, hands-on process everyone can enjoy.
-
No Oven Required: Perfect for warm spring days or when your kitchen is already too busy with other holiday preparations.
-
Pure Nostalgia in Every Bite: The combination of creamy coconut and smooth chocolate is a classic, beloved flavor that feels instantly familiar and celebratory.
I’ll never forget the year I brought a platter of these to a family gathering. My uncle, a man whose culinary preferences begin and end with plain chocolate chip cookies, eyed them suspiciously. Eventually, curiosity won out. He took one, then another, and before the afternoon was over, he’d quietly asked if he could take the few remaining ones home. It was the highest compliment from the most unexpected critic.
What Makes It Special
It’s the quality of a few simple ingredients that makes this dessert truly shine.
-
Cream Cheese & Butter: This dynamic duo creates an impossibly rich, creamy, and tangy base for the filling, setting it apart from drier, crumblier traditional recipes.
-
Sweetened Shredded Coconut: Provides that iconic, chewy texture and tropical sweetness that is the heart of the candy.
-
High-Quality Melting Chocolate: Using real chocolate chips designed for melting creates a smooth, snappy shell that coats beautifully and delivers a professional finish.
Making It Happen
Start by lining a baking sheet with parchment paper; this is your landing pad for your soon-to-be beautiful chocolate eggs. In a medium bowl, use a hand mixer to beat the softened cream cheese and butter together until they’re perfectly smooth and blended. This is the foundation of your creamy filling. Gradually beat in the powdered sugar until the mixture is thick and luscious.
Now, switch to a spoon and fold in the shredded coconut, making sure every strand is coated in that sweet, creamy mixture. At this point, the dough will be soft, which is why we pop it into the refrigerator for about an hour. This short chill makes it firm enough to handle.
When the hour is up, lightly dust your hands with powdered sugar to prevent sticking. Take scoops of the coconut mixture and gently roll and shape them into small, oval eggs. Place each formed egg onto your prepared baking sheet. Once they’re all shaped, transfer the entire sheet to the freezer for another hour. This deep chill is crucial—it ensures the eggs stay firm and don’t fall apart during the chocolate dipping process.
When you’re ready to dip, melt your chocolate chips according to the package directions, usually in short bursts in the microwave or over a double boiler. Work with one egg at a time, keeping the rest in the freezer. Spear an egg with a fork and carefully lower it into the warm melted chocolate. Use a spoon to help pour the chocolate over the top, ensuring it’s completely enveloped. Gently tap the fork on the edge of the bowl to shake off any excess chocolate.
Then, carefully slide the dipped egg off the fork and back onto the parchment paper using a second fork or a toothpick. Repeat with all the eggs. Let the chocolate set at room temperature or, for speed, pop them back in the fridge for 5-10 minutes until the shell is firm.
You Must Know
-
Patience is Key: Don’t rush the chilling steps. A firm, cold coconut center is non-negotiable for clean dipping.
-
Dust Those Hands: The coconut mixture can be sticky. A light coating of powdered sugar on your hands makes shaping the eggs a breeze.
-
Tap Off the Excess: After dipping, that gentle tap of the fork is what prevents a puddle of chocolate from forming around your eggs (a “foot”), giving you a cleaner, more professional look.
-
Keep ‘Em Cold: Only take a few eggs out of the freezer at a time while dipping. If they get too warm, they become difficult to handle.
Serving Ideas
Arrange these elegant eggs on a beautiful platter as the grand finale to your Easter brunch or dinner. They pair wonderfully with a cup of freshly brewed coffee, cutting through the sweetness perfectly, or a glass of cold milk for the ultimate nostalgic treat. For a truly spectacular dessert spread, serve them alongside a light fruit salad or some fresh berries.
Make It Different
-
Dietary Tweaks: Use vegan cream cheese and plant-based butter to make this dairy-free. Ensure your chocolate chips are also vegan-friendly.
-
Flavor Twists: Add a teaspoon of almond or vanilla extract to the coconut filling for a subtle flavor boost. You could also mix in some finely chopped nuts for added crunch.
-
Chocolate Choices: While semi-sweet chocolate is classic, feel free to use dark chocolate for a richer, less sweet treat or white chocolate for a beautiful, creamy contrast.
Storage & Freshness Tips
Store your finished Coconut Cream Eggs in a single layer in an airtight container in the refrigerator. They will keep beautifully for up to one week. For longer storage, you can freeze them for up to two months. Thaw in the refrigerator before serving. There is no need to reheat these; they are best served chilled straight from the fridge.
Success Tips
The single most important step for success is ensuring your coconut centers are thoroughly chilled and firm before you even think about dipping them in the chocolate. This makes the entire process smooth and mess-free. Also, when melting your chocolate, be careful not to overheat it, as this can cause it to seize and become clumpy. Melt in short intervals, stirring frequently.
Frequently Asked Questions (FAQ)
Q: Can I use desiccated coconut instead of shredded?
A: You can, but the texture will be different. Shredded coconut provides a more substantial, chewy texture, while desiccated (dried and finely ground) coconut will result in a denser, less fluffy filling.
Q: My chocolate is too thick for dipping. What can I do?
A: You can thin it out slightly by adding a teaspoon of coconut oil or vegetable shortening to the melted chocolate and stirring until smooth. This will make it more fluid and easier to work with.
Q: How far in advance can I make these?
A: They are a perfect make-ahead treat! You can prepare them fully and store them in the fridge for up to a week before serving.
Q: The mixture is too sticky to shape. What happened?
A: This likely means it needed more chilling time. Pop the mixture back into the fridge for another 30 minutes. Also, make sure you’re dusting your hands generously with powdered sugar.
Q: Can I use a different shape?
A: Absolutely! While eggs are traditional for spring, you can shape the mixture into simple rounds, bars, or even nests for a fun variation.
No-Bake Coconut Cream Eggs
Prep Time: 30 minutes
Chill Time: 2 hours
Total Time: 2 hours 30 minutes
Category: Dessert
Difficulty: Easy
Cuisine: American
Yield: About 2 dozen eggs
Ingredients
-
8 oz cream cheese, softened
-
1 tablespoon butter, softened
-
4 cups powdered sugar, plus more for dusting
-
1 cup sweetened shredded coconut
-
1 (12 oz) bag melting chocolate chips (milk, dark, or semi-sweet)
Instructions
-
Line a baking sheet with parchment paper. Set aside.
-
In a medium bowl, use a hand mixer to beat the softened cream cheese and butter together until smooth and combined.
-
Gradually add the powdered sugar, beating on low speed until fully incorporated and the mixture is thick.
-
Switch to a spatula or wooden spoon and fold in the shredded coconut until evenly distributed.
-
Cover the bowl and refrigerate the mixture for 1 hour, or until firm enough to handle.
-
Dust your hands lightly with powdered sugar. Scoop out tablespoon-sized portions of the mixture and roll them into balls, then shape into oval eggs. Place the shaped eggs on the prepared baking sheet.
-
Freeze the eggs for 1 hour.
-
Melt the chocolate chips according to package instructions.
-
Using a fork, dip each frozen coconut egg into the melted chocolate, ensuring it’s completely covered. Use a spoon to help coat it if needed. Let the excess chocolate drip off.
-
Carefully transfer the dipped egg back to the parchment paper using a second fork or a toothpick.
-
Repeat with all eggs. Place the tray in the refrigerator for 5-10 minutes to allow the chocolate to set completely.
Notes
-
Allergy Info: Contains dairy, soy (often in chocolate), and coconut.
-
Nutrition (estimate per egg): Calories: 210; Fat: 9g; Carbs: 32g; Protein: 1g; Sugar: 30g.
